Hello crafters! First up, we have an easel card (I know, an actual card, huh! Will wonders never cease!). I started my card by creating the easel part of it by folding my base piece, then folding the top part of it again. Next I began to create the piece that I attached to the front fold. I cut the
Let It Snow die out of
coconut white card. I removed the inside bits of the design and then glued it back into place in the aperture which I had backed with a piece of aqua card. The aqua card helps pop the words out so they are more easily readable too. I covered the entire sheet with a
sticky self adhesive sheet and coated it with
Iced Snow for a wintry blingey feel. I cut a piece of
acetate and wrapped the ends around the card and glued them to the back (I covered the edges with another piece of card to neaten it up a bit). I left the acetate very puffy for a fun effect. I also scattered
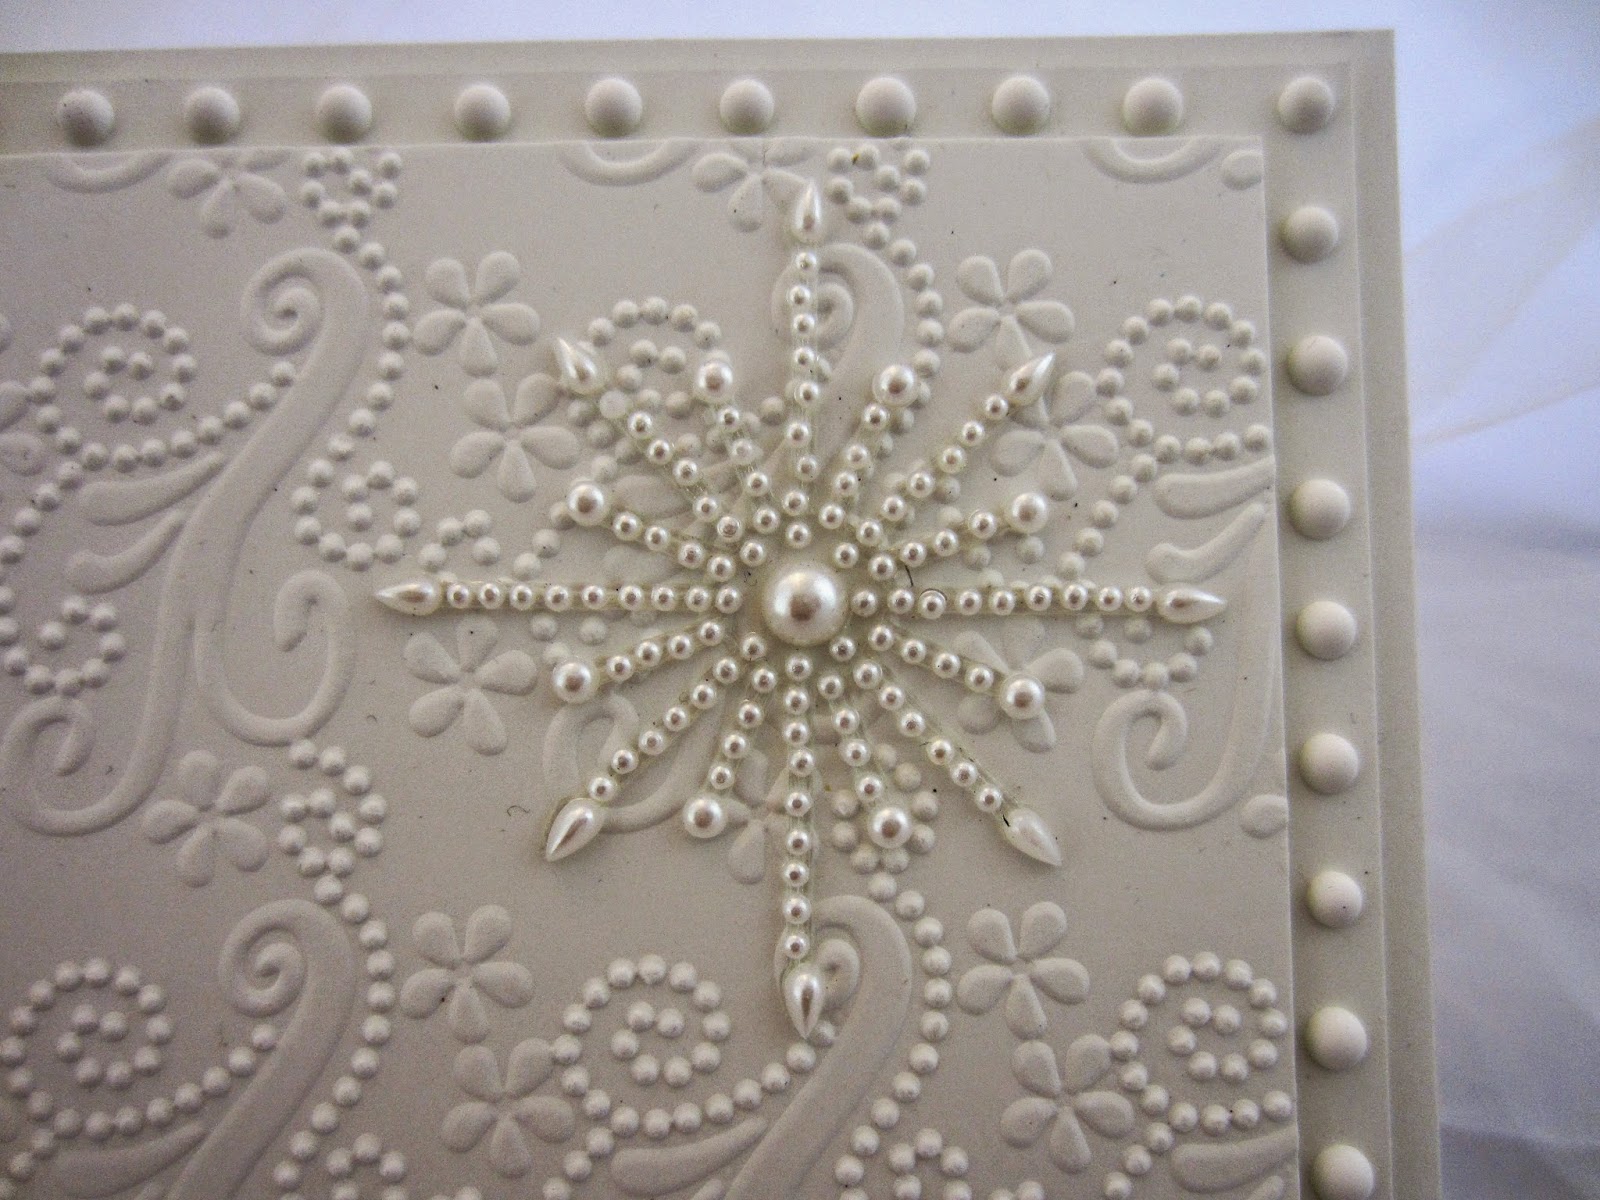
small pearls across the front of it so they look like snow that is floating. I added a
pearl snowflake to the acetate as well. For the bottom "stopper" portion of the card, I used several small snowflakes and my greeting which I cut out using the
California Collection Decorative Frames die set B. I added
Iced Snow to the edge of the white mat die cut. When open the top piece just sits behind the greeting tag to hold it into place. You can see from the picture taken above the card a better look at the acetate puffiness. When closed the finished dimensions are 4 1/2" x 6" in size (a really small card for me!) Scroll down to see card no. 2.

Card number two is one of those where you have a bit of a play and come up with some other fun way to use a die other than it's usual intended purpose. Here I have cut several of the
Pine Bough die to create this fun snowy tree. I coated the die cuts with
Cosmic Shimmer dries clear glue then sprinkled them with
Iced Snow for that wintry effect again. I glued them into place wider at the bottom, narrowing to the tip where I added a shadowed star from one of the dies in my
Christmas Angel set. I embossed the top of the card behind the tree with the
Floral Brocade Pinpoint embossing folder and added a pearl star in the upper corner. For the sentiment, I cut several of the
Believe die in white and stacked them for a bit of dimension. This is a great way to get dimension on those dies that are too thin and detailed to add mounting foam behind them. I cut one extra one in silver card and offset it behind to act as a shadow which really helps it stand out against the white backdrop. I dotted the "i" with a pearl and added some white mats to give the card a more finished look. I used the
Cosmic Shimmer white PVA glue to dot all the way around the edge to frame it. The finished dimensions are 7 1/2" x 8" in size. Well we are officially on the run up to Christmas now, so I hope you are well on your way to finishing up your Christmas cards. I hope that some of the Friday double day ideas have helped you along the way. All for now, Sue x


204 comments:
«Oldest ‹Older 201 – 204 of 204Ooooow my goodness what a card, this is beautiful,
Crafty hugs Julie xxx
Oh my I love these cards! The Let it and Believe dies at gorgeous! Thanks so much for the much inspiration!
SIMPLY STUNNING cards!!!
LOVE the dies, LOVE the designs, LOVE the layers, LOVE the sparkle, LOVE the fancy folds, LOVE IT ALL!!!
The frosty pine leaves are my favourite thing about this, such a nice touch.
Post a Comment