Tuesday 31 May 2022

I'm Here For You

Hello bloggers!   Back to the background stash for the start of today's card.  I cut the Bird Bath out of slate grey card and used Weathered Wood distress ink to shade it.  I seated the birdbath to the left side of the circle and added greenery around the bottom and side.  I cut several pink flowers and added them as well.  I used a bit of the leftover pixied card and cut two hummingbirds out of it.  I added them around the bird bath.  I cut the I'm Here For You sentiment in black and glued it to the top centre of the card.  The card was completed with white mats and layers.  The finished dimensions are 8 1/4"  x  8 1/4"  in size.  All for now, Sue x


                                                        Follow my blog with Bloglovin

Monday 30 May 2022

Deepest Wishes For A Happy Birthday

Hi bloggers!  I started by cutting two oval apertaures into a piece of white card.  I used the Double Stitched Ovals and made two frames to go around the apertures.  I added them with mounting foam.  In the upper aperture, I used the Aquatic Plants die set and cut several plants of differing colours and I added the Scuba Diver cut in slate grey.  In the lower aperture, I added Neptune, along with a few plants and accents.  In the upper corner, I cut two dolphins and the first part of the sentiment.  In the lower corner, I added the Happy Birthday and a red crab from the Under The Sea Creatures.  The card was completed with white mats and layers.  The finished dimensions are 8 1/4"  x  9 1/2" in size.  All for now, Sue x


                                                       Follow my blog with Bloglovin

Sunday 29 May 2022

Hope Your Day Is Amazing

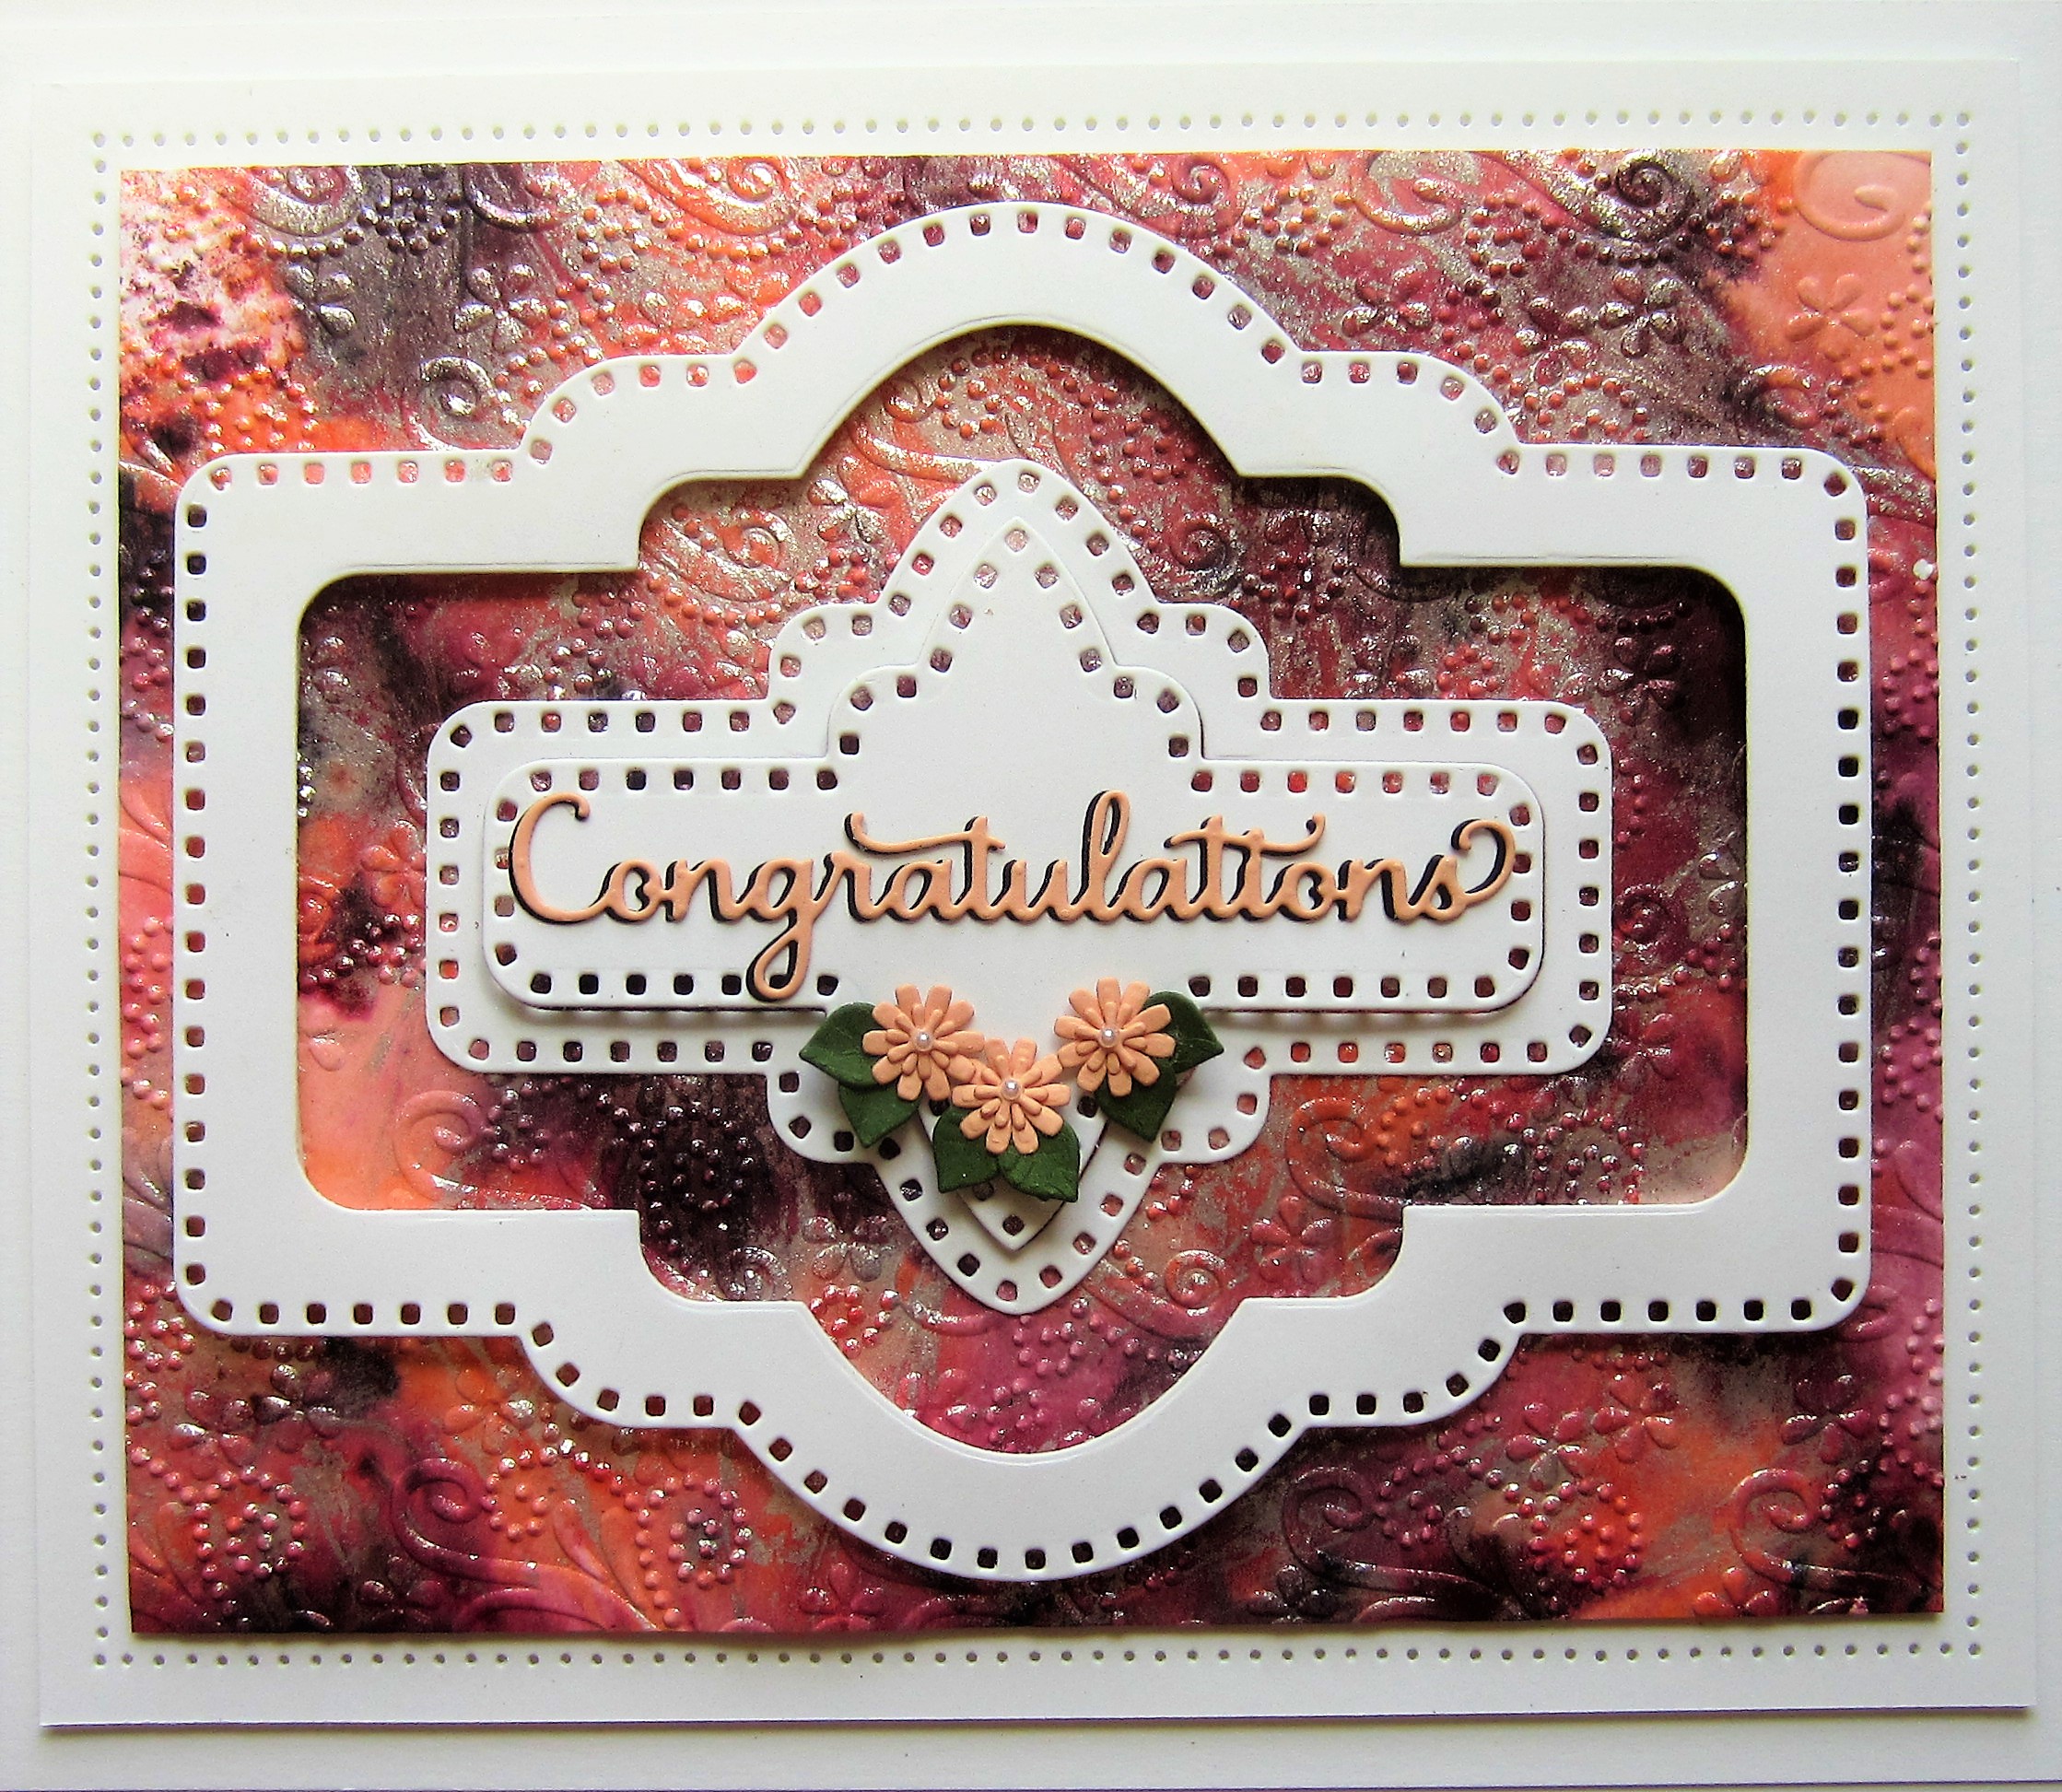
Good Sunday morning all! I embossed a piece of white card with the Honeycomb Haven embossing folder.  Next I selected a piece of Pixie Powdered card from my background stash.  I used Pale Olive, Emerald Green and Golden Mint Pixie Powders.  I cut a large frame out of it using the Noble Vintage Labels.  I cut a smaller white frame and attached to two to make a multi-layered frame.  I added it to the centre of the embossed background with mounting foam.  I cut the Hope Your Day Is Amazing sentiment from a leftover piece of the pixied card. I added a black shadow to it then glued it to the centre of the frame.  Using the French Marigold die set, I made two glittered flowers and added them in the lower left corner of the frame.  The card was completed with white mats and layers.  The finished dimensions are 7 1/4"  x  8 3/4"  in size.  All for now, Sue x


                                                         Follow my blog with Bloglovin

Saturday 28 May 2022

Deepest Wishes For A Happy Birthday

Hi bloggers!  I started with a striped page from the Nautical Adventures Paper Pad as my background.  I added a wide strip of Navy Blue card with a thin white and rust mat behind it.  I cut the Scuba Diver in black and added it to the top of the card with a few bubbles.  Next I used the Aquatic Plants die set and cut all of them in a variety of shades from rusts to greens and glued them along the lower edge f the card.  From the Scuba Diver die set, I cut the treasure chest in tan and added some gold coins on top.  I seated the treasure chest in among the aquatic plants.  I cut the Deepest Wishes For A Happy Birthday sentiment in white and glued it to the navy blue strip of card on the left.  The card was completed with white and navy mats and layers.  The finished dimensions are 8"  x  8 1/4" in size.  All for now, Sue x


                                                         Follow my blog with Bloglovin

Friday 27 May 2022

To A Dear Friend

Hi crafters!  I thought I would share a quick card I made using one of our newest embossing folders.  I selected a piece of white card and used the new Honeycomb Trellis embossing folder.  Next I made a multi-layered frame using the Clipped Corner Rectangles. I made a smaller white frame for the bottom and then I made a larger frame and inked through the dies while they were still in the dies so there is a pretty white lip on the upper frame.  I used Spun Sugar distress ink for that.  I added the frames with mounting foam over the embossed background.  Next I inked the Spring Roses and Daffodils Stampcut die in black and ran it through the machine to cut it.  I used Distress markers to colour it (Spun Sugar, Worn Lipstick, Squeezed Lemonade, Fossilized Amber, Crushed Olive and Forest Moss).  I added it with mounting foam to the left side of the frme.  I cut the To A Dear Friend sentiment in black and glued it to the centre of the frame.  The card was completed with white and black mats and layers.  The finished dimensions are 6 1/2"  x  8" in size.  All for now, Sue x


                                                     Follow my blog with Bloglovin

Thursday 26 May 2022

Happy Bird Day

Hello bloggers!  I thought I would share a card using the Bird Cage die.  I started with a piece of white card and added a wide strip of red to the bottom.  I use a thin strip of black as a a border between them.  I cut a Parrot in white and then used Distress Markers to colour it.  I wanted some bright colours so I used red, orange and blue, with black for the beak and eye.  Next I cut the Birdcage in black.  I gluded the parrot to the card then glued the birdcage over the top.  I added small floral accents to the top of the card and the bottom of the card by the sentiment.  I used the Happy Bird day sentiment at the top left corner of the card and the Dear Friend sentiment cut in black in the lower right corner.  The card was completed with white and black mats and layers.  The finished dimensions are 7"  x   8 3/4"  in size. 

On a different note, Steph Cotterill has asked that I redrew a new winner for the woodpecker die.  So in order to comply, I have drawn a new name for the winner of the Woodpecker and that is......

                                                       Crafty Jo!!!


Please email me at americansue1@gmail.com and confirm your postal address to claim your winning die.   All for now,  Sue x


                                                       Follow my blog with Bloglovin

Wednesday 25 May 2022

Congratulations

Hello crafters!  I started by creating a background using Pixie Sparkles.  I used Coral Crush and Red Oxide Pixie Sparkles.  Once dry, I embossed the piece using the Floral Brocade embossing folder.  Using the Vintage Label Frames, I cut a larger white frame and attached it to the background with mountng foam.  Next I cut two smaller dies in the set  and matted them, then attached them to the centre of the frame. Next,  I cut the Congratulations die out of soft salmon card and shadowed it in black.  I glued the sentiment across the centre of the card.  Using the Mini Cosmos dies, I made three flowers and added green leaves then seated them under the sentiment.  The card was completed with white mats and layers.  The finished dimensions are 7 1/4"  x  8 1/2"  in size. 

The Blog Launch die winners were posted yesterday afternoon and we still have quite a few that have not been claimed!  Please scroll down to the post under this one to see if your name is on the list and claim it!    All for now, Sue x


                                                     Follow my blog with Bloglovin