Sunday 31 January 2021

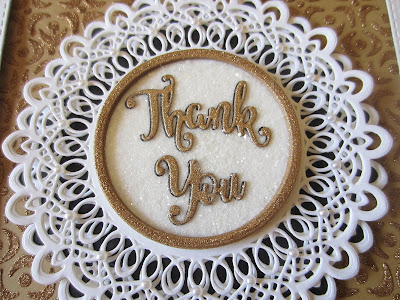
Thank You

Good Sunday morning all!  I found this sample from an older release the other day!  I started with a piece of tan card and taped the Retro Mask to it.  I used the Sahara Gold Glitter Kiss through the mask.  I removed the mask and allowed it to dry well.  Next I made a multi-layered frame using the Double Stitched Square die set.  I made a wider white base frame and added a thinner black frame to the top of it.  I added the frame over the dried mask background using mounting foam.  Next I cut the Eliza die in white two times.  I offset the two white masks then added them to another of the masks cut out of black card.  I cut a smaller circle die with a sticky adhesive sheet added to it.  I used two circle dies to cut an edge frame to add to my circle.  I cut them out of a piece of Glitter Kiss card.  I peeled the backing off the circle and added the frame, then cut the Thank You sentiment out of the Glitter Kiss card and set it into the centre.  I used Frosted Sparkle Glitterbitz on the remaining exposed adhesive area.  I added the circle to the middle of the die cuts.  The card was completed with white, tan and black mats and layers.  The finished dimensions are 8" x  8"  in size.

We still have a couple of unclaimed winning dies.  Please make sure to scroll down and see if your name is on the list of winning dies from the blog launch!    All for now. Sue x


Saturday 30 January 2021

Thanks

Hi bloggers!  I started with a piece of black card and used the Summer Sky Opal Polish across the card.  When used on black card, this polish has a gold timbre to it.  I used the Quilted Pillow embossing folder, then cut the background into three wide strips.  I added the strips to a piece of white card with mounting foam.  Next I cut the Maggie die in both white and black card.  I cut the backing out of an extra bit of the Opal Polished card.  I attached it to the black die cut, then cut the centre of it out.  I nipped the white one in half.  I added the white halves to the top of bottom of the black die cut so they showed above and below the die.  I added the die cut to the backing with mounting foam.  I cut a Decorative Flag and cut the Thanks sentiment in both opal polished card with a black shadow.  I added it across the centre of the die.  I cut the Striped Nasturtiums outline die and made a flower.  I added a black eyelash centre with a pearl then added it to the side of the flag die.  Using Lace Edged leaves, I accented the flower.  The card was completed with white, and black mats and layers.  The finished dimensions are 6"  x  7" in size.  

I wanted to let you know that I will be doing a demo on Gwen Fletcher's Create and Craft show this afternoon at 3:00pm UK time!  I hope you can pop in to have a watch!  All for now. Sue x


                                                       Follow my blog with Bloglovin

Friday 29 January 2021

January Release Die Winners

 Hello everyone!  I hoped you all enjoyed the die release this month.  It was a bit smaller than usual, but hopefully the less time between them will make up for that!  I loved all of your comments too, so thank you for those.  Here is the list of winners from the launch:


Slimline Stitched Rectangle Frames:  Theresa w in Berks!!!

Slimline Essential Frames:  Karen Lotty!!!

Slimline Stitched Oval Aperture Trio:  Fluffycat!!!

Slimline Stitched Rectangle Aperture Trio:  Ann Topp!!!

Slimline Decorative Squared Rectangles:  Rose in Chester!!!

Slimline Decorative Oval Aperture Trio:  Robin Sachs!!!

Slimline Decorative Rectangle Aperture Trio:  Stella Munn!!!

Stacked Get Well Soon:   June Horrocks!!!

Slimline Large Circles Background:   Heidi MT!!!

Sweet Wishes:   Jean Z!!!

Slimline Decorative Squared Stripes:  Marianna Hammer!!!

You Are So Special:   Maria MK!!!

Slimline Stars Background:  Crewe Trish!!!

Thinking Of You:  Hunnymummy 54 MK!!!

Just Because:  Marion Scott!!!

Happy Birthday:  Carole Eaton!!!

Daisy Blooms Stampcuts:  Sued 99!!!

Poppy Spray Stampcuts:  Alice (scrAPpamondo)!!!

Pansy Trio Stampcuts:   Rolfi!!!

Hydrangea Stampcuts:  June Smith!!!


Congratulations all!  Please email me at americansue1@gmail.com to claim your winning die and confirm your postal address.  Please put the name of the die you won in the subject line of the email, this helps us make sure to get the correct die to each of the winners!  All for now, Sue x


Thank You

 Hi bloggers!  I wanted to share another of the new Slimline stencils with you today!  I started with the Lattice Swirls stencil taped to a piece of white card.  I used the Honeydew Matt Chalk Polish through the mask in a light circular motion.  It dries very quickly so I removed the mask and added a multi-layered white frame over the top that I created using the Slimline Essential Frames.  I cut a Decorative Flag die out of white card.  I used a bit more of the same polish and coated a small piece of card and cut the Thank You sentiment out of it.  I glued it to the flag and added the flag die to the middle of the short end of the frame with foam.  Next I cut the Cosmos Flowers, cutting the solid flower out of white card with a sticky adhesive sheet added to it.  I peeled the backing off of each flower, then added the matching white outline Cosmos Flower to it, then coated the remaining exposed adhesive with Frosted Sparkle Glitterbitz.  I made and assembled three different sized flowers and added them in opposite corners of the frame.  I cut the Lace Edged Leaves and Dandelion Clocks then used them as accents around the flowers.  The card was completed with white mats and layers.  The finished dimensions are 5"  x  9 1/4"  in size. 

Don't forget to check back later this afternoon as I will be doing the drawings and posting the list of winners for each of the dies from the blog launch!   All for now. Sue x


Thursday 28 January 2021

Butterfly Stained Glass

Hello crafters!  I just love the simplicity of this Butterfly Stained Glass card!  I started by cutting the die out of white card and gluing a piece of acetate to the back of it.  I used the Crystal Tints and applied them to the acetate from the front of the die.  I used the Yellow Citrine, Blue Aquamarine, Orange Garnet, Lime Peridot Crystal Tints.  I set it aside to dry well, then cut one more of the dies and glued it to the top of the other die since there were a few places that the tip of the crystal tints had touched the die.  I added mounting foam to the back of the die to raise it and added it to another piece of white card.  The card was completed with white mats and layers.  The finished dimensions are 5 1/2"  x  6 3/4" in size.  All for now, Sue x


                                                        Follow my blog with Bloglovin

Wednesday 27 January 2021

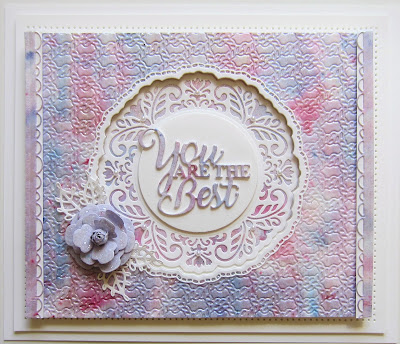
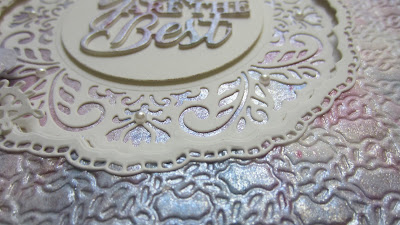
You Are The Best

 Hi bloggers!  I thought I would share another card that uses the new Pixie Sparkles today!  I started with a piece of white card and use the Fuchsia Rose, the Pale Blush and Beyond Blue Pixie Sparkles all over the card.  I spritzed it with water to activate the powder.  I decided to use a brush to move the colour  all over the card.  Once dry, I used the Millie die to cut an aperture in the centre.   I used the Rope Chain embossing folder and added some texture to the background, then added mounting foam to the back.  I added the background over another piece of white card, then recessed the fall away centre piece from the background, back into place.  I cut the Millie die in white and glued it in the aperture too.  I cut the You Are The Best sentiment out of an extra bit of the Pixied Sparkle card and glued it to a circle then in the middle of the Millie die.  I made a single flower using the solid flower from the Striped Nasturtium set and added a couple of leaves from the Lace Edged Leaves as accents.  I used the Striped Swirl  Edger  set and cut two thin decorative borders from the Sparkle card and glued them to a strip of white card then to the edges of the card.  I used the outer two cutting dies form the Millie set and cut a white frame and glued it to the outside of the aperture.  The card was completed with white mats and layers.  The finished dimensions are 7 1/4"  x 8 1/2"  in size.  All for now. Sue x


                                                      Follow my blog with Bloglovin

Tuesday 26 January 2021

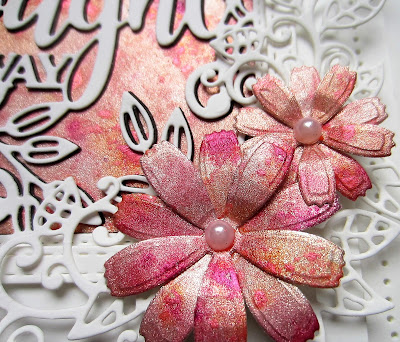
You're Never More Than A Thought Away

Hi crafters!  I went back into my craft stash for the background on today's card.  I decided on a pixie powder background that used Scarlet Mist and Burnt Orange Pixie Powders.  Next I cut the You've Never More Than A Thought Away die and cut it in both white and black card.  I added the black die cut behind the white one as an offset shadow, then glued it to the pixied background.  Next I made a multi-layered white frame using the Double Stitched Rectangles dies.  I added it with mounting foam over the background.  I used some of the leftover pixied card and cut two Cosmos Flower dies out of it.  I assembled the flowers and put them in the lower corner of the frame.  I cut the Magnolia Corner in white and nipped it apart and used it as accents around the flowers.  The card was completed with white mats and layers.  The finished dimensions are 6 1/2"  x  7 1/2"  in size.  All for now, Sue x