Tuesday 31 December 2019

You Are Simply The Best Ever

Hi bloggers!  Happy New Year's Eve to you all!  Most of you know that I usually post my Orphan Cards on this date every year, but I have decided not to this year.  I am no longer able to post them out to a loving home, which is the reason why I used to do it.  I would rather you enjoy a simple card that I found very pretty!  I started with white Yupo Paper and used Sailboat Blue Cool Peri and Purple Twilight Alcohol inks on it.  I added a bit of blending solution to get the colours to mix and circle outward.  I used the shadow die of the rose from the Elegant Flower Trio die set to cut an aperture.  I added mounting foam to the back and attached it to a piece of white card that I cut the Rose die into.  I added the piece that I cut out of the background behind the cut out rose.  I used the Simply Best Ever sentiment in white in the corner and stacked several for dimension.  I added a wider white mat that I glittered the edge with Iced Snow, then finished the card with white mats and layers.  The finished dimensions are 7" x  7 1/2" in size.  All for now, Sue x


                                                      Follow my blog with Bloglovin

Monday 30 December 2019

Your Friendship Is Special To Me


Hello crafters!  This is one of my favourite cards from this year so I wanted to get it in before the end of the year!  I started by cutting an aperture in the middle of a piece of coconut white card with the Mallory die, then embossing the card with the Rose Bed embossing folder.  I added foam to the back to raise it then mounted it over a piece of white card that had a sticky adhesive sheet attached to it.  I cut Mallory die in white and recessed it into the aperture where the sticky adhesive sheet was attached.  I used Frosted Sparkle Glitterbitz on the remaining exposed adhesive areas.  I cut the Mallory outer dies out of powder pink to create a thin frame to go around the aperture.  I also added a thin pink frame around the card using the Double Stitched Rectangles.  I stamped the sentiment in black and cut it out with the small rectangle centre die from the Mallory set and added a thin black mat to it that I hand cut. I stamped the Cosmos Flowers in black and cut them out with the matching Cosmos Flower dies.  I used Worn Lipstick on the edges and centres before assembling.  I stamped the leaves and cut them out then used Peeled Paint ink to colour them.  I arranged the flowers in opposite corners and added the greenery as accents.  I also cut some Splendid Swirls in white as embellishments for the flowers.  The card was completed with white, powder pink and black mats and layers.  The finished dimensions are 6 3/4" x  7 3/4" in size.   All for now. Sue x


                                                       Follow my blog with Bloglovin

Sunday 29 December 2019

Just For You


Good Sunday morning all!  It's back to the Glitter Kiss for today's offering!  I started by coating a piece of dark cardstock with the Blue Teal Glitter Kiss and allowing it to dry.  I embossed it with the Sublime Swirls 3D embossing folder for texture.  Next I cut the Millie die out of white cardstock and added the thin outer frame out of black card and glued it into the centre of the card.  I cut two of the Pierced Flags and layered them and added the Just For You sentiment cut in black to it.  I tucked the end under the Millie die and made a flower out of some extra Glitter Kiss card.  I used the Exquisite Poppy die set to make the flower and cut some Lace Edged Leaves in white to accent it.  The card was completed with white and black mats and layers.  The finished dimensions are 6 1/2" x  7 3/4" in size.  All for now, Sue x


                                                    Follow my blog with Bloglovin

Saturday 28 December 2019

Embossed Frame card


Hi crafters!  If you want to learn how to use an embossing folder on your die cuts, then this in the video for you to watch!  It is a bit tricky, but easily achievable once you see how to do it.


The finished dimensions are 7 1/4" x  8" in size.  All for now, Sue x


                                                       Follow my blog with Bloglovin

Friday 27 December 2019

On Your Special Day

Hi crafters!  Here is a wedding card that I missed somehow along the way.  I started with a piece of milk card for a more antique look.  I embossed it with the Rows Of Bows Pinpoint Embossing folder.  I cut a smaller piece of milk card and backed it with an antique gold mat and added it to the bottom of the embossed background.  I used a Clear Perfect Medium pad and rubbed it around the edges then used Gold embossing powder and heat embossed it.  In the centre I added the Wedding Column and Arches cut out of milk card.  I added a green ivy to the top of the arch.  Using Enchanted Gold Gilding polish, I lightly rubbed  it across the ivy and columns.  I cut the Wedding Couple out of antique gold card and added them under the arch with foam.  I cut two birds out of milk card and added them to the top corners.  I used the On Your Special Day sentiment cut out of antique Gold card and glued it to the embossed background at the top of the card.  The card was completed with milk and antique gold mats and layers.    The finished dimensions are 6 3/4" x
8 1/4" in size.  All for now, Sue x


                                                        Follow my blog with Bloglovin

Thursday 26 December 2019

Thank You


Hi bloggers!  Back to non Christmas cards now!LOL  I made this ages ago for the shows on HSN in the States.  I started by covering a piece of card with Summer Meadow Gilding Flakes.  Next I used the Rope Chain Embossing folder to emboss it.  I used the Black Soot ink pad and rubbed it over the top of the embossing to bring out the pattern, then heat embossed it with clear embossing powder.   I cut the background into three sections and added them with foam on to a piece of black card.   Next I cut the 
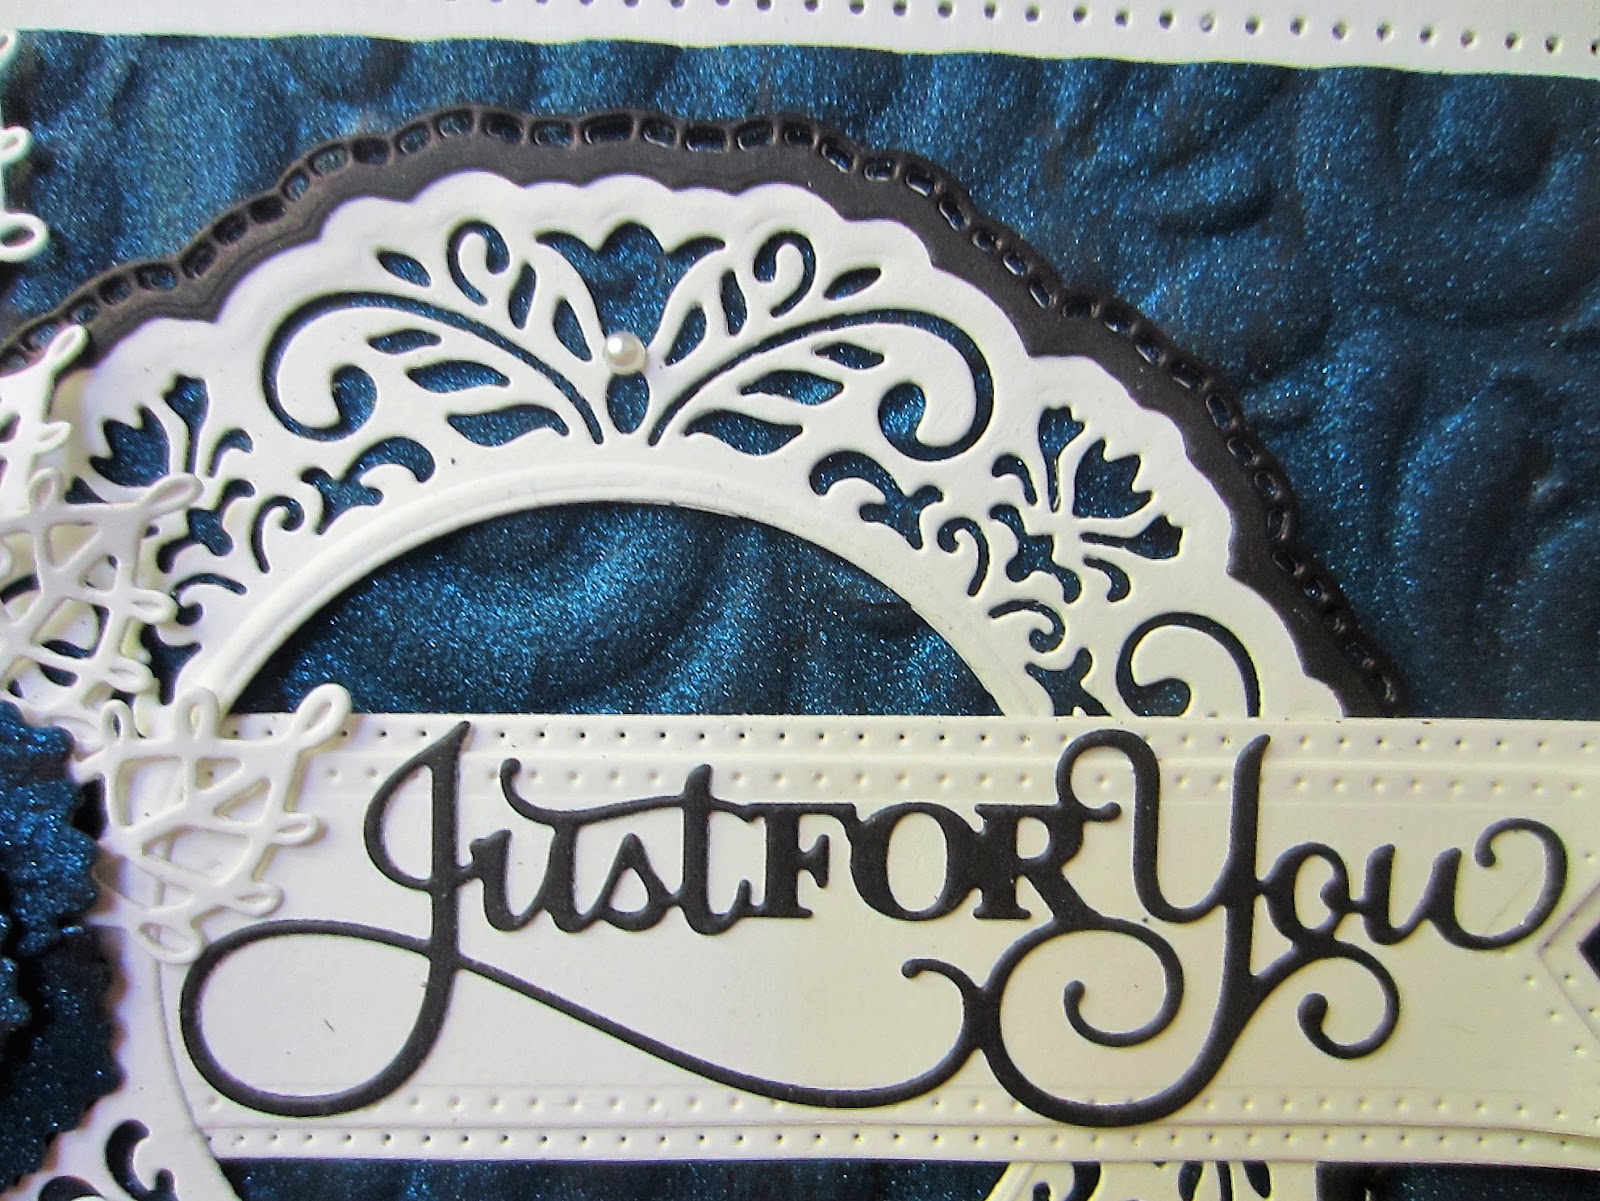
Claire  die in white and added a white backing to it.  I cut the frame around the edge of it out of a bit of extra card that i used the gilding flakes on and glued it to the edge of the die.  I cut the centre circle from the same extra piece.  I added it with foam to the centre then glued the Thank You sentiment to it after adding a black shadow to the words.  Using the Petal Pocket Flowers, I created three of them and added centres cut from the gilding flakes extra piece.  I added them around the focal element and tucked a satin ribbon bow in underneath them in the corner.  The card was completed with white and black mats and layers.  The finished dimensions are 6 1/2" x  7 3/4" in size.  All for now, Sue x


                                                        Follow my blog with Bloglovin