Wednesday 30 June 2021

June Christmas Die Blog Launch Winners

 Hello crafters!  Thank you so much for a wonderful launch for the June Christmas release.  The comments were all very lovely, I really appreciated them all.   I have done all of the drawings and here are the winners:


Christmas Angel 2021:  Jackie Meechan!!!

Swirling Ray Background:  Rosie from Chorley!!!

Ornate Oval Frame:  Betty McAlister!!!

Have A Joyful Christmas:  Scottydog!!!

Layered Snowflake Background:  Brandco 2450 Sharon in Toronto!!!

Tis The Season To Sparkle:  Jan on the Fosse!!!

Winter Pines:  Barbara V!!!

Sending Love This Christmas:  Handmade by Donna!!!

Christmas Lights:  DeCor!!!

From Me To You:  June Horrocks!!!

Pine and Holly Spray:  Litte Largo!!!

Happy Holly Days: Billie Sue Wooley!!!

Merry Big Bold Word Die/Stamp Combo:  Kirstie Black!!!

Christmas Big Bold Word Die/Stamp Combo: Crafty Chris in Bournemouth!!!

Believe Big Bold Word Die/Stamp Combo:  Marion Scott!!!

Greetings Big Bold Word Die/Stamp Combo:  Ann Topp!!!

Poinsettia Stampcuts:  Trudy Aylott!!!


Congratulations all!   Please email me at  americansue1@gmail.com to confirm your postal address and claim your winning die.  I ask that you put the name of the die you have won in the subject line of your email please.  All for now, Sue x

Just Because

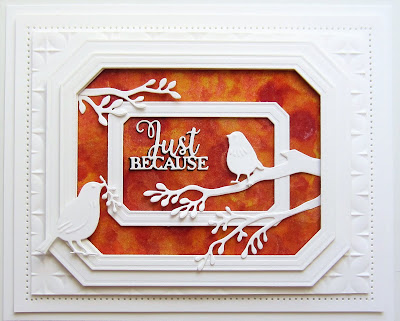
Hello crafters!  I used a piece of Silver Sparkle Alcohol ink card to create the background for this card.  I used Red Pepper and Sunshine Yellow alcohol inks all over it, then added some blending solution to give it a more mottled look.  Next I cut a multi-layered frame using the Clipped Corner Rectangles and added the frame over the background with foam mounting tape.  I cut a smaller frame and added it to the inside of the larger frame.  Using the Cherry Blossom Frame, I cut  a few of the branches in white and added the birds too in white.  I used the Just Because sentiment cut in white with an offset black shadow.  I cut a larger piece of white card and embossed it with the Quilted Pillow embossing folder then added the framed element to it.  The card was completed with white mats and layers.  The finished dimensions are 6 3/4"  x  8 1/4"  in size. 

Just a little reminder that I will be doing the drawings for the winners of the blog launch.  Please check back in the afternoon to see if your name is on the list.   All for now,  Sue x


                                                       Follow my blog with Bloglovin

Tuesday 29 June 2021

Thanks

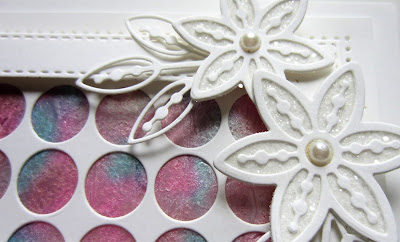
 Hi bloggers!  I thought I would share a fun card made with the Slimline Large Circles Background.  I cut the die out of white card, then lined it back up and cut another section giving me a wider card.  I used the Pearl Tints between two pieces of acetate.  I used the Blue Diamond and the Chateau Rose Pearl tints randomly all over a piece of acetate, then added another piece and sealed the edges with tape, then glued the Large Circles background over it.  I made a wide white frame and added it with munting foam over the background.  I cut the Decorative Flag die in white and added from the left side of the frame and cut the Thanks die out of aqua card and glued it to the flag.  I used the Pinwheel Florals cut in white and added a sticky adhesive backing to them, then glittered all the flowers.  I arranged them in opposite sides of the card and added white leaves.  The card was completed with white mats and layers.  The finished dimensions are 6 3/4"  x  8 " in size.  All for now, Sue x


                                                           Follow my blog with Bloglovin

Monday 28 June 2021

Sweet Wishes

Hi bloggers!  I started this card by having a a rummage through my background folder and found this piece of pixied card to use.  I created it by using Emerald Green, Pale Olive and Aqua Lagoon Pixie powders.  Next I cut the floral panel from the Cosmos set and the Daisy Floral Panels with the leafy panel from the Daisy set in the centre.  I glued the floral panels to the pixied card and added mounting foam to raise it.  I added double sided tape around the edge of a larger piece of white card and sprinkled it with Iced Snow.  I added the floral panel to the centre of it.  Using the Sweet Wishes sentiment, I cut it in Cobalt blue and added an offset black mat.  I glued the sentiment to the top right side of the card.  I added clear medium micro beads to the centres of the Cosmos and Daisy flowers and small white pearls to the small flowers in the centre panel.  The card was completed with white mats and layers.  The finished dimensions are 7"  x  7 1/2"   in size.  All for now, Sue x


                                                       Follow my blog with Bloglovin

Sunday 27 June 2021

Because You Are Amazing

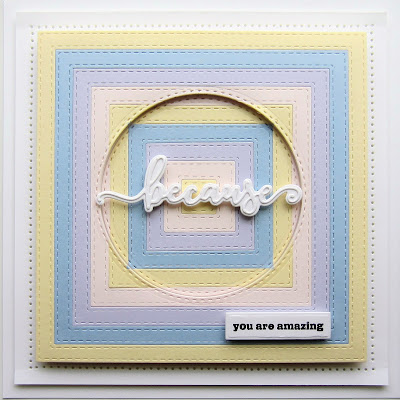
Good Sunday morning all!  I selected several shades of pastel card for today's card offering.  I used Custard, Sky blue, Wisteria and powder pink card.  I lined up all the dies from the Double Stitched Squares and cut them with each piece of the pastel card so I had loads of square frames when they were all cut.  I taped them back into place, alternating the colours onto a piece of copy paper.  I used the Double Stitched Circles to cut an aperture in the centre.  I added mounting foam to the back of the outside pieece to raise it, then recessed the circle back into place in the middle of the card.  I cut the Because Shadowed sentiment in white and added it to a white backing piece, then glued it across the middle of the aperture (I added some mounting foam to the back to keep the word raised and even).  I stamped the rest of the sentiment and cut it out with the tag die in the set and mounted it in the corner.  The card was completed with white mats and layers.  The finished dimensions are 7"  x  7" in size.  All for now, Sue x


                                                       Follow my blog with Bloglovin

Saturday 26 June 2021

Poinsettia Stampcuts

 Hello everyone and welcome to the final post of the June Christmas die release.  Last, but not least is the Poinsettia Stampcuts die.  This set has four different sized poinsettias and two separate leaves that can all be inked and then cut to create perfect floral pices for your Christmas cards and projects.  Shown here, you can see the relative sizes of the three largest dies in the set.  They are perfect for adorning any of your creations.  For the final time this launch, I will ask you to leave a comment so your name can be entered into the drawing to win this beautiful die set.  Please don'e forget to check back on the afternoon of June 30th to see if your name is among the list of winners!  I hope you have enjoyed the release as much as I have enjoyeed bringing it to you!  All for now, Sue x


                                                         Follow my blog with Bloglovin

Friday 25 June 2021

Greetings Big Bold Word Die/Stamp Combo

Hello bloggers!  The final post of the day belongs to the Greetings Big Bold Word Die/Stamp Combo set.  Again, I just love the way that these can so easily be done for batch cards for Christmas, there are just so many lovely ways to create beautiful cards with them! Shown here, this is a great way to use up some of your scraps and still make an amazing card, win /win in my book!  I will finish off the day with reminding you to leave a comment on this post.  This, however, isn't quite the end of the launch.  There is one more die set to share so it will be on the blog in the morning at the usual 6am time for you.  I hope you will like it!! 

Just a quick note I forgot to mention earlier, but I will be doing the 6pm Create and Craft tv show today (starting right now)!   All for now, Sue x


                                                         Follow my blog with Bloglovin

Believe Big Bold Word Die/Stamp Combo

Hi there my crafty friends!  The third of the four new Big Bold Word dies is the Believe Big Bold Word Die/Stamp Combo set.  This set has six dies, including the Believe die, an outline for it and four tags as well as eight coordinating clear stamps that can be used to add more to the sentiment.  These dies look great when paper pieced as you have already seen as well as glittered, pixied, polished or gilded, just to name a few.  Don't forget to leave your comment before leaving the blog, you wouldn't want to miss the chance to win this beauty, now
would you?  We have one final post of the day that will be on the blog at 6pm tonight.  I hope you will be able to find a few minutes to pop back by and take a peek!  All for now,  Sue x


                                                           Follow my blog with Bloglovin

Christmas Big Bold Word Die/Stamp Combo

Hi bloggers!  We are onto the new Christmas Big Bold Word Die/Stamp set for this post.  I just love how easy these dies are to make a beautiful card with so little effort!  Don't they look amazing when paper pieced?  You can easily get out all that leftover decorative paper and go to town with these!  There are six dies in this set and seven coordinating clear stamps that go with it too.  If this one is calling your name, then by all means, leave a comment on this post.  Remember, someone is going to win it so it might as well be you, right!  We still have a couple more posts for today to share with you.  The next one will be online here at 3pm today.  Any guesses as to what it may be??  Hmmm... we shall see then.  All for now, Sue x


Merry Big Bold Word Die/Stamp Combo

Hello there my crafty friends!  Introducing the Christmas Big Bold Word die sets.  We are starting out with the Merry Big Bold Word Die/Stamp Combo set.  I had so many requests for some Christmas versions of the Big Bold Word die sets.  You asked and I happily complied!  Shown here, you can see just how beautiful this set is, the card just really jums right out at you, doesn't it!  Go ahead and leave a comment, I know you want to! LOL   I have included the Pinterest button on each post too, in case you would like to save any of the samples or dies for later inspiration.  I will be back a noon with the second post of the day.  All for now, Sue x


                                                      Follow my blog with Bloglovin

Thursday 24 June 2021

Happy Holly Days

 Hi crafters!  The last of the mini expressions is the Happy Holly Days!  It is just the perfect size for apertures or frames and goes well with cute Christmas cards since it is a little play on words.  If this one would be a nice addition to your Christmas supply stash, then why not jot a quick comment into this post's comment section.  If you are new and have never left a comment, it is really simple.  There are full directions on the right hand side of the blog that you can follow.  We have come to the end of day three, but there is one more full day left to go plus a single post on the last day.  We will be starting here at 6am tomorrow morning.  All for now, Sue x

                                                          Follow my blog with Bloglovin

Pine And Holly Spray

Hello there my crafty friends!  Next up we have the Pine And Holly Spray die set.  This set was designed to be an accent for your cards.  Shown here, I have used it as my focal element to create and lovely spray across the card so you can see the versatility to it.  If this set tickles your fancy, then just be sure to leave a comment on this post.  Someone is going to win this set and it might as well be you, right!  We have one final post for today and that will be on the blog at 6pm today.  All for now Sue x


                                                              Follow my blog with Bloglovin