Friday 30 November 2018

Christmas Double day

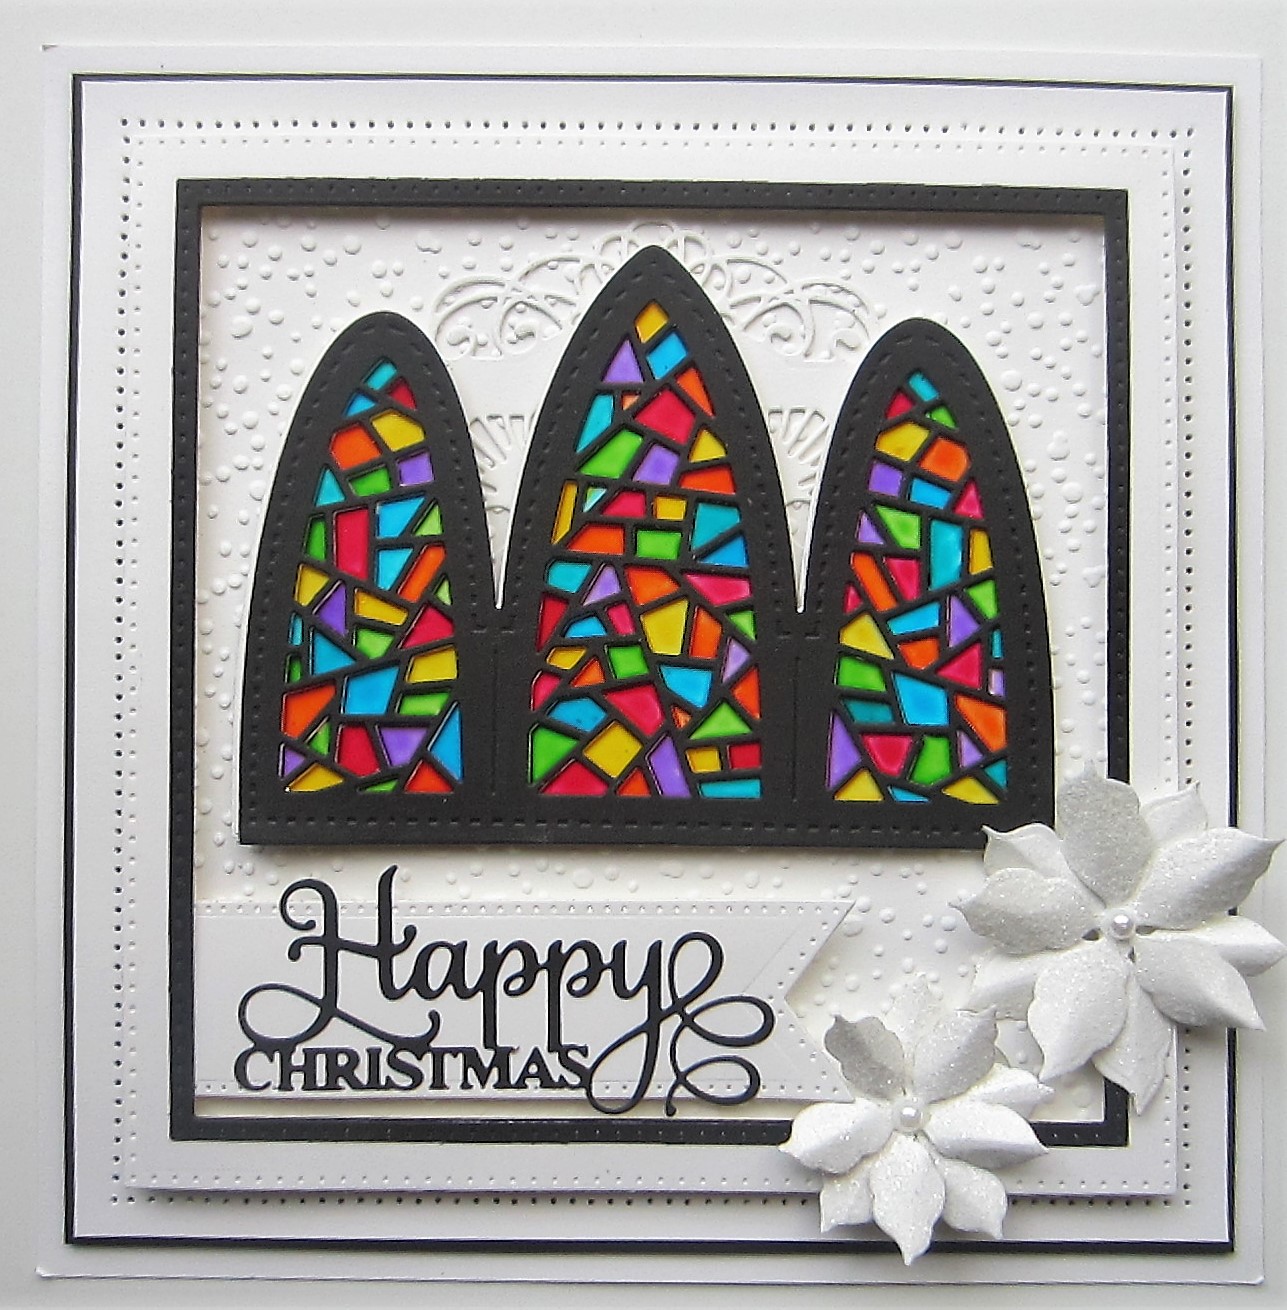
Hi bloggers!  We are getting down to the last four double days of the year!  I thought I would start this one off with a bright and cheery card.  I started by embossing a piece of coconut white card with the Falling Snow folder.  I pulled out my Double Pierced Squares and made a multi layered frame with a white base and a thin black edge to it.  Next I cut the Triptych Window in black and glued it on to a piece of acetate.  I used the Crystal Tints to fill in the mosaic areas on the window.  I randomly applied them , allowed the dry, then went back in for a second coat and set it aside to dry overnight.  I cut another window to add to cover any spots where the tint may have gotten on top of the die cut.  I added a white backing to make the colours really pop.  I cut the Eve die in white and seated the window on top of it in the top of the frame area.  I cut the Happy Christmas sentiment and glued it to a wide Pierced Flag and attached it below the window.  I made two glittered Poinsettias and seated them opposite the sentiment tag.  The card was completed with white and black mats and layers.  The finished dimensions are 8" x  8 1/4" in size.  Scroll down for card number two.


Card number two started with a piece of ruby red card.  I used the Nordic Christmas mask and applied Red Glitter Kiss through it.  I allowed it to dry well then used the Double Pierced Circles to cut an aperture in it. I cut the Carol die in white and glued it to the circular cut out, then cut the centre out of it.  I raised the circular cut out with carol attached to it using mounting foam, then added it back in place.  I recessed the centre back into place.  I cut the Warm Winter Wishes from the Snowball Frame die set and glued it in the centre of the card.  I made three glittered white poinsettias and seated them around the circle.  I added a line of dries clear glue around the edge of the background and added Frosted Sparkle Glitterbitz and allowed it to dry.  The card was completed with white and red mats and layers.  The finished dimensions are 7 1/2" x  7 1/2" in size.  All for now, Sue x


                                                      Follow my blog with Bloglovin

Thursday 29 November 2018

You Are Sew Sweet

 Hi crafters!  I just love this sewing frame and I know that any of your friends that sew would love it too!  I have basically paper pieced this one, but it was done by cutting into the frame rather than using fall away pieces.  I cut the Sew Sweet Frame and started with a white frame as a base.  I cut the frame several more times out of various colours of card and decorative papers.  I used milk card for the tape measure and spools.  I wrapped the spools with Bakers Twine in pink and blue.  I cut the dressmakers mannequin and pin cushion out of papyrus card.  I used decorative papers from my Classic Elegance Paper pad for the cloth swatches and fabric around the mannequin.  I used silver card and a silver paint pen for the thimble, pin, sewing needle and scissors and Iris card for the buttons and sentiment.  I glued all the pieces that I cut away from the various frames on top of my base.  Once they were all in place, I cut a black frame and added it as a shadow, then added mounting foam to the back.  I embossed a piece of coconut white card with the Dot Matrix Pinpoint folder and added the frame to it, gluing the sentiment in the centre with a black shadow added.  The card was completed with white and Iris card mats and layers.  The finished dimensions are 6" x  7" in size.  All for now, Sue x


                                                     Follow my blog with Bloglovin

Wednesday 28 November 2018

Warmest Wishes


Hello there my crafty friends!  More Christmas cards, but I do think that this one could be used for other purposes with just a simple change of sentiments, don't you?  I started with milk card and embossed it with the Falling Snow embossing folder.  I cut the Snowball Frame and added it over the embossed piece with mounting foam.  I cut a slightly larger piece of milk card and added double sided tape around the edge.  I glittered it with Iced Snow then added the frame to the centre.  I cut the Bold Holly Leaves and glued them into the lower corner.  From the Christmas Robin die set, I cut two robins out of tan card and used some Vintage Photo ink around the edge and Festive Berries to add a red breast to them.  I cut the pine sprig out of tan card and added a bit of Forest Moss ink to the edges.  I cut several pine cones out of tan card.  I glued all the pieces into the arrangement on top of the holly sprigs.  I cut the Warmest Wishes sentiment in red and added to the upper corner of the frame.  The card was completed with milk mats and layers.  The finished dimensions are 6 1/4" x  7 3/4" in size. All for now, Sue x


                                                     Follow my blog with Bloglovin

Tuesday 27 November 2018

Best Wishes

Hi bloggers!  One from the October release for you today!  I started with a piece of Cobalt Blue card.  I laid the Script mask over it and used Salty Ocean distress Oxide and Wilted Violet Oxide through the mask for a sort of two tone to the writing.  I removed the mask and heat set the ink.  Next I cut the Rose Flower Square out of gold mirror card and attached it to a backing with a piece of sticky adhesive sheet on it.   I had a small piece of pixie powdered card left over that was made with Midnight Blue and Purple Violet PP so I cut the Rose again and paper pieced it back into the gold mirror card die cut.  I mounted it on a slightly larger square cut from the Double Stitched Squares in white.  I added it to the centre of the card and cut the Best Wishes sentiment in gold and mounted it below.  White, gold and Cobalt Blue mats and layers were used to complete the card.  The finished dimensions are 6 1/2" x  7 3/4"  in size.  All for now, Sue x


                                                      Follow my blog with Bloglovin

Monday 26 November 2018

Warm Winter Wishes

Hello crafters!  I wanted to share another of my favourites from the festive release.  I started with a piece of coconut white card and cut a circle and attached it as the moon.  Next I used Distress Oxides to create the sky.  I started with Wilted Violet just around the moon, then blended in Faded Jeans and Stormy Sky and worked sown towards the bottom with Mermaid Lagoon.  I removed the circle, leaving the white moon and heat set it to dry the ink.  Next I cut the Believe In The Magic Frame out of black card twice.  I nipped away the Santa and reindeer and glued them into the sky.  I cut away the cabin and the trees and then cut more trees from the second frame and added them next to them in the lower part of the card.  I added them onto a black strip at the bottom of the card, leaving a section for my sentiment.  I cut the Warm Winter Wishes  from the Snowball Frame set in white and nipped them apart and mounted them diagonally across the bottom.  The card was completed with white and black mats and layers.  The finished dimensions are 7" x  9 1/2" in size.  All for now, Sue x


                                                        Follow my blog with Bloglovin

Sunday 25 November 2018

Holly Jolly Christmas

Good Sunday morning all!  How about this cheeky little chappie for today's offering!  I started by cutting two of the Frosty Snowflake Border die in aqua card.  I attached them to the top and bottom edge of a piece of coconut white card with a strip of sticky adhesive sheet.  I used Frosted Sparkle Glitterbitz to add a sparkle.  Next I cut a white card using the Double Stitched Rectangles and added a black mat to it by cutting the next size up in the Double Stitched rectangles Set B.  I used the Stitched Hills and Clouds die to cut a base out of white.  I used the Build A Snowman die set to create the cute snowman in his top hat and added a lamp post next to him.  I cut the sentiment in both aqua card and black card and used it as a shadow then added the sentiment next to the snowman.  I added a few lines of clear glue and sprinkled Iced Snow on the base for a frosty look.  The card was completed with white, aqua and black mats and layers.  The finished dimensions are 7 1/2"  x  8 3/4" in size.
All for now Sue x


                                                        Follow my blog with Bloglovin