Monday 31 October 2016

Beautiful Day

 Happy Halloween!  Sorry no spooky card for today (well at least I hope it isn't spooky! LOL)  I started this card by cutting the Butterfly Background out of coconut white card, using the centre cutting die to cut it into a frame.  Next I covered a piece of acetate with a self adhesive sticky sheet and peeled the backing sheet off and coated it with Red Blaze Gilding Flakes.  I used a rubit scrubit pad to refine and smooth the flakes on to the acetate.  I glued the Butterfly frame to the top of the acetate.  I stamped a sentiment and covered it with a small piece of sticky adhesive sheet.  Next I cut a frame using the centre of the Madeleine die set.  I peeled the backing off of my sentient and seated the round frame over it, then added Diamond sprinkles to coat the sticky on top of the sentiment.  I attached it in the centre of the Butterfly frame.  I cut several of the Exquisite Poppies in white and used a gold paint pen around the edges as accents.  I added several flowers around the sentiment seating them on white satin ribbon and using Olive Branches as accents.  The card was simply finished with a white pierced mat on a final white mat layer.  The finished dimensions are 6 3/4" x  6 3/4" in size.

Just a quick little tease for tomorrow.  We are launching my final 2016 die release here on the blog starting at 6am Tuesday morning.  I do hope that you can join us as we will have our usual die giveaway of one set of each design with anyone willing to join in being eligible to win one!  All for now, Sue x


                                                       Follow my blog with Bloglovin

Sunday 30 October 2016

Double Noble Sunday

Good Sunday morning all!  I have a double bill of Noble dies for today's blog post.  First up are the Ovals.  I started by embossing a piece of white card with the Jacobean Floral embossing folder for some background texture.  Next I cut the "frames" with the oval dies in three different sizes, but with each one of these, rather than keeping the dies equal distance apart, I pulled one side together to create a sort of elliptical frame.  With each set of these, I inked them while they were still in the die using Barely Nude Colour Cloud.  I removed the dies and added mounting foam to each of the frames.  I seated them on  my background with the thinner edges on top of each other so they appear to be radiating outwards from that point.  I stamped my sentiment and cut it out with the Pierced Flags and lightly inked it as well.  I seated the sentiment across the frames then created a flower using the Perfect Peony die.  I inked the edges with the same colour and then "sugared" it with Iced Snow.  I seated the flower on the end of the strip with some Lace Edged leaves and Dandelion Clocks as accents. I added a side view butterfly from the Magical Butterfly set cut out of coconut white card as a finishing touch to the outer frame edge.  I completed the card with a white on white pierced mat and layer.  The finished dimensions are 8" x  8 1/2" in size.  Scroll down for card number two.


Card number two uses the Double Pierced Noble Circle Set B dies.  I started this card exactly the same way with a white Jacobean Floral embossed background (yes I do like that folder! LOL)  Next I cut a large frame out of black card using the Circles.  While the card was still in the die, I carefully moved it on to the Jacobean Floral folder with the cutting edge of the die away from the folder.  I covered it with a tan mat and several pieces of card as a shim and then added the raspberry adaptor plate.  Leaving the folder open, I ran it through the Platinum machine to emboss just the centre area on the frame.  Before removing it from the die, I lightly rubbed it with Enchanted Gold Gilding wax to enhance the design.  I added mounting foam to the back of the frame.  I embossed a piece of vintage gold card with the same folder and rubbed it with Midnight Gilding Wax.  I buffed it then seated the frame over it and trimmed the excess away.  I stamped a sentiment then created a frame from the Belgian tag out of gold and black card and seated it over the sentiment, then added it to the centre of the card.  As a floral accent, I cut enough Exquisite Poppies out of gold card too create five flowers and I arranged them on the circular frame, seating them with black jute bows and olive branch leaves.  The card was completed with white, black and gold mats and layers.  The finished dimensions are 8" x  8"in size.

The winners of this week's Comment Game are:

Marion Scott!!!
Sue J!!!
Gwen 70!!!

Congratulations all!  Please email me at americansue1@gmail.com to confirm your address and claim your prize.  All for now, Sue x


                                                      Follow my blog with Bloglovin

Saturday 29 October 2016

Snowflake Background Card


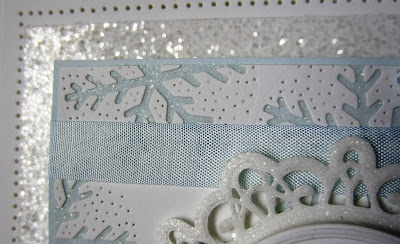
Hello crafters!  Today's video shows off the Bold Snowflake frame and how you can use it to create a pretty and unique background.

The winner of this week's Wednesday card giveaway is:

Lynne L!!!

Congratulations!  Please email me at americansue1@gmail.com to confirm your address and claim your card.


The finished dimensions are 7 1/4" x  7 3/4" in size.  All for now, Sue x
                                                          Follow my blog with Bloglovin


Friday 28 October 2016

Christmas Double Days

Hi bloggers!  This is my one of my favourite angels cards, I just love the colour combo.  I started by embossing a square of milk card using the Star Swirls embossing folder.  I rubbed Enchanted Gold gilding wax over the top of it for a subtle shine and matted it with a thin black mat.  Next I cut four of the Bright Star Adornment in milk and attached the edges to the four edges of the background piece.  I added mounting foam to the back and attached it in a diamond orientation to a larger piece of milk card, also matted in black.  I cut the 2016 Angel in both milk and black card.  I offset the black as a shadow and then used the die to lightly emboss the shape on to milk card which was covered with a sticky adhesive sheet.  I hand cut it and attached it to the angel and then gllittered it with Diamond Sprinkles to create a solid background for her.  I added her to the centre of my background with mounting foam.  I completed the card with milk and black mats.  The finished dimensions are 8" x  8" in size.  Scroll down for card number two.


For card number two, I cut the Mini Poinsettia background in white using just the outer decorative cutting die in the set.  I backed it in white and added mounting foam to the back.  I cut the centre section of the die in white and added a sticky adhesive sheet to the back of it.  I gilded the open areas on the front with Red Blaze gilding flakes and added a piece of white card to the back and cut the centre of it out.  I added mounting foam to raise it and added it over another piece of gilded card.  I cut two of the Happy Christmas die in white and stacked them and glued them into the opening.  I made two poinsettias that I glittered with Iced Snow and added them in opposite corners.  I cut white Holly Branches as accents and used pieces of gold metallic lynx as accents with them.  The card was completed with a white on white mat and PVA glue dots around the edge.  The finished dimensions are 6 1/2" x  8 1/2" in size.  All for now, Sue x


                                                  Follow my blog with Bloglovin