Hello there my crafty friends! It almost looks as if this picture was taken in black and white, but it is just a silver and white card for today's offering. I started by taping the
Feathered mask to a piece of s;ate grey card I used
Silver Chrome Glitter Kiss through the mask and then set it aside to dry overnight. Next I cut the background into three sections. I added mounting foam to the backs of each section and added them to another piece of white card. Next I cut the
Claire die out of white card, using just the outermost die in the set. I cut the die again, but this time I used the next size down in the set and used the decorative die with it. I added a backing of the outside die cut and backed it out of
silver Glitter Kiss. I cut the smaller circle from the inside of the die and used silver Glitter Kiss around the edge of it. I added it to the centre with foam. I added the
Just Because sentiment it to the centre, Next I made a small scrunched flower using the solid flowers from the
Striped Nasturtiums. I added
silver glitter kiss to the tips of the petal and allowed it to dry well. I seated it with leaves and
Fern Fronds cut in white. The card was completed with white and silver mats and layer. The finished dimensions are 7 1/2" x 7 1/2" in size. All for now, Sue x
 Follow my blog with Bloglovin
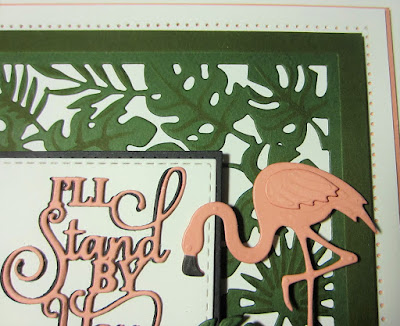
 Hi there bloggers! I started with the Tropical Background for today's card. I cut it out of Khaki card and used Forest Moss Distress Oxide ink through the die before removing it to add accents to the leaves. Next I cut a small square using the Double Stitched Square die set. I added a thin green mat behind it and added it with foam to the centre of the card. I cut the I'll Stand By You sentiment out of Soft Salmon card and added a black shadow behind before gluing it to the square. I used two of the Flamingos from the Tickled Pink die set also cut out of Soft Salmon card. I used a sharpie to colour their beaks black before adding wings and attaching them to the card with foam. I cut a couple of individual leaves using the Tropical Flora die set and added them to the corner of the sentiment. The card was completed with white and soft salmon mats and layers. The finished dimensions are 7 1/4" x 7 1/4" in size. All for now, Sue x


