Wednesday 31 May 2023

Precious baby Boy

 Hi bloggers!  To make this cute baby card, I selected a piece of blue striped paper from the Dots 'N Stripes Paper Pad.  I cut it to use as the bottom part of my background.  I used a piece of Sky Blue card for the top and added a thin black strip between the two pieces.  I cut the First Train die out of Cobalt blue card and added black wheels to the train engine and the open car.  I cut several red hearts from the decorative heart die and added them to the open car.  I cut the Mini Bunting Flags out of red and blue.  I stamped them with the word Baby using the Mini Bunting Alphabet stamp set.  I attached them to a piece of Baker's Twine, alternating the colours and I attached it above the train.  I added the Birthday Wordie saying between the bunting and the train.  At the bottom of the card, I cut the Precious Baby Boy and backed it with a white shadow backing.  I added it to the bottom of the card with mounting foam.  The card was completed with red, cobalt blue and white mats and layers.  The finished dimensions are 8" x  8" in size.  All for now, Sue x


                                                       Follow my blog with Bloglovin

Tuesday 30 May 2023

On Your Wedding Day

Hello there my crafty friends! I hope everyone had a lovely relaxing bank holiday!  I started today's card by cutting the Lace Rose Heart die out of white card.  I glued it to a piece of clear acetate, then turned it over and added glitter to the back.  I started with the red of the heart and filled in that area with glue, then sprinkled on Fire Red polished silk glitter and tapped off the excess.  I did the leaves next in Hunter Green.  I filled in the background and sprinkled Sparkle Star glitter on it, then set the piece aside to dry overnight.  I cut a frame using the Decorative Hearts.  I used one of the smaller dies to cut an aperture in the middle of a piece of white card.  I added mounting foam to the back to raise it then added another piece of white card behind it.  I recessed the heart die cut into the aperture, then glued the Lace Rose Heart into the centre.  I added the frame around the aperture with mounting foam.  I cut the On Your Wedding Day from our Milestone Wordies and added it below the heart.  The card was completed with white mats and layers.  The finished dimensions are 7 3/4"  x  7 3/4"  in size.  


Now for the first announcement!  The winner of the May die collection release is........................................................................................................................................................................................................................................................................................................................................

                                                        Theresa Weatherley!!!

Congratulations!  Please email me at americansue1@gmail.com to confirm you postal address and claim your prize.

The second announcement is that Jamie Rodgers will be on Hobby Maker today demonstrating the dies from this latest release for you.  His show time is at 7pm on Tuesday.  He is back on Wednesday at 1pm demonstrating his Pierced Collection, then he is back at 5pm on Wednesday with a second show with my Love Collection.  I hope you will be able to join him on Hobby Maker to see his amazing demonstrations!  All for now, Sue x


                                                        Follow my blog with Bloglovin

Monday 29 May 2023

Hello Friend

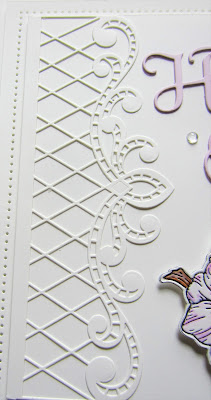
Hello crafters!  I started today's card by cutting the  Jewelled Scalloped Border in white.  I glued it to the left side of a piece of white card.  I inked the Magnolia Stampcut die with a black water based ink and ran it through the die cutting machine.  I used Alcohol ink markers to colour it.  I attached it at the bottom of the card.  I cut the Hello Friend sentiment out of lilac card and glued it above the Magnolias.  I added a few of the water crystals as accents.  The card was completed with white mats and layers.  The finished dimensions are 7 1/2"  x  8 1/2"  in size.  All for now, Sue x


                                                     Follow my blog with Bloglovin

Sunday 28 May 2023

Bundle Of Joy

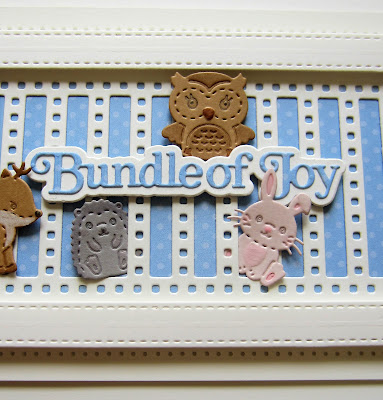
Good Sunday morning all!  I started this sweet baby card by cutting the Slimline Decorative Squared Stripes die in white.  I used a piece of the blue dotty paper from the Dots 'N Stripes Paper Pad to add a backing behind it.  I used the Slimline Rectangle Frames to add a white frame over the top.  I cut the six animals from the Baby Woodland Animals die set.  I arranged the animals along the slats of the background.  I cut the Bundle Of Joy sentiment out of dotty blue paper.  I added it to a white backing and attached it in the centre of the card.  I cut a small blue star from the Noble Pierced Star set and added it in the corner.  The card was completed with white mats and layers.  The finished dimensions are 4 3/4"  x  9"  in size.  All for now, Sue x


                                                       Follow my blog with Bloglovin

Saturday 27 May 2023

Twinkle Twinkle Little Star

 Hello bloggers!  I just had to have another play with alcohol inks and the Silver Sparkle Alcohol ink card from Ranger (I love this stuff!)  I used Sunshine Yellow, Valencia Orange, Enchanted and Red Pepper Alcohol inks and added them in stripes to my silver sparkle card.  Next I used the Pierced Star die set and cut two of the sizes randomly into a piece of white card.  I added mounting foam to the back of the piece and attached it over the silver sparkle alcohol inked card.  I cut the Twinkle Twinkle Little Star sentiment in black and added it to the backing piece which I cut in white.  I attached it with mounting foam to the lower corner of the card.  The card was completed with white mats and layers.  The finished dimensions are 7 1/2"  x  9 1/4"  in size.  All for now, Sue x


                                                       Follow my blog with Bloglovin

Friday 26 May 2023

Happy Anniversary

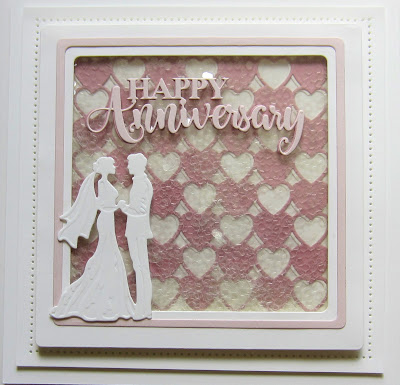
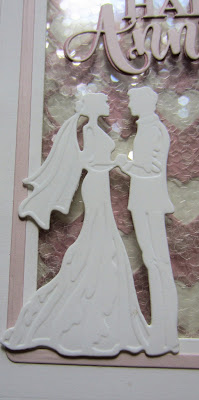
Hello crafters!  Here's a shaker card made using the latest dies that we released this week.  I started by cutting the Checkered Heart Background out of Old Rose card and white card.  I offset the white die cut behind the old rose die cut then backed it with a piece of white card.  I cut the Round Corner Squares and made a multi-layered frame with a thicker white base and a thin pink frame on top.  I added a piece of clear acetate to the back of the frame then ran mounting foam around the edge.  I added Iced Flake to the frame (which I turned over so it formed a "bowl" for my shaker elements.)  I sealed it with another piece of acetate, then attached the frame over the Heart Background.  I cut the Wedding Couple in white and added it to the corner of the frame.  I cut the Happy Anniversary sentiment out of powder pink card, shadowed it with an old rose die cut and glued it to the acetate across the top of the frame.  The card was completed with white mats and layers.  The finished dimensions are 7 1/4"  x  7 1/4"  in size.  All for now, Sue x


                                                       Follow my blog with Bloglovin

Thursday 25 May 2023

Heart Blooms

 Hello there my crafty friends!  The final post is dedicated to the Heart Blooms die set.  This set has nine dies in it so you can create beautiful floral arrangements on your cards.  For the final time, add your comment on to this post and be sure to check back on the morning of May 30th to see the name of the winner.  I hope you have enjoyed this blog launch!  All for now, Sue x


                                                           Follow my blog with Bloglovin

Heart Scroll Border

 Hello crafters!  This next die set is the Heart Scroll Border.  Shown here, I have used four of them to create a pretty frame for my card.  You can extend it or even cut it down in size and use only the centre section depending on your needs.  This little guy is very versatile and I'm certain it will come in handy for those love/romance cards.  You just need to add your comment on this post and you will be entered in the drawing to win this collection.  We have one final post in this release and it will be on the blog at 6pm today.  I hope you can pop back by the blog then.  All for now, Sue x


                                                         Follow my blog with Bloglovin

Best Wishes

Hello bloggers!  The last sentiment in this release is the Best Wishes.  I love that this one can be used for so many different occasions, but it works great, of course, with wedding and anniversary cards such as this one.  This die also offers a shadow backing die that it can be used with or without depending on your needs.  I really like this font too as it is sort of a cross between a standard block style and a little bit scripty too, but so very readable.  You know the drill, add your name to the comments section and don't forget to make it somewhat memorable to avoid any confusion.  I will return at 3pm for the penultimate post.  All for now, Sue x
 
                                                        Follow my blog with Bloglovin