Friday 31 December 2021

Hugs & Kisses

Hello bloggers and Happy New Year's Eve!  I started with a piece of Pixie Sparkled card that I made using Teal Marine and Zesty Lime Pixie Sparkles.   I used the inner heart from the Layered Heart Background die set and cut it into the card randomly all over (without over lapping it).  I used a piece of white card with a sticky adhesive sheet added to it and attached it to the back of the heart cut outs background.  I filled in the exposed adhesive with Frosted Sparkle Glitterbitz.  I cut a Pierced Flag in white and added the Hugs & Kisses sentiment cut in black to it.  I attached it with mounting foam to the background about a quarter of the way from the bottom of the card.  Using the Heart Leaf Flowers, I made three white flowers and attached them at the back edge of the flag.  I used the leaves from the set as well as a Bauble Branch as accents around the flowers.  The card was completed with white and black mats and layers.  The finished dimensions are 7 1/2"  x 8" in size.  All for now, Sue x


                                                       Follow my blog with Bloglovin

Thursday 30 December 2021

Birthdays Are The Best Days

 Hello bloggers!  I started this very simple card by embossing a piece of white card with the Fanciful Flowers embossing folder.  I used the Double Stitched Squares to make a very wide white frame to go over it and added it with mounting foam.  Next I inked the Wild Rose Cluster Stampcut die with Black Archival ink and ran it through the machine to cut it.  I did this twice, using one whole die cut and then I nipped away a single rose from the cluster on the second one.  I used Distress Markers to colour the roses (Forest Moss, Fossilized Aber and Barn Door and Festive Berries).  I attached the cluster in the lower corner and the single rose in the opposite corner.  I cut the Birthdays Are The Best Days sentiment in black and glued it inside the frame.  The card was completed with white mats and layers.  The finished dimensions are    7 1/2"  x  7 1/2"  in size.  All for now, Sue x


                                                         Follow my blog with Bloglovin

Wednesday 29 December 2021

Just Because

 Hello there my crafty friends!  I cut the Just Because Slimline All In One twice to start, once out of white card and once out of black card.  I used the black die cut as a shado behind the white one, then added a backing of Arctic Bue card.  I went back to the die and cut it several more times.  I cut it out of powder pink  card, old rose card, wisteria card and green card.  I nipped away the flowers out of the different colors and added them on top of the white base piece.  I used a small piece of card just over the flowers for a second time and then cut just the centre versions of each of the flowers and added them with foam mounting tape.  I nipped away all the leaves out of the green die cut and glued them back on to the base piece.  Using the Slimline Rectangle Frames die set, I added a white frame around the entire All In One with mounting foam.  The card was completed with white and black mats and layers.  The finished dimensions are 4 3/4"  x  9 1/4"  in size.  All for now, Sue x


                                                      Follow my blog with Bloglovin

Tuesday 28 December 2021

Belated Birthday Wishes

 Hello crafters!  I seleected a piece  Arctic Blue card and embossed it with the Twill Weave embossing folder for texture.  I cut the background on the diagonal and added mounting foam to both pieces.  I attached the pieces to another piece of white card with a small gap between them.  I cut the Sunflower Stained Glass Circle die out of black card.  I added a white backing piece to it, then began paper piecing it.  I used custard card for the sunflower petals and khaki green card for the leaves.  I filled the flower centr with glue then sprinkled Black Onyx glitter on to it and allowed it to dry thoroughly.  I attached the stained glass circle to the upper part of the card.  I cut the Belated Birthday Wishes in black and glued it to the lower part of the card.  The card was completed with white and black mats and layers.  The finished dimensions are 7"  x  8"  in size.  All for now, Sue x


                                                         Follow my blog with Bloglovin

Monday 27 December 2021

Happy Anniversary To A Special Couple

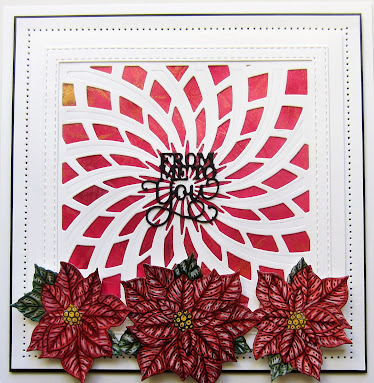
Hello crafters!  I selected a piece of caught in crystal from my craft stash.  It was cretaed by sprinkling Flirty Sky and Pumpkin Patch Pixie Sparkles on a piece of acetate.  I added clear Cosmic lacquer to it, then used my finger to mix the lacquer and the powder.  I covered it with a piece of scrunched up white tissue paper and set it aside to dry overnight.  I cut the 
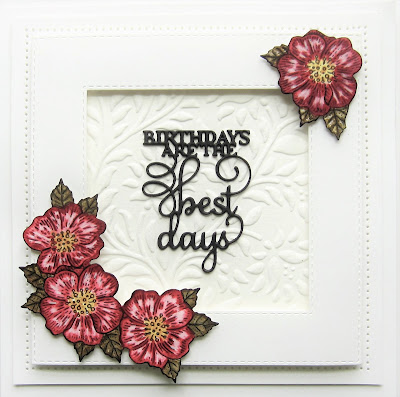
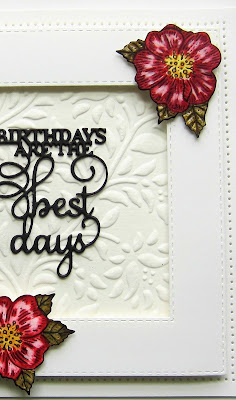
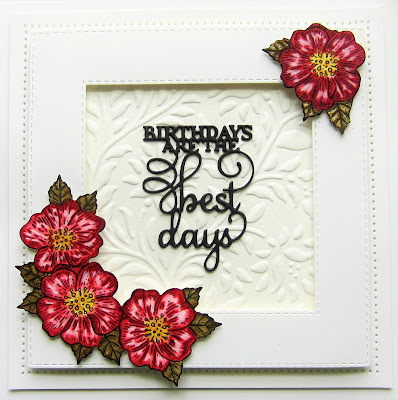
Scalloped End Rectangles in white.  I nipped apart one of the frames and glued the pieces to the top and bottom edge of the card.  I cut some smaller frames and used them in the centre.  I nipped the two smaller ones apart and added them around the larger pieces, extending them from the centre.  I cut the Happy Anniversary Duo in black and added both parts of the sentiment to the centre mat.  I cut several of the 
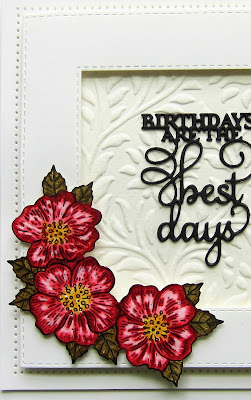
French Marigolds in white and spritzed them with water and scrunched them.  I assembled the flower once they were dry, then inked the tips with Victorian Velvet Distress ink.  I cut the Family Tree die in white then nipped apart the leaves to use as accents around the flower.  The card was completed with white mats and layers.  The finished dimensions are 6 1/2"  x  10"  in size.  All for now, Sue x


                                                        Follow my blog with Bloglovin

Sunday 26 December 2021

Hugs & Kisses

 Hello bloggers!  Happy Boxing Day!  I started with a piece of white card and used the Noble Decorative Hearts to cut an aperture in the centre of the card.  I used the smallest die in the Heart set and cut a bunch of them in white.  I glued all the small white hearts to the background of the aperture.  I added mountng foam to the back to raise it, then added it to another piece of white card.  I cut a smaller hearts out of a piece of Pixie Sparkled card from my craft stash (I used Flirty Sky with a little bit of Red Oxide added in)  I glued it in the aperture.  I cut the Hugs & Kisses sentiment in lack and glued it to the pink heart in the centre of the aperture.  The card was completed with white and black mats and layers.  The finished dimensions are 7"  x  8 1/4" in size.  All for now,  Sue x


                                                        Follow my blog with Bloglovin

Saturday 25 December 2021

The Last Of The Christmas Cards.... Finally!

 Hello and Merry Christmas everyone!  Here are the very last of the Christmas card samples for this year.  I promise to not post any more Christmas cards until June 2022 when the next Christmas die release is scheduled.  I hope everyone has a great Christmas and Happy New year too.  If you have a few minutes today to leave a comment, I would love that.  All for now, Sue x


                                                         Follow my blog with Bloglovin