Friday 31 March 2017

Thinking Of You


Hi crafters!  Today's offering is a diagonal Gemini die border card using wisteria, white and black card.  I started by cutting the diagonal border in coconut white card using the Cepheus Gemini die.  I did two across without the cutting edge, then flipped it the other way and centred it below in the middle and used the matching cutting edge.  I followed the shape and hand cut the remaining areas to the edges of the card.  I backed it wit a piece of wisteria card that I scored the bottom to add detail.  For the focal element, I cut the Butterfly Frame centre in white and backed it with wisteria card.  I cut the same die in back and cut it in half and added it to the sides peeking out from underneath.  I stamped my sentiment and cut it out with the Double Pierced Noble Circle die, adding a light inking of Chic Viola Colour Cloud before removing it and a black mat from the B set.  I cut several of the Exquisite Poppies in wisteria card, adding black lines with a fine tipped pen.  I added black centres and white pearls to them and arranged them around the focal element with Lace Edged Leaves, Olive Branches and white satin ribbon.  White, wisteria and black mats were added to complete the card.  The finished dimensions are 7" x  8 3/4" in size.  All for now, Sue x


                                                      Follow my blog with Bloglovin

Thursday 30 March 2017

Treasured Friend

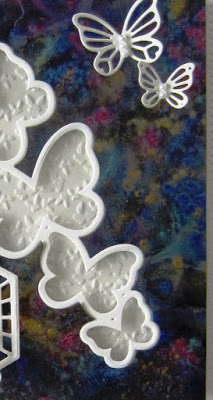
Hi crafters!  Another one using the Cascading Butterfly die set today!  You have seen how pretty it looks with Pixie Powders, but I think it is just as stunning done in a simple blush, white and black combo.  I started by cutting an aperture in blush card using the Cascading Butterfly die set. I added a piece of acetate across the back, then added mounting foam to raise it for dimension.  I embossed a piece of white card with the Butterfly Dreams and added it behind the aperture.  I cut the Cascading Butterfly die again but this time in black and I used just the outline shape and added it over the aperture to define the shapes.  I stamped my sentiment and cut a frame from the Cape Verde die set to go over it and added it in the upper corner of the card.  I made three black flowers using the Chrysanthemum die set and accented them with Spring Foliage in white.  I completed the card with white, black and blush mats. The finished dimensions are 6" x  7 1/2" in size.  All for now,  Sue x


                                                      Follow my blog with Bloglovin

Wednesday 29 March 2017

Wednesday Weekly Card Giveaway

Hello there my crafty friends!  Today's card giveaway was one of my demos from previous Hochanda shows,  I started with a piece of aqua card and used the outer die from the Lotus Striplet to cut a decorative back ground into it.  The small squares in the die easily slot back in so you can cut any manner of designs from it!  I backed it with white card and added a muti-layered frame cut from the Scalloped Lattice Frames over the top.  I cut the Pacific Ocean tag in aqua and backed it in black and added it with foam to the centre of the card.  I stamped my sentiment and cut it out with the oval from the set and added it to the tag centre.  I embellished the card with a diagonal spray of Striped Nasturtiums cut with only the solid flowers in the set.  I inked all the edges with Aqua Adirondack ink and cut slits into each of them to give them a slightly different appearance.  The flowers were accented with bits of the Family Tree cut up into pieces.  White, aqua and black mats were added to complete the card.  The finished dimensions are 7 3/4" x  8 3/4" in size.  If you would like to be entered into the drawing to win this ones, just leave a comment.  The winner of the drawing will be announced on Saturday's blog post.  All for now, Sue x


                                                        Follow my blog with Bloglovin

Tuesday 28 March 2017

Posh Door


Hello there my crafty friends!  I have been playing with the Arched Door/Window die.  I have a posh door card to share with you and hopefully it will give you some ideas for your own door cards!


                                                      Follow my blog with Bloglovin

Monday 27 March 2017

Heartfelt Thanks

Hi crafters!  Today's card mixes the dies up so you can see different ways in which they can work together.  I started with a piece of dusty rose card from my stash and cut the Atlantic Ocean Background outer decorative die.  I backed it with coconut white card and cut the centre out of it.  I added mounting foam to raise it for dimension.  Next I used the centre decorative die and cut the design out of a piece of coconut white card, but used it in a diamond orientation.  I used the heart shape from the Laced Heart to cut an aperture in the centre of it.  I mounted the frame over it, then added a heart treat cup from the back to fit into the heart aperture.  I filled the heart with heart confetti cut in rose and white and sealed it with a piece of acetate.  I cut the centre of the Laced Heart in dusty rose and glued it behind the acetate on the heart.  I tied a messy bow out of Rose seam binding and added it to the lower right hand corner.  I made a flower from the Chrysanthemum die and tipped the ends with Victorian Velvet ink then added some glue and sprinkled Iced Snow on them.  I seated the flower in the centre of the bow and added some leaves and a sentiment tag.  I used several of the butterflies from the Cascading Butterfly die set to add around the card as accents.  White and dusty rose card mats were added to finish the card.  The completed dimensions are 7" x  7" in size.  All for now, Sue x


                                                         Follow my blog with Bloglovin

Sunday 26 March 2017

Best Wishes

Good Sunday morning all!  An older offering for today, I hope you don't mind!  I started by stamping the Poppy Daydream Stamp To Die For in black.  I coloured it with pencils.  I cut a multi layered frame from the Double Pierced Noble Ovals Set B and attached them with foam over the coloured image.  I stamped a sentiment and added it in the upper corner of the frame.  For the surround, I used the Tiled Squares Striplet and made a frame with it.  I matted it with red card then black card.  The card was completed with a red bow tied from frilly edged ribbon and a black crystal sparkler and white on white mats and layers.  The finished dimensions are 8 1/4" x  8 1/4"in size.


The winners of this week's Comment Game are :

Yvonne H!!!
Anne (Northampton)!!!
Sandy H!!!

Congratulations all!  Please email me at americansue1@gmail.com to confirm your address and claim your prize.  All for now, Sue x


                                                     Follow my blog with Bloglovin

Saturday 25 March 2017

Cascading Butterlfies


Hi crafters!  Today's video shows you what Pixie Powders look like on black card stock!  It is a really different look, but oh so pretty I think!

The winner of the Wednesday Card Giveaway is:

Sarah Wrightson!!!

Congratulations!  Please email me at americansue1@gmail.com to confirm your address and claim your card.


The finished dimensions are 6 3/4" x  7 3/4" in size.  All for now, Sue x


                                                        Follow my blog with Bloglovin

Friday 24 March 2017

Just A Note

Hi bloggers!  Another sunny custard card for you today!  I selected the Swiss Background and cut the centre two decorative dies out of a piece of coconut white card,  I backed it with custard card to show through the decorative cut out areas. Next I cut a multi layered frame out of the Scalloped Lattice Frames Set B using both coconut white and custard card. I added mounting foam to the back of the frame to raise them. I cut four of the Centaurus Gemini dies out of coconut white card and added them to the foam on the frames so they were coming out from under the edge of the frame, but only just touching the decorative area of the background below.  I stamped my sentiment and added it to the centre with a touch of Lemon Meringue Colour Cloud to the edge.  I cut three Exquisite Poppies out of custard card and seated them in opposite corners.  The larger flower was seated on white tulle and a white satin ribbon bow.  White and custard mats were added to complete the card.  The finished dimensions are 6 1/4" x  8 3/4" in size.  All for now, Sue x


                                                         Follow my blog with Bloglovin