Saturday 31 July 2021

Dream Big & Explore

 Hi bloggers!  I started with a piece of light Grey card and used a stamp from the Textures clear stamp set.  I inked it with Weathered Wood distress ink and randomly stamped it all over.  Next I tore the card into pieces, then put it back together, overlapping the pieces slightly to give the background the look of a rhino's hide.  I inked it lightly around the edges with Tea Dye Distress ink to give it a distressed look.    Next I stamped the Rhino and cut it out by hand around the edge.   I used distress markers to colour the stamp.   I stamped and cut out one of the Safari Tags and coloured it in, then cut it in half and added it to the side of the card to look like hinges.  I stamped the sentiment from the Wild About You clear stamp set in the lower corner in black ink.  The card was completed with white and gray mats and layers.  The finished dimensions are 7 1/2"  x  8 1/4"  in size.  

I posted the list of winners yesterday afternoon so please be sure to scroll down to the post under this one to see if your name is on the list.  There are still about half of the dies that have not been claimed yet!  All for now,  Sue x


                                                      Follow my blog with Bloglovin

Friday 30 July 2021

July Die Release Blog Launch Winners

 Hello there my crafty friends!  Thank you so much for a successful die release launch, I thoroughly enjoyed reading all the comments!  Here is the list of winners named that were drawn:


Slimline Stars Rectangle Aperture Trio:  Jackie Trinder!!!

Slimline Holly Rectangle Frames:  Sharon Lonsdale!!!

Slimline Holly Oval Aperture Trio: Karen Ladd!!!

Joy To The World:  Fluffycat!!!

Slimline Inner Scalloped Oval Aperture Trio:  rjsmusic!!!

Slimline Outer Scalloped Oval Aperture Trio:  Susan Foster Croydon!!!

Merry Christmas:  Zoemo!!!

Season's Greetings:  GrannyJanny1 in Kippax!!!

Festive Accessories:  Eunice from Edmunton!!!

Slimline Inner Scalloped Rectangle Aperture trio:  Glennis F!!!

Slimline Outer Scalloped Rectangle Aperture Trio:  Magic Maggie!!!


Congratulations all!  Please email me at americansue1@gmail.com to confirm your postal address and claim your winning die.  Please put the name of the die that you won in the subject line of your email as it makes it easier to get the right dies to all the winners.  All for now, Sue x

Peace

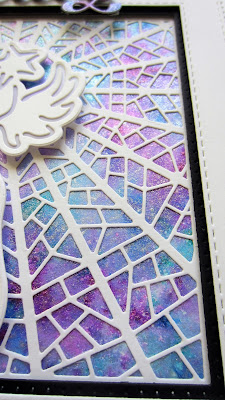
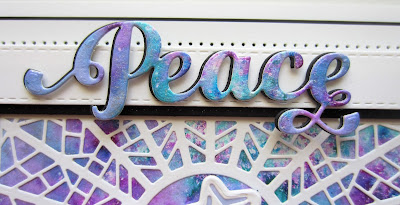
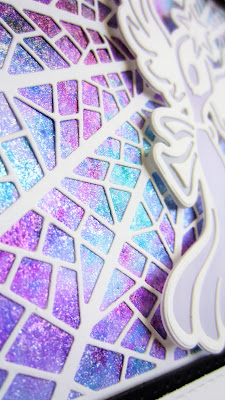
 Hello crafters!  Today's background started with a piece of white card and I sprinkled Purple Violet and Aqua Lagoon Pixie Powders all over it.  I spritzed it with water to activate the powder then allowed it to dry.  I cut the Mosaic Ray Background in white and added it over a piece of the pixied background.  Using the Double Stitched Squares, I made a wide white frame.  Using the Double Pierced Square die set,  I added a thinner black frame to the inside of it then added it over the background with mounting foam.  I cut the Christmas Angel 2021 out of white card and added a white vellum backing to it.  Next I added the angel to the background with foam mounting tape.  I cut the Peace die out of the leftover pixied card, then added black shadow to it then glued it to the top of the frame.  The card was completed with white and black mats and layers.   The finished dimensions are 7 1/2"  x  7 1/2" in size.  

Don't forget to check back here later in the afternoon as I will be psoting the winners of the July Die Release Blog Launch.   All for now, Sue x


                                                         Follow my blog with Bloglovin

Thursday 29 July 2021

Surprise

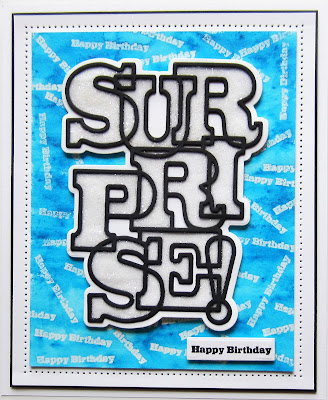
Hi crafters!  I started with a piece of white card and used the Happy Birthday stamp that comes in the Surprise Big Bold Word Die/Stamp combo set and randomly stamped it all over the card.  I inked the stamp with a clear Pefect Medium and used Clear Embossing Powder over it, then heated it.  Next I sprinkled Beyond Blue Pixie Sparkles all over the background and spritzed it with water.  I moved the colour around with a brush, completely covering the background.  Once dry, I used a piece of kitchen roll and wiped the colour off of the stamped words (the embossing powder makes it resist the colour).  Next, I cut the Surprise die out of black card and glued it to the white backing card.  I added dries clear glue to the letters one at a time, then sprinkled on Frosted Sparkle Glitterbitz and tapped off the excess.  I allowed it to dry, then added it with mounting foam to the background.  I stamped the Happy Birthday with black ink and cut it out with a tag die.  I mounted it in the lower corner.  The card was completed with white and black mats and layers.  The finished dimensions are  6 3/4"  x  8 1/4" in size.  All for now. Sue x


                                                           Follow my blog with Bloglovin

Wednesday 28 July 2021

Season's Greetings

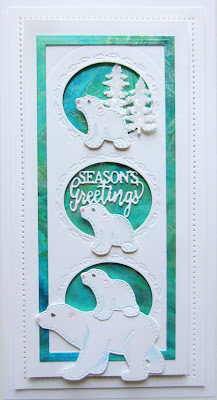
Hello bloggers!  I just couldn't resist these adorable Polar Bears from a previous release!  I started with a piece of watercoloured card from my stash.  I used Lime Sherbert and Turquoise Cascade randomly all over a piece of white card and allowed it to dry thoroughly.  Next I cut the Slimline Decorative Holly Oval Aperture Trio out of white card, leaving a wide border.  I added mounting foam to the back and then attached it to a piece of the watercoloured card.  I used the leftover card and cut a thin frame from it using the Slimline Essential Frames.  I glued it to edge of the aperture piece.  Next I cut the bears from the Polar Bear Playtime, one large and three babies.  I used a soft blue pencil to highlight the bears.  I cut two of the small Winter Trees and glittered them and added them to the upper opening with one of the small bears.  I used the Season's Greeting sentiment in the centre with another bear.  I added the large bear with the baby riding on the back in the lower section.  The card was completed with white mats and layers.  The finished dimensions are 5"  x  9 1/2"  in size. 
I will be doing a demo on Jamie Rodger's show on Create and Craft today at 6pm UK time (1pm EST in the US)  Hope you can join us there!   All for now. Sue x


                                                         Follow my blog with Bloglovin

Tuesday 27 July 2021

You Don't Look A Day Over Fabulous

Hello bloggers!  I started today's card by inking a piece of  Yupo card with Citrus and Patina Alcohol inks.  I matted it with a piece of white card then a piece of black card.  I cut a larger pic of white card and picked up the same alcohol ink colours using a piece of scrunched up kitchen roll, then pouncing it all over the white card.  It gave a pretty dotty look to the card.  I added the centre piece with mounting foam to the larger white card with the alcohol ink dots.  I cut a Cosmos Flower in white then glittered it and added it to the corner.  I used Lace Edged Leaves cut in white as an accent.  I cut the Word Fabulous twice in white card and stacked them, then glued it to the card.  I stamped the rest of the sentiment from the Fabulous Die/Stamp Combo set and cut it out with the tag die in the set.  I added it above the Bold word with mounting foam.   The card was completed with white mats and layers.  The finished dimensions are 8"  x  8"  in size.    All for now,  Sue x


                                                            Follow my blog with Bloglovin

Monday 26 July 2021

Please Let It Snow

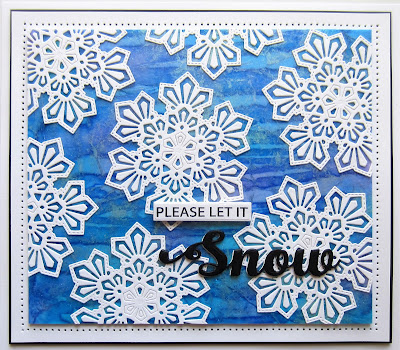
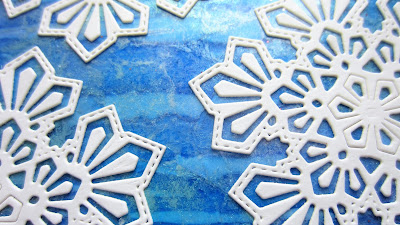
Hi bloggers!  It seems a strange title for a post in the middle of summer, but if you helps you get a start on your festive cards, then it's worth it!   LOL  I started with the background and drizzled dries cler glue all over a piece of clear acetate.  I used Beyond Blue Pixie Sparkles and mixed it in with the glue, then covered it with scrunched up white tissue paper and set it aside to dry.  Once dry, I cut six of the snowflakes from the Layered Snowflake Background in white and glued them all over the acetate.  I used the Snow Die /Stamp combo and cut it in black and glued it to the bottom corner f the card.  I stamped the rest of the sentiment and cut it out with the tag die from the set and mounted it above.  The card was completed with white and black mats and layers.  The finished dimensions are 7 1/4"  x  8 1/4"  in size.    All for now, Sue x


                                                        Follow my blog with Bloglovin

Sunday 25 July 2021

Happy Birthday

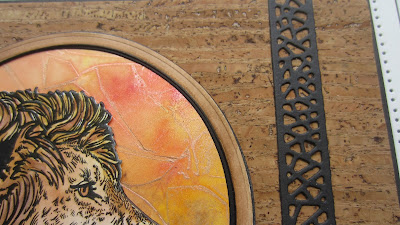
Good Sunday morning all!  I found a piece of rolled cork in my stash and thought it would make a nice background for this card.  I matted it to a black mat, then added two black borders to the sides cut with the Mosaic 3D Bow border.  I stamped the Lion and cut it out with the matching Lion die.  I coloured it with Distress Markers, then added a background that was made with yellow and red Watercolour inks.  I stamped the sentiment from the Wild About You clear stamp set and cut it out with the Safari Tags and added it to the bottom corner of the card.  The card was completed with white and black mats and layers.  The finished dimensions are 7 1/2"  x  9"  in size.  All for now, Sue x


                                                     Follow my blog with Bloglovin