Thursday, 20 December 2012

Winter Greetings

Hi bloggers!  I can't believe that I still have Christmas cards to show, but I do!  Considering that I started posting them around June sometime  (so sorry about that! LOL), you would have thought I had run out of them by now, wouldn't you?  I promise not too many more to go now!  I really like this one even if it is a bit traditional by my standards.  I started with a white background piece that I wanted to give some soft embossing to so I decided to use some snowflake pendant die cuts to do that.  I cut two of them out of kraft card (it is fairly thick and works well for this technique, but you can use any card).  I stacked them on top of each other and glued them together.  I slipped it under my card, locating it in the lower corner, but slightly off the page too.  I placed my tan mat and pink plate on top and ran it through the GC to emboss the shape into my card.  I did it again in the upper corner, taking care to leave my already embossed area outside the machine and plates so they would not flatten.  You might wonder why I didn't just use the dies themselves for this, but you get a completely different look when you emboss this way.  It is somehow softer of a look too. I used Broken ink to lightly highlight the embossed snowflakes on the background too. I used one of the snowflake stamps from the CE set called Snowflakes and Twigs and added some white embossed snowflakes to the background for interest.  Next I cut three small squares of silver, aqua and white and layered them up and placed them on the diagonal across my card.  The centre one was stamped with my sentiment and silver heat embossed, then I did the same technique using smaller snowflake dies to emboss all three of the squares.  I lightly inked all the squares with Broken China also.  I covered two small scraps of coconut white card with our sticky sheet pieces (great to use those odd leftover sized pieces for this) and then I cut two of the small snowflakes and micro beaded them.  I added a flatback pearl to the centres and mounted them in the upper and lower squares, slightly off centre.  I pierced the edges of the white mat giving it a lovely frame to my frosty card.  I hope all your Christmas preparations are coming along nicely and you still find a bit of time to do some relaxing cardmaking over the weekend too!  I have a tutorial for you tomorrow so don't forget to check back.  All for now, Sue x


Wednesday, 19 December 2012

Just Because

Hello my crafty friends! Today's card showcases several different die sets, including my one of my favourites, the Venetian Motifs. I started with a simple embossed background using the A4 Garden Lattice Embossibility in taupe card.  I rounded the corners and matted it on a piece of red card.  I wrapped a piece of black duchess lace around the left side and secured the ends to the back of the card.  From there, I began working on my focal element by cutting two Venetian Motifs out of black card (don't forget to use wax paper with these as they are very detailed and fine).  I cut both of the dies in half.  Next I cut a large Labels 28 out of red card.  I stamped each end with one of the JustRite Botanical Swirl stamps using a black archival ink pad.  I mounted the cut pieces of the venetian motifs so that they were peeking out from behind the label shape.  I let the small curly parts of the die hug around the label shape too.  Next I stamped the same Botanical swirl stamp on to taupe card using a black archival ink pad.  I stamped my sentiment in the centre.  I cut this out with the matching Samantha Walker designed die. I inked the frame with Antique linen while still in the die.   The inside of this frame also cuts out so I turned it so the points were offset and mounted it with 3D foam.  I added some flatback pearls as accents.  To add a bit more red to my card, I tied a messy bow out of the Lipstick red seam binding ribbon and added it to the bottom of my lace border.  I added a black Dazzler to the centre and two black stick pins.  The finished dimensions are 7 1/2" x 8 1/2" in size.  Just because, it says it all! 
 
I just want to say that I realise how precious time can be around this time of year.  It always seems as if there is far too much to be done and we are always trying to get everything finished before those holiday deadlines! So I really want to thank you for giving me some of your valuable time to pop by the blog.  Your daily comments are such wonderful gifts to me.   All for now, Sue x


Tuesday, 18 December 2012

Bonjour

Good morning blog friends!  We are going French today, oui, oui!  This is one of my favs from the show.  My photography just does not do it justice, but I started with some background paper that I found while in FL. from Websters Pages (I am fairly certain that it can be found in the UK too).  I cut three strips and covered them with our self adhesive sticky sheets.  I peeled the backing paper off and covered them in clear micro beads for texture.  I matted each strip with milk card and then taped them on to a background piece of blush card.  I stamped one of the JustRite French Frill tag stamps on milk card and cut it out with the matching Botanical Swirls die.  I inked it  lightly with Tattered Rose distress ink while it was still in the die, then used a bit more to deepen the roses on the stamp.  I used some black tulle and threaded it through either end of the tag and tucked the ends around the back of the card and secured them.  I tied a bow and added it to the right hand side.  I cut two of the French Frills dressforms out of black card.  I decided to use just the stand and replaced the dress portion with stamped versions from the same Just Rite stamp set.  I inked them with Tattered Rose also and cut them out with the matching die.  Using mounting foam for height, I added them to the centres of the dress forms.  On each dressform, I added three small flatback pearls to the neck.  Across the card strips, I added a lovely spray of swirlie pearls for interest.  I decided to go with a black mat to balance my dressforms and tulle and I pierced the inner layer to finish my card.  Finished dimensions are 7 1/2" x 8 1/2"  It's one of those  no particular purpose, girlfriend type of cards, but I love it!  All for now, Sue x


Monday, 17 December 2012

Blog Candy Winners!

Hello bloggers!  As promised, I am back to announce the winners of the big Blog Candy Contest.  Thank you for patiently waiting until I returned from Florida and had a chance to get all the entries updated.  Without further ado, the winner of the THIRD place prize goes to..........
............................................................................
.....................................................................
............................................................
.....................................................
.................................................
........................................
...................................
...........................
.....................
..............
.........
...
Trudy Aylott!!!!
 
The winner of the SECOND Place prize goes to................
.............................................................................
...................................................................
..................................................................
.......................................................
........................................
............................
......................
..............
.......
....
Richard Bond!!!
 
And finally, the winner of the GRAND FIRST PLACE PRIZE goes to.......
...........................................................................................
...................................................................................
.............................................................................
......................................................................
..........................................................
.................................................
.......................................
................................
.......................
...............
............
.....
...
Katie Hinds!!!!
 
Congratulations to all!  Please email me at americansue1@gmail.com to confirm your address and claim your prize.  If you  have sent me your address in the past, you are still entered in the next blog candy contest.  If you haven't, then don't forget to do so to be entered in the next drawing which will take place when we reach 3900 followers!  Thanks again for all your support!  All for now, Sue x

My Nicest Thoughts

Morning my crafty friends!  Thank you, thank you, thank you!  What a wonderful welcome back you gave me yesterday!  There were so many fantastic emails with well wishes, wonderful cards and the jingles and songs were out of this world!  I can't imagine how much time was spent on the song by Clare W, but it was magnificent (if you are curious, she left it in her comment on yesterday's blog)  I thought I would start with this card from the last show since I barely finished it and got to show it before the show ended!  We are going tone on tone for today's milk coloured card.  I started by embossing the background with the A4 sized embossibility folder for some texture.  I think it is important to add texture when you are doing tone on tone cards.  You need enough going on to keep the eye mesmerised.  To my embossed background, I added four Asian Accent borders.  I mitred the corners and added a flatback pearl to each corner.  For my central focal element, I cut the Asian Motif as a base to layer upon.  I cut two of the Venetian Motifs, offset them and interlocked the pointy pieces.  If you just slightly bend every other one forward, they will stay nicely.  I stamped my sentiment on milk card, cut it out with the Venetian motif again, and inked the centre with Antique Linen distress ink.  Then this time, I nipped away the pointy pieces, leaving just the circular sentiment piece.  I used a piece of sand paper to smooth the cut areas and used mounting foam to give it height in the centre of the card.  I pierced around the edges and added some flatback pearls for a finished framed look.  Finished dimensions 7 1/2" x 7 1/2"

Just a little reminder that I will be posting the winners of the Big Blog Candy Drawing on the blog this afternoon so don't forget to check back to see if it is YOU!!  All for now, Sue x


Sunday, 16 December 2012

Beautiful Butterfly Background

Hi bloggers! Say that fast three times! LOL I was supposed to have this die on my shows back in September, but it was pulled from the show at the last minute because there wasn't enough stock. Finally, I will be able to show it on Sunday! I had made several cards with the die back then and they have just been waiting for their time on the blog since then! I loved this die when I first laid eyes on it, but I can't for the life of me ever imagine needing to make it larger. It does line up to be cut into an expandable background. I wouldn't say it is as easy as the lattice backgrounds are, but it can be done. I will say, though, that this die is large and very intricate and will require a second pass through the machine with the die turned in order to cut it completely. I wouldn't recommend this die unless you have a Grand Calibur or other A4 sized machine to use that will allow the die to be turned. For today's card, I picked out some bright red and white patterned paper from my stash. I covered it with a self adhesive sticky sheet, peeled back the liner and poured clear micro beads over it. Next I centre my Butterfly Magic die in the middle of my coconut white card, leaving a wide edge around it. I cut my butterfly background, removed all the waste pieces and placed mounting foam around the edges. I centred it over my micro beaded background, then mounted the entire piece with a thin red mat. I cut one more of the Butterfly Magic dies in white card, but this time, I nipped away several of the flowers and the butterfly. I mounted these atop the matching areas in the background for dimension and interest. I added some white glitter to the edges of the butterflies wings for some bling. I stamped my sentiment on white card, then used the Resplendent Rectangles to cut a red frame for it. I mounted it on an angle at the top of my card. I used the red frilly edged ribbon and tied a double bow. I glued it in the corner, allowing the tails to trail to each side. A pearl embellishment graces the centre of the bow to complete it. I added a double mat of coconut white card with a pierced edge. Finished dimensions 7 1/2" x 9 1/2" (see it's a big card already, imagine extending that background! Holy Moly would that be huge! LOL)
It's Sunday so it is time for more winners to be announced! This week's comment game winners are:
SharonKirkwood!!!
3362Jan!!!
Jan Caven!!!               Congratulations all!!  Please email me at americansue1@gmail.com to confirm your address and claim your prize.    If your name wasn't drawn, don't forget that Monday afternoon there will be more winners with the big Blog Candy Drawing.  Do check back!   Also, another reminder to tune in today to see my shows at noon (tool Shed)  on Create and Craft TV and again at 5pm.  There are some lovely goodies on the shows too!   All for now, Sue x


Saturday, 15 December 2012

A Girlie Swirlie Card!

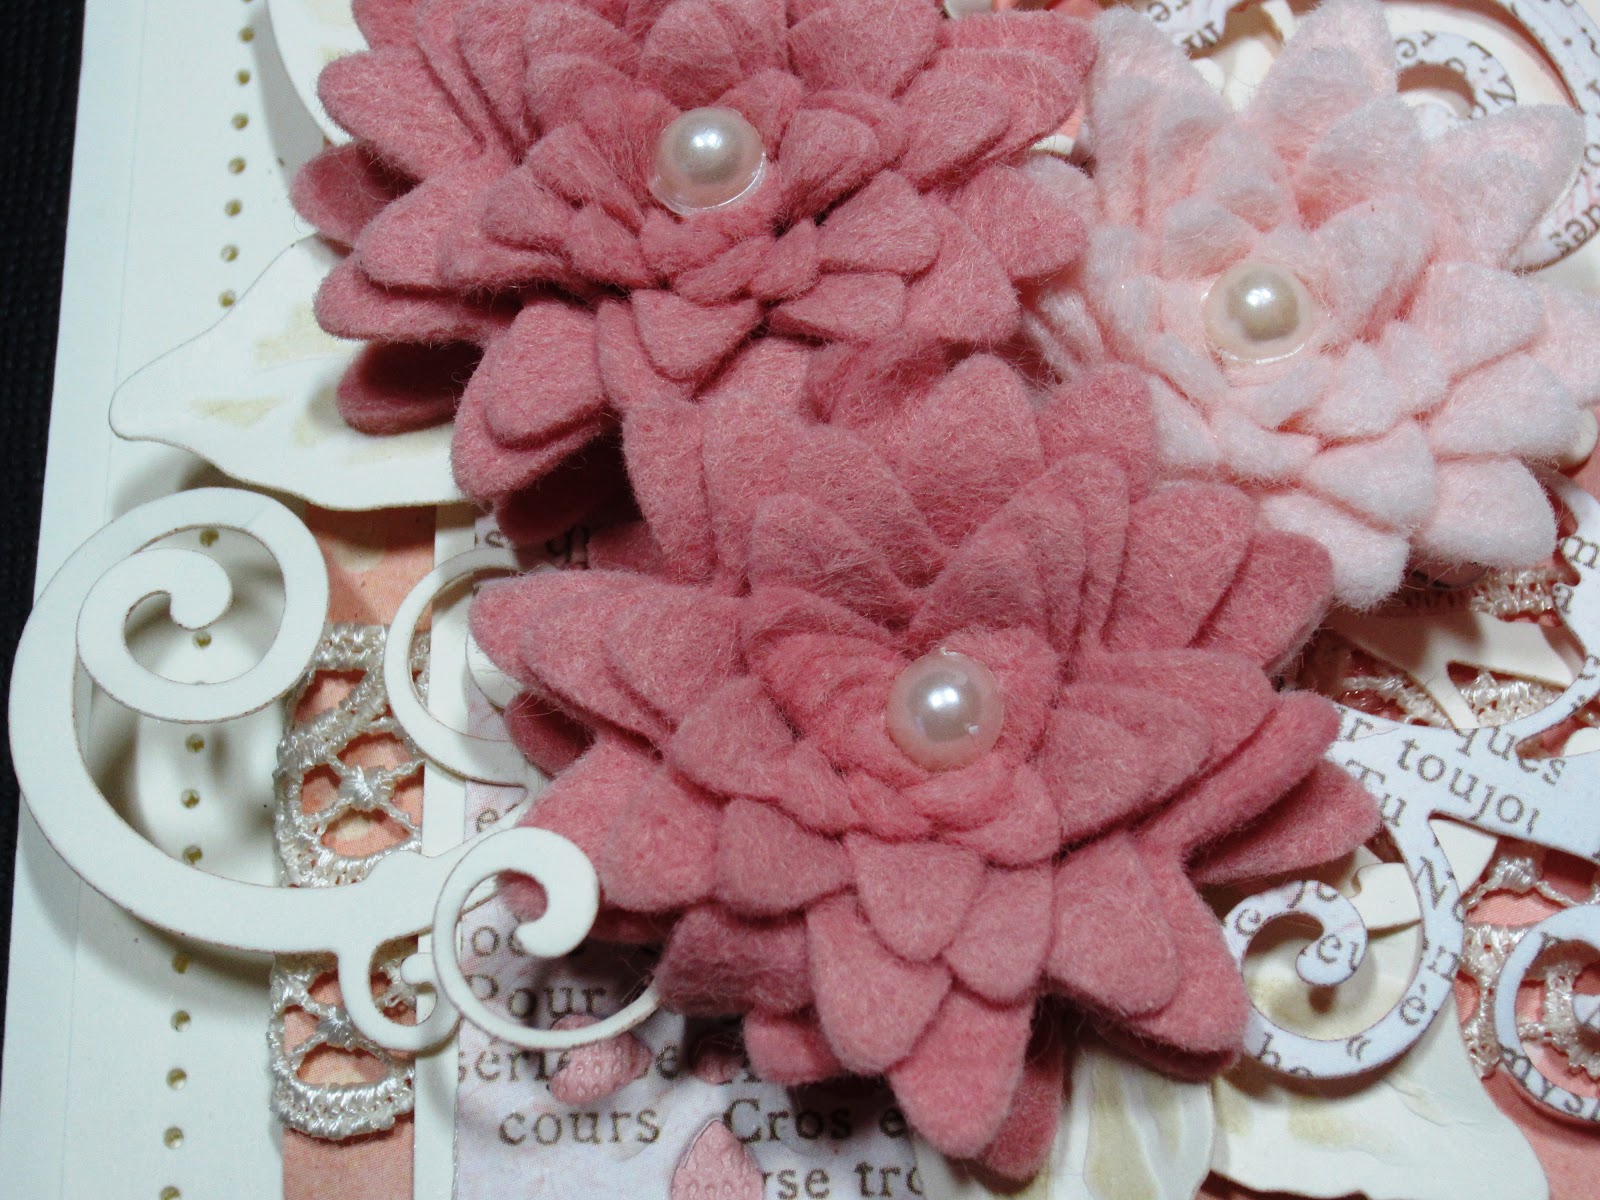
Hi guys!  The weekend has come around fast hasn't it!  Not everything has gone to plan as I had hoped.  I have managed to get most things caught up, but I still need to do the big Blog Candy drawing which I will have to push back to Monday.  I had hoped to get it done and posted yesterday, but there just weren't enough hours in the day.  I promise it will be sorted by Monday afternoon sometime. Now for today's card, a real frilly one to be sure (right up my street!), the only thing missing is a ginormous bow! LOL  Even I couldn't find a place to put one!  I started with some dotty background paper from my stash (My Mind's Eye, I think?)  I used the Decorative Labels Eight to cut an aperture in the centre.  I stamped my sentiment on milk coloured card, then place the same label shape and the next size smaller die over my sentiment, centring them both around it.  I taped them into place, then placed the tan mat over them and the pink embossing plate and ran them through the GC machine to emboss the pattern without cutting it.  I inked the area showing through the dies with Tattered rose distress ink.  I added 3D mounting foam to my background piece and placed it over the sentiment, lining it up with the aperture area.   Next I cut a small border using a strip of decorative script paper and placing one of the edgeability inserts in the middle of it.  The insert cut out the small heart pattern only.  I placed a piece of matching paper behind the hearts and then used a milk coloured mat behind the border.  I taped it into place along the left side of my card.  I wrapped a piece of cream coloured scalloped lace around the bottom of the card.  Using the Spiral Flower three, I cut three flowers from two shades of felt (btw, Sam Poole carries the nicest felt in her shop online, cuts like a dream!)  I rolled the flowers and secured them with Cosmic Shimmer dries clear glue, then glued them into place in the corner of my card.  I added pearls to the centres of each of the flowers.  Out of both script paper and milk card, I cut several of the swirl from the Jewelled Flowers and Flourish set to use as accents around my flowers and in the opposite corner of the aperture.  I cut a few leaves from the Bitty Blossom set to add around the flowers too.  I pierced the edges which I double matted in milk card to give it a nice framed look. Finished dimensions 7 1/2" x 8 1/2" in size. (I remembered to photograph this next batch of cards with rulers by the side so I would know!) I do have these dies on my shows on Sunday so it is sort of like a sneak peek (even though I made this one for the last shows I did!)  I have some fun demos planned so I hope you can tune in to Create and Craft TV on Sunday at noon for two hours and again at 5pm!  All for now, Sue x


Friday, 14 December 2012

Many Thanks

Hi bloggers!  I have found that I am totally crazy about these Resplendent Rectangles.  I find myself picking them up to use quite a bit.  This was one of the first cards that I made with them just to see what they looked like when there were cut and layered up.  Nothing too tricky here, but they have a beautiful simplicity to them. I used the new Blush card (which, by the way, is available on Sunday's shows with the new TEAL card! Finally!) I lightly inked them while they were still in the die using Victorian Velvet distress ink.  I stamped my sentiment using a black archival ink pad and cut it out with the middle die in the set.  I cut the two larger ones and layered them atop each other for the focal element.  I threaded a piece of white American seam binding through one of the sections on the die and tied a messy bow, finished with a pearl embellishment.  I added a wide mat of coconut white card for the Cosmic Shimmer PVA glue dots.  This allowed me to create my paved pearl technique which consists of varying the glue dot sizes in random patterns.  I like the textural feel to this card, especially the way the pearl embellishment almost matches the look on the edges.  All for now, Sue x


Thursday, 13 December 2012

A Krafty Christmas

.  Hello everyone!  Back at last and hitting the ground running!  Since I need to get unpacked, laundry done and my Christmas tree put up and decorated today (through the jet lag! LOL), I thought I would post one of the Christmas cards that I had left to show.  This one has a bit of a vintage feel to it with the kraft card background.  I stamped the Justrite Holly Background stamp using a coffee archival ink pad on to Kraft card.    I used some coloured pencils to shade the leaves and holly berries.  I inked the edges with walnut stain to age it a bit and used a soft blue pencil to bring a bit of highlight into the inner oval area.  I stamped the heirloom ornament on to Kraft card using a clear perfect medium pad and heat embossed with gold powder.  I cut it out with the matching die and stamped the sentiment in the centre.  I used a white pencil to highlight some of the areas on the ornament, but wanted the gold to be the main focus.  I mounted it in the centre of the oval with 3D foam and added a small gold bow to the top.  I used my clear perfect medium pad and rubbed it around the edge of the background.  I sprinkled it with bright gold embossing powder and finger to remove it in spots for a more distressed  look when melted.  You can see this better in the last picture.  I matted it with a thin mat of white card before adding a wider mat of kraft card which I pierced.  This card reminds me of Christmas decorations made with spiced oranges and cinnamon sticks for some reason.  Got to get crackin' on that tree soon.  All for now, Sue x


Wednesday, 12 December 2012

Blue And White Thank You

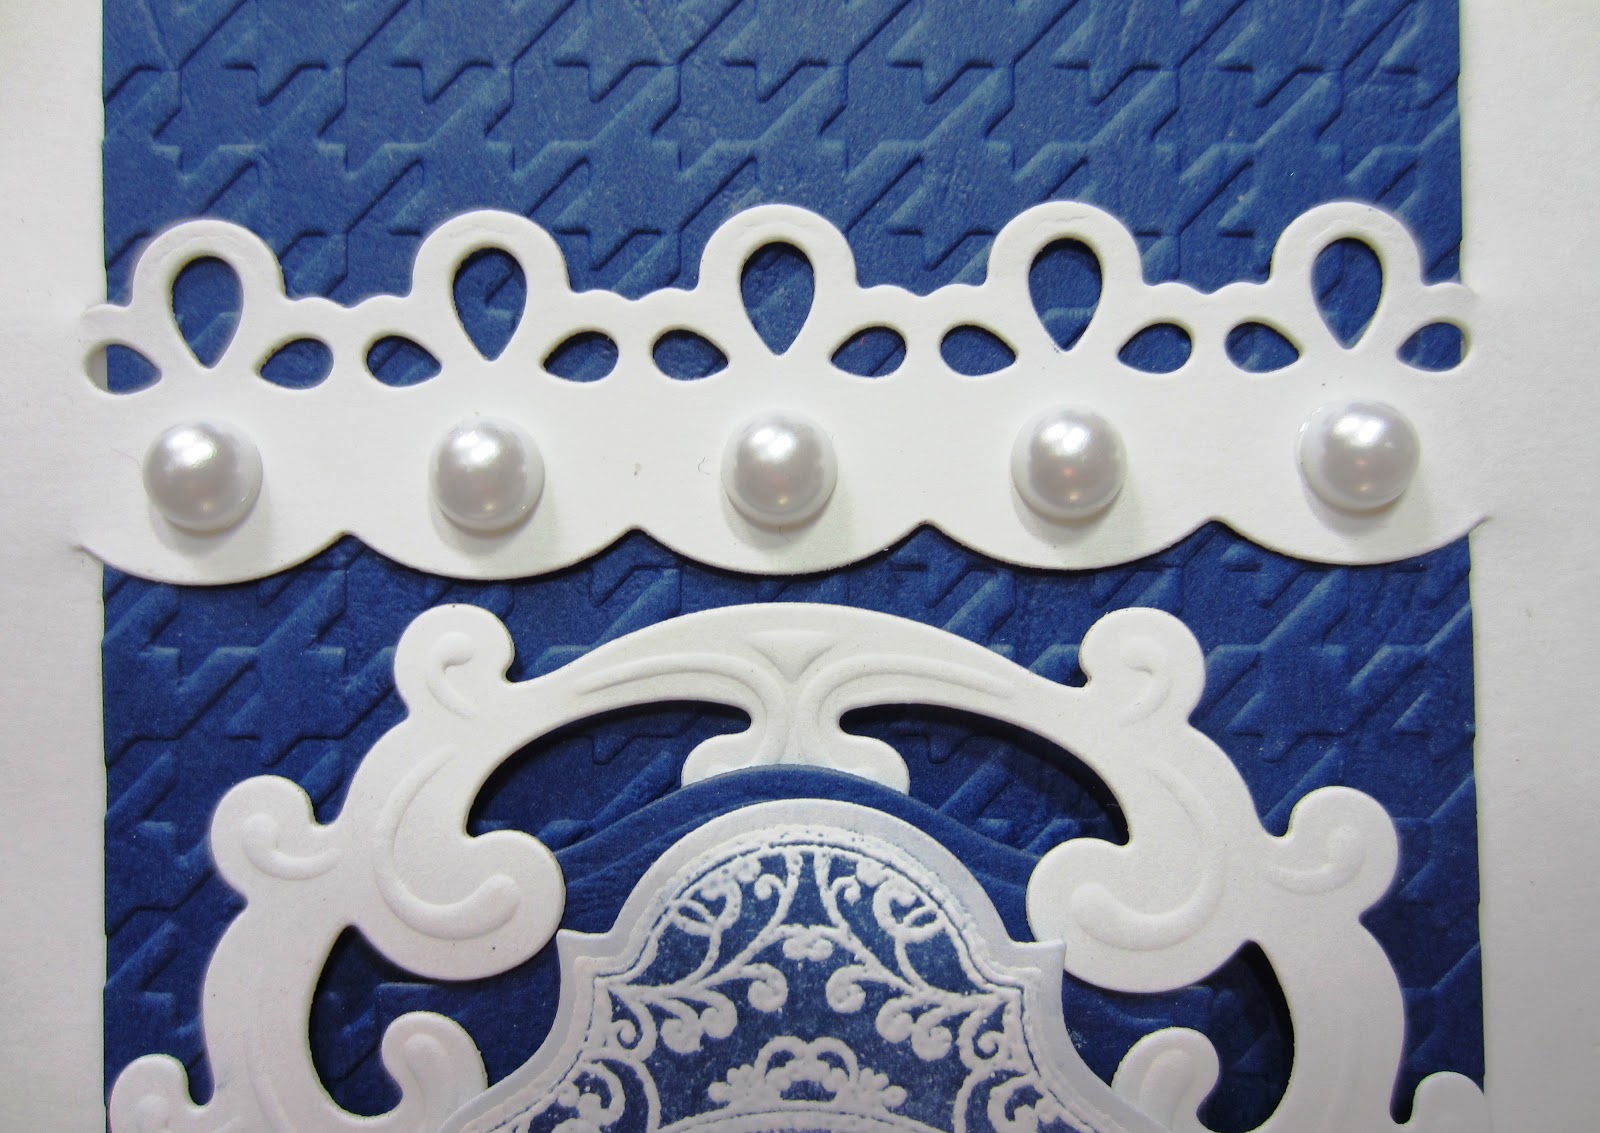
Good morning all!  I was hoping that this post would be going live right about the time my plane is touching down, but they delayed our flight 8 hours!  Hopefully, I'll be home by late afternoon but until then another labels 20 card that I made but combined with several of the fun Heartfelt Creations dies.  I started with a piece of coconut white card and the border from the Heartfelt Butterfly border set.  This die is unique in that it is rather small and the ends of it do not cut out.  I used that feature on this card to cut two borders on either side of my card. I embossed a piece of blue card using the Couture Creations Houndstooth embossing folder.  Once embossed, I slid it under each border so it was actually being held in place by the borders.  You can see this more clearly in the pictures below.  I cut one of the Heartfelt Decorative Oval Windows in white to use as the backdrop for my focal element.  Next I cut a labels 18 in dark blue.  The swirls from the window tucked around the edges nicely.  I stamped the small Justrite Labels 20 Thank you stamp using a clear perfect medium pad,white embossed it and cut it out with the matching die.  I stamped the sentiment in the centre open area.  I used Stormy Sky distress ink to go over the stamped piece and inked all the non embossed areas, but left a small white area in the centre as an accent.  I added this piece in the centre with mounting foam to complete my focal element.  I added 8mm pearls to the borders on each side and pierced the top and bottom sections of the main piece.  I added the border piercing on the bottom layers to complete the card.  I like the cleanness to this card, easy to make and can be used for a number of occasions too.
I see that Sam Poole is offering free shipping on orders over £10.00 so if you need any last minute crafty items for yourself or gifts, hop on over to her shop!  You can find her name on  the right hand side of my blog, just click on it.  I think she even has some micro beads left if you hurry!  All for now, Sue x


Tuesday, 11 December 2012

Kindness


Hello my crafty friends!  I am all packed and ready to head back home today.  I have had a lovely visit and I still got lots of cards made too.  Just take a guess, how many do you think I am bringing back with me this time?  Today's card is another one of the Label 20 samples that I found.  I started with my blue background which I embossed with the So Trendy Embossibility folder.  Now this folder is one of the smaller sized ones so I had to do my background in two sections, but it lines up and repeats quite easily so it wasn't a problem.  I decided to just emboss the top of the background and I used some reversible blue and brown ribbon and created a plaited dividing piece between the background. I added a messy bow to the side  using the same ribbon, only thinner in width.  The plaited ribbon technique is shown in a step by step tutorial on the Creative Expressions website (http://www.creative-expressions.uk.com/greatideas/toptips/list.php?ttc=3) as well as the tutorial for the two flowers on the card.  They both can be found on the page in the link above if you are interested.  For the flowers, I decided to stamp the blue paper with one of the swirls from the Justrite Kindness stamp set to give the paper some pattern before making my flowers.    I added a few leaves from the Bitty Blossom die set.  For the focal element,  I stamped the Labels 20 Kindness stamp using a coffee archival ink pad.  I added the natural pearl nestabling to the edge.  I cut another labels 20 in brown card and then cut it down the centre to add as a mat to the top and bottom of my stamped one.  I stamped my sentiment on taupe card in coffee archival ink and cut it out with a simple oval die.  I used a light inking of brushed corduroy around the edges.  I used next next size larger and cut an oval mat in brown for it and mounted them in the centre of my focal element.  I added a couple of pearl swirls to the top and bottom of the card and pierced around the edges.  By the way, the answer is 104!  Can you believe it!  All for now, Sue x


Monday, 10 December 2012

My Personal Favourite

 Hi bloggers!  I completely forgot this card because I had put it into a special folder on my computer for the project book cards (those cards are not to be shown on my blog).  However, we ended up not using this one in the book so it gets to have a blog showing afterall.  I love this one, not sure if it is the crisp clean blue and white combo or all the flowers, the bling or the trellis effect but it is one of my favourite cards.  Maybe just because it took me ages with all those flowers, who knows! LOL  I started with some decorative paper I purchased.  One side is striped and I used that for the background.  The other side is dotty which I used for some of the flowers and my sentiment.  I used my edgeability insert to cut four border pieces.  I decided to use them with a white piece behind for tone on tone look.  I cut strips of white paper and wove it to form my lattice.  The way that I do this is to tape four or five strips all going the same direction to my craft mat.  Then I weave the others through them and tape them down to my craft mat once I am satisfied with the spacing.  Then I put double sided tape on the back of my border pieces and lay them down on top of the lattice on my craft mat.  I then peel it off my craft mat as one piece and trim away any lattice pieces that show outside my borders.  I add foam mounting pieces to the back to raise it above my background paper (I hope that all makes sense).  Once the lattice was in place, I used the Bitty Blossoms to cut all but two of the flowers of varying sizes and colours.   I rolled them and used glue dots to place them on my card.  For the two largest flowers, I used the Button Floral stamp to make my roses out of the dotty paper.  I used the swirl from the Heartfelt Creations dutch Iris die set to add some accents to my floral spray.  Next I cut one of the Labels 20 die out of white card.  I added natural pearl Nestabling to it and added it in the corner with mounting foam.  I stamped the Justrite Fleur de Lis using a clear perfect medium pad.  I heat embossed it with white powder and cut it out with the matching die.  I stamped the sentiment in the middle then mounted it in the middle of the larger blingey Labels 20.  Of course, it wasn't complete until I added my signature pierced edge!  I think it screams my name now, don't you! LOL  All for now, Sue x