
would it! I hope you enjoyed todays offering! All for now, Sue x
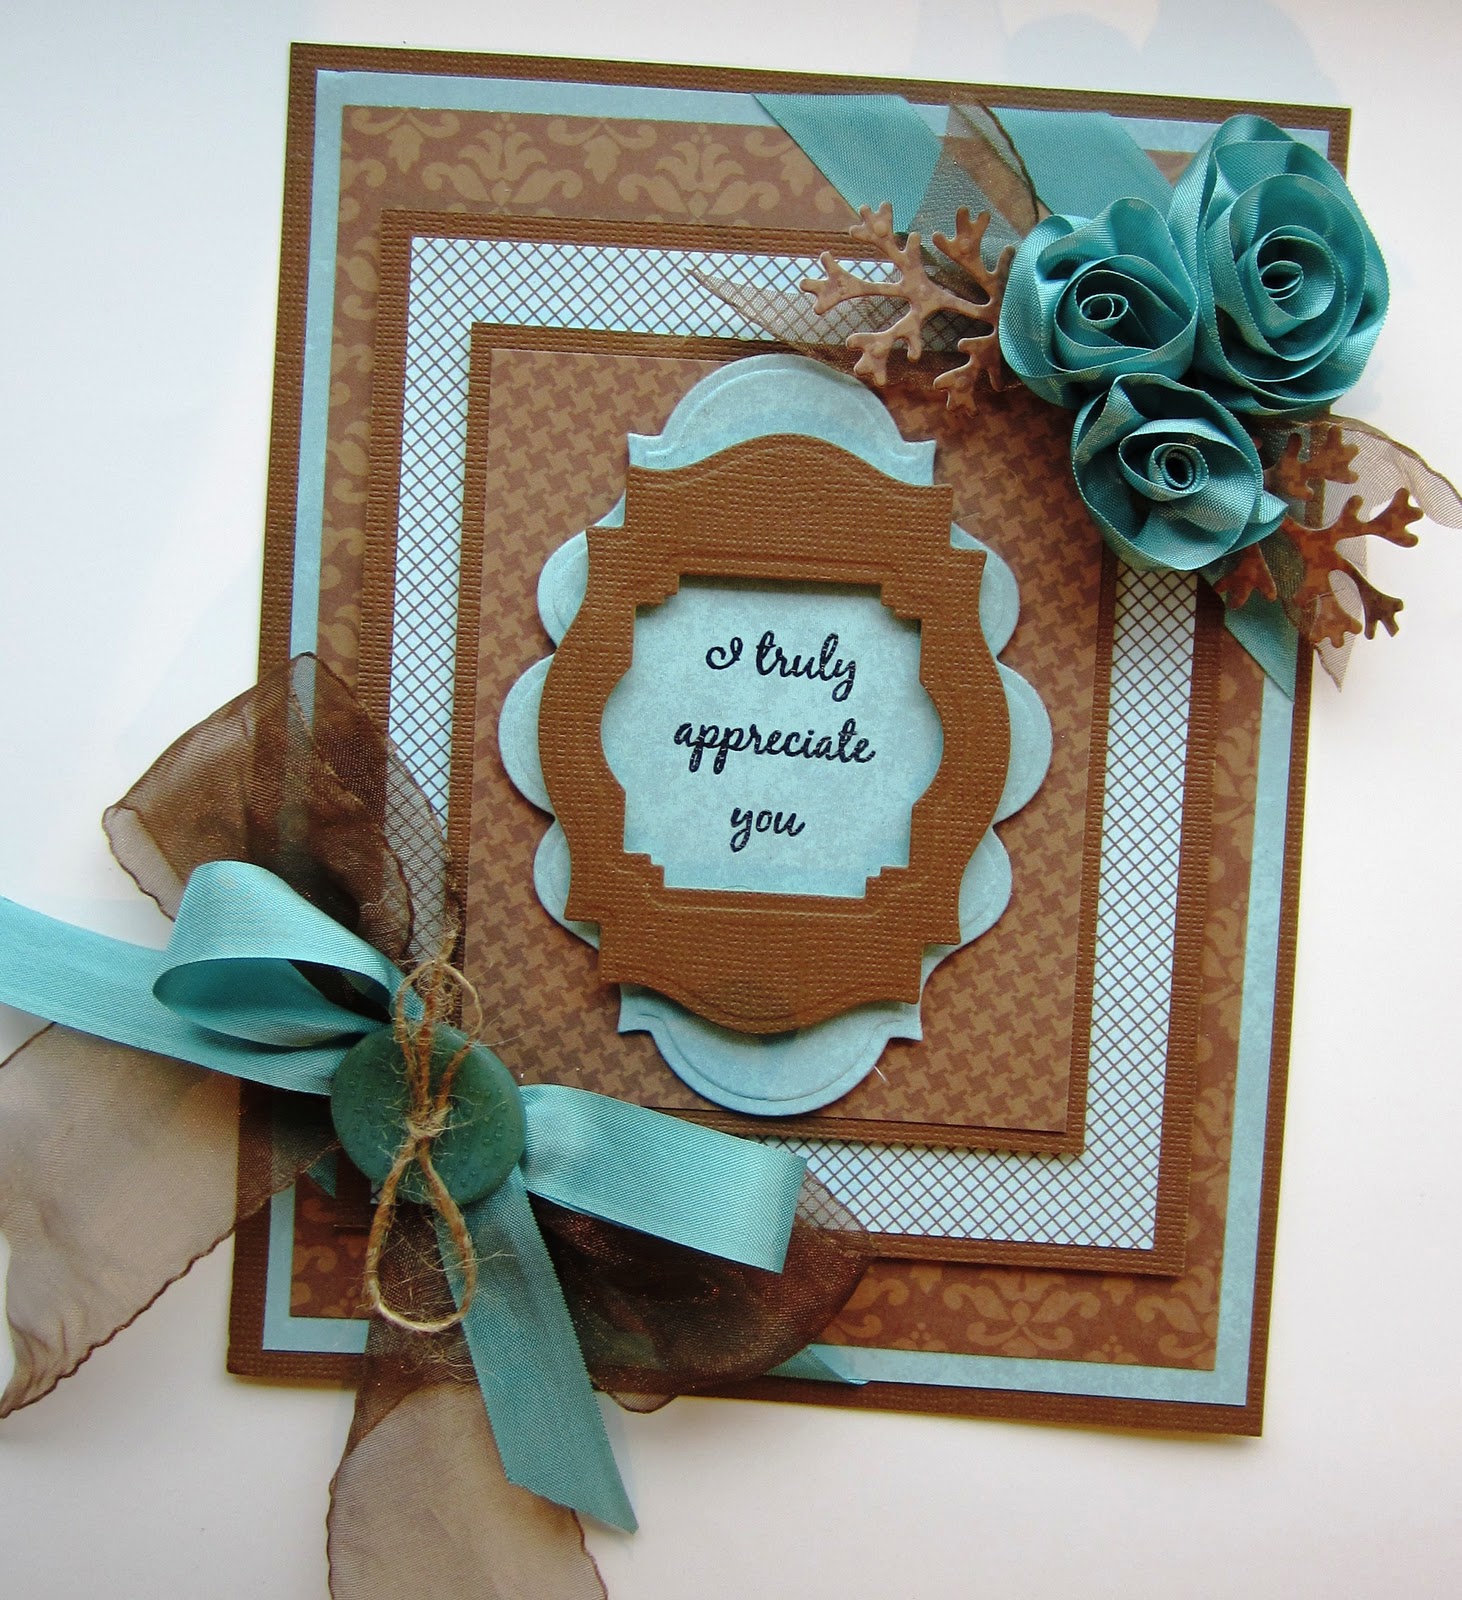
 Hi crafty blog friends! Back to teal again today. It seems that I can't seem to stay away from it too long lately. It is a nice colour though, don't you think? I started out with a piece of white card for this one and cut the Samantha Walker Twisted Metal tag die out of it. I kept the die in place and inked the entire background with Broken China Distress Ink to create the teal background colour.


 Hello blogland friends! It's time for candy and a card today. I finally got my pictures uploaded on to my computer of the latest candy offering. I put it together the morning before I left for Florida and haven't had a chance to post it until now! Not wanting to disappoint either, I have included my morning card for your perusal too. I really like this card because the colours in it seems so autumnal and soothing. I like this tree stamp a lot too. I used Labels 23 to pyramage the tree, but I left a white border on each section by inking through the die with Fired brick and Mustard yellow. I just splodged the ink randomly while in the die to create an autumn feel to the background of the tree. I did the same to the background with the sentiment, only keeping the colours softer and more muted this time. I cut a Grand Labels 23 in black for the background and pierced around the edge using the die as a guide. I finished the card by adding small black rhinestones to the corners. If the card isn't to your taste, then how 'bout this candy offering?
 There are 5 rubber stamp sets, a Rubit Scrubit pad, an adirondack ink pad, a clear stamp set, two distress inks, metal strips, distress embossing powder, glitter, gold embossing powder, an Archival ink pad, black rhinestones swirls in facing directions, an acrylic block, some buttons, clear embossing powder and a giant pile of vintage ribbon! I loved the fact that everyone seemed so involved last time and left lots of comments so I am going to keep the game going the same way from now on. To be entered into the candy draw, you need to send me your detail once and every time you leave a comment on the blog or email me with a comment, you get an entry. If you check the blog daily and let me know that you have been by then you will receive an entry for each time. Simple as pie! If you have any problems leaving a comment, then use the "anonymous" button but please sign your name to your post so you get credit for it! All for now, Sue x

 Good morning blog friends! More teal! And the blog pendulum swings back the other way today to no ribbons or bows. Just a very simple card, but I really like the way it came out. I cut the Samantha Walker Twisted metal die out of my teal card. I kept the die in place and moved the entire piece on to my Grand Impressibilities and embossed it all. Since I wanted the negative piece as my background, I removed the actual die cut (and saved it for another time). I sanded my background to bring up the detail of the embossed background and edged the entire piece with Black Soot distress ink. You can see the detail in the close up picture below. Then I put sticky foam mounting pieces all over the back of this piece and set it aside for a bit. I cut the Twisted metal die again in black card. This time, I took the die out and then taped the outer fine scroll piece back in to the background. I mounted this under neath my background piece so that it created a black edge on the inside. I stamped my sentiment on white card and centred it into the middle of the opening in the background. The card was finished with a bit of piercing (as I do) and some matting and layering with both black and white card for contrast. I hope you like it! All for now, Sue x
 Good morning to everyone! You were warned yesterday about the ribbon/bow overload! This is probably the most OTT card that I have done lately so it just had to be posted today. I did this entire card just so I could demo the gold crochet ribbon rose, then we sold out of the ribbon, go figure! I just wanted to show that this ribbon makes the same kind of rose that the cream crochet ribbon makes. The version that I did demo of this card involved using the Grand Impressibility to emboss the gold Labels 20 die. I really liked the way that came out, but I didn't get a picture of it before they whisked it away to be sent out to the email recipient. Under the heading of "you just never know", I was not going to show this card as I wasn't crazy about it, when one of the stage hands went absolutely nuts over it. I thought who knows, maybe it is someone else's cup of tea so to speak, so here it is. It is out of my comfort zone somewhat as I don't use metallics a great deal, but I was itching to use the background paper that I have had in my stash for some time.