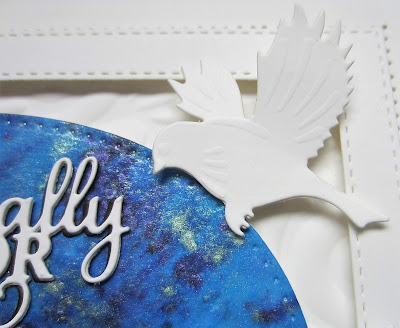
Hello there my crafty friends! I love the Robin Family and just had to share another card with you! I used a background from my crafty stash that was done with Midnight Blue and Aqua Lagoon Pixie Powders. I used the Double Pierced Ovals and cut it into an oval background piece. Using the Sublime Swirl embossing folder, I embossed a piece of white card. I put a frame around it using the Double Stitched Rectangles and added it with foam over the embossed background. I glued the pixied background to the centre. I cut a branch from the Cherry Blossom Frame die set in white and actually glued two together to make it a bit longer (I added a small flower in white to hide the join). From the Robin Family die set, I cut four of the robins in white and the nest and added them to the scene. I cut the eggs out of duck egg blue card and glued them into the nest. Using the Especially For You sentiment, I cut it in white and black, shadowed it then glued it to the top of the oval. The card was completed with white mats and layers. The finished dimensions are 7" x 8 1.4" in size. All for now. Sue x
A daily papercrafting blog which features my handmade cards showcasing Creative Expression's products including my own line of cutting dies and embossing folders, Cosmic Shimmer, Ranger and more which use various techniques and ideas to hopefully inspire the creativity in you.
Tutorials
- Home
- My Ribbon Flower Tutorial
- Fancy Nestie
- Blossoms Five Flower Bud
- Blossoms Five Full Flower
- Easel Tutorial
- Wax Paper Embossing Folder Tutorial
- Caught In Crystal
- Shaving Foam Tutorial
- Quilt Card Tutorial
- Paved Pearl Technique
- Faux Leather Technique
- Plaited Ribbon Wreath Tutorial
- Paper Rose Tutorial
Monday, 30 November 2020
Sunday, 29 November 2020
Strength Circle
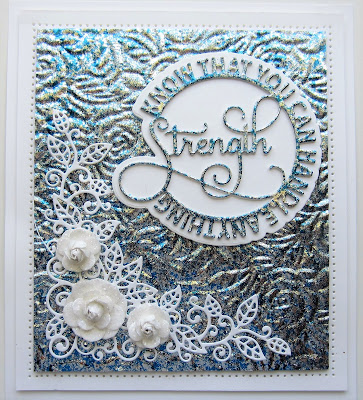
Good Sunday morning all! It's another quick and easy card for today! I love the Aurora Flakes and would use them all the time if they were just a bit easier to photograph! LOL Trust me when I say that they always look better in person! I covered a piece of white card with a sticky adhesive sheet. I peeled the backing paper off and coated it with Blue Ice Aurora Flakes. I used a Rubitscrubit pad to move the flake around and then refine and remove any excess flakes. I embossed the piece with the Rose Bed 3D embossing folder for texture. Next I cut the Strength Circle die out of some leftover piece of the flake card. I cut the shadow backing for it and glued it together. I mounted it in the upper right corner of the background. I cut the Magnolia Corner in white and then used the extra flower die from the set to make three dimensional flowers and added them to the corner. I added glue to all the petals after assembling them, then coated them with Frosted Sparkle Glitterbitz for some bling. The card was completed with white mats and layers. The finished dimensions are 6 1/4" x 7 1/4" in size. All for now. Sue x
Saturday, 28 November 2020
The More Candles, The Bigger The Wish
Hello bloggers! Here's a super simple but really pretty birthday card, perfect for anyone who is having a birthday! I started with my beloved Pixie Powders and used Midnight Blue heavily and just a smidge of Purple Violet for contrast. I cut The More Candles All In One out of a piece of it and cut another larger piece of the pixied card as a background. I covered a piece of coconut white card with a sticky adhesive sheet and cut it the same size as the All In One. I attached the die cut to it and used Frosted Sparkle Glitterbitz on the remaining exposed adhesive. I cut the scalloped backing piece from the die set in white and glued the All In One to it. I attached it to the larger pixied piece with mounting foam. The card was completed with white and black mats and layers. The finished dimensions are 7" x 8 1/2" in size. in size. All for now. Sue x
Friday, 27 November 2020
Festive Wishes
Hello there my crafty friends! How about a traditional sort of Christmas card for today's offering! I started by cutting the Deco Snowflake die in white. I cut the outer die as a backdrop to layering upon with the other dies. Next I cut the decorative rectangle from the set in white. I added a backing cut from red card with a sticky adhesive sheet attached. I used the Ruby Slippers Holographic Glitterbitz on the exposed adhesive areas and added it to the larger die. Next I used the Double Pierced Ovals and cut a thin frame out of white card and added it with mounting foam. Using the Festive Wishes die, I cut it in Ruby Red and black card. I shadowed the sentiment then glued it inside the oval frame. I attached the background piece to a slightly larger rectangle then added mounting foam to the back. I cut a larger piece of white card and added sticky tape around the edge, then costed it with Iced Snow. I added the smaller rectangle focal piece to the centre. Using the Decorative Holly Accents, I cut two different sized poinsettias and nipped away the leaf areas. I used two flowers offset to make one flower and added them in the lower corner. I added Evergreen Branches cut in white as accents. The card was completed with white and red mats and layers. The finished dimensions are 7" x 8 1/4" in size. All for now. Sue x
Thursday, 26 November 2020
Wishing You Brighter Days
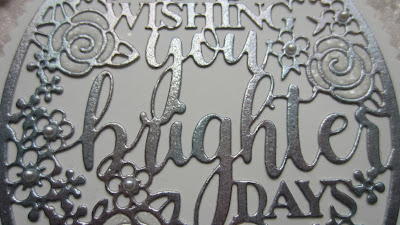
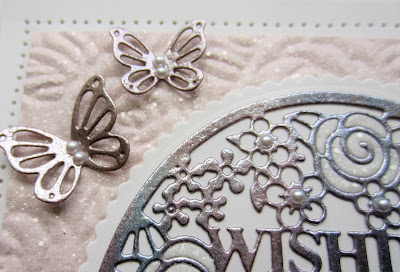
Hi bloggers! Happy Thanksgiving to my American friends! I started this card with a piece of Powder Pink card and used the Rose Bed 3D embossing folder on it. Next, I gave it a light coating of spray adhesive and used Frosted Sparkle Glitterbitz all over it. For the focal element, I used Stellar Mink, Moonlit Sea and Moonlit Storm Luna Paste all over a piece of card. I applied the paste randomly and smoothed it out with my finger, then allowed it to dry. Once dry, I cut the Wishing You Brighter Days All In One out of it. I placed a piece of white card under the luna paste card when cutting the die and it gave me a nice impression of the die on the white card to use. I added glue to the areas on the white card where the flowers were and glittered them, then added the luna paste die cut to it, lining up the images. I cut a white backing card and glued it to that, then added it with foam core to the middle of the background. I cut three butterflies out of some of the leftover Luna Paste card and glued them around the background as accents. The card was completed with white and powder pink mats and layers. The finished dimensions are 7" x 7 1/2" in size. All for now, Sue x
Wednesday, 25 November 2020
I'm Here For You
Hi there my crafty friends! I selected another Pixie powder piece to use for today's card. This one was created using Plum Aubergine and Plum Twist Pixie Powders. Using the Whitney Background die, I cut into the pixied card. Next I used the Whitney Edger set to cut away the two sides. I glued them to the sides of a piece of coconut white card. I used the Double Stitched Ovals and made a multi-layered frame using a white base and a thinner top frame cut from the pixied card. I embossed a small piece of white card with the Quilted Pillow folder and attached the oval frame over it. I trimmed away the excess card and attached it to the centre of the card with foam. I cut the I'm Here For You sentiment out of the pixied card and added an offset black shadow behind it before gluing it into the centre of the oval frame. I covered a piece of white card with a sticky adhesive sheet and cut three small flowers out of it from the Cherry Blossom set and a butterfly from the Petite Butterfly set. I used Frosted Sparkle Glitterbitz to glitter all of them then added them to the card. The card was completed with white mats and layers. The finished dimensions are 6 1/4" x 8" in size. All for now. Sue x
Subscribe to:
Posts (Atom)


