Thursday, 24 September 2015

Die Grouting Technique

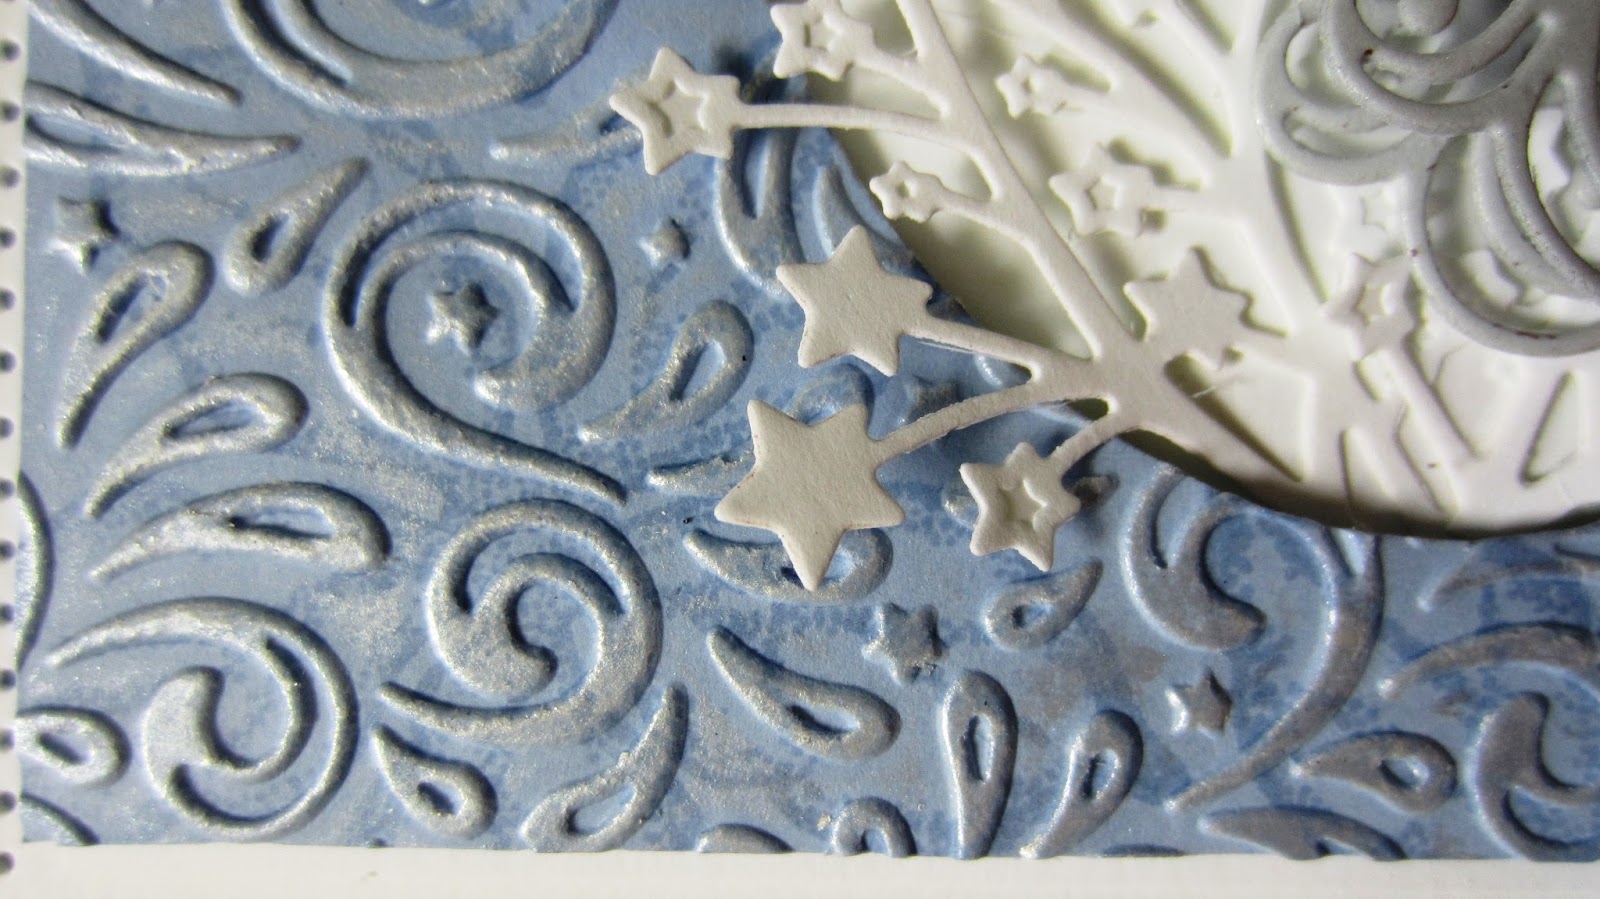
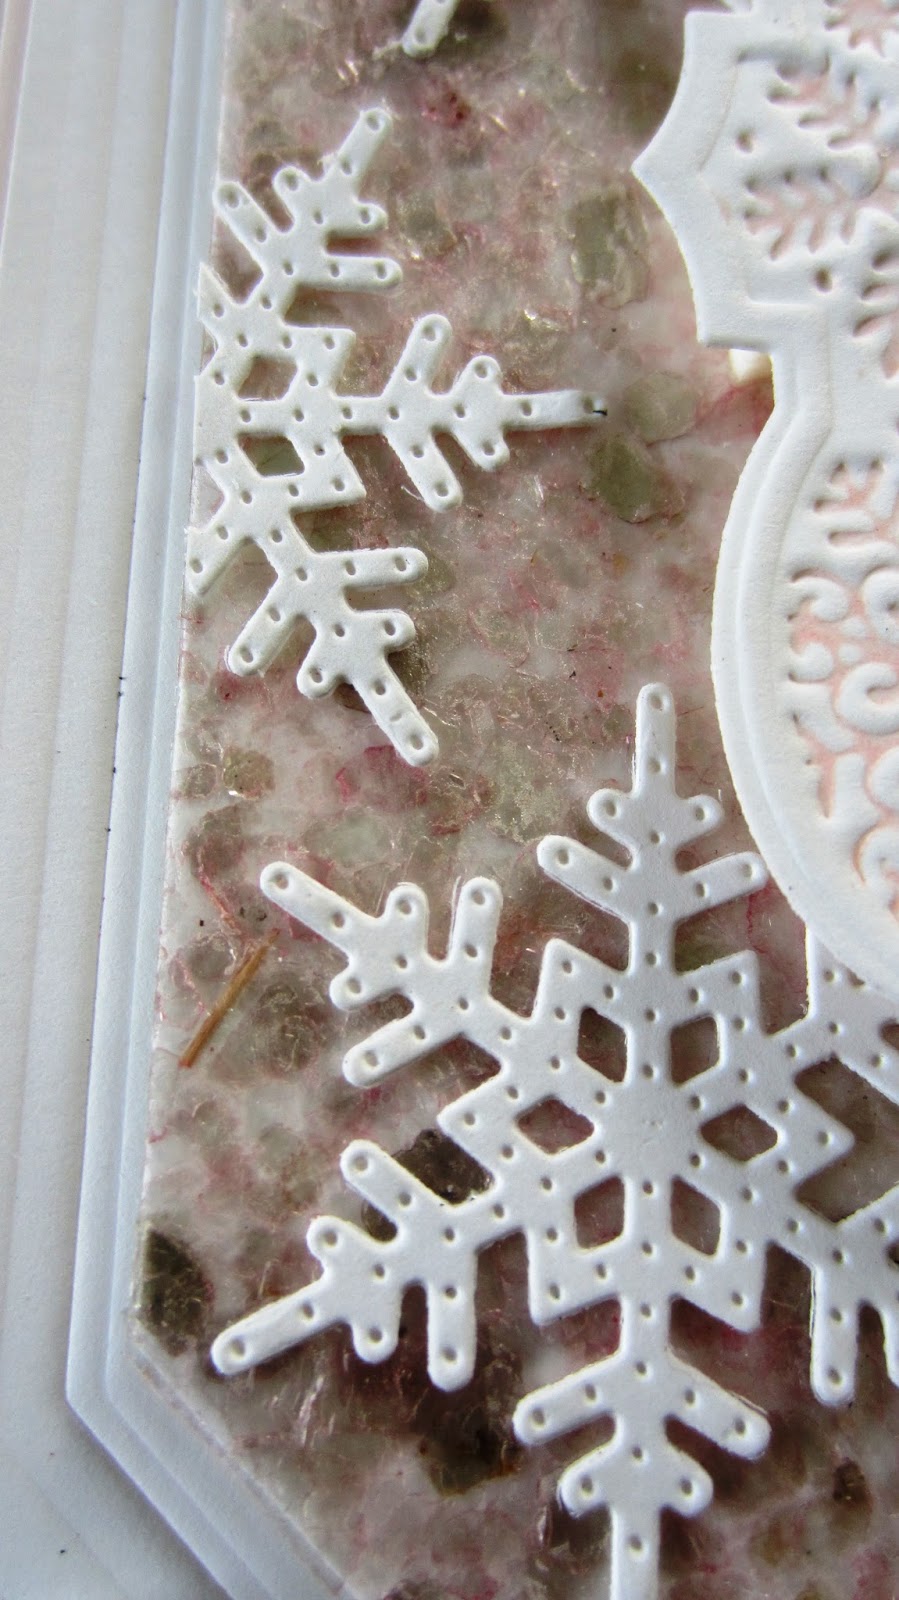
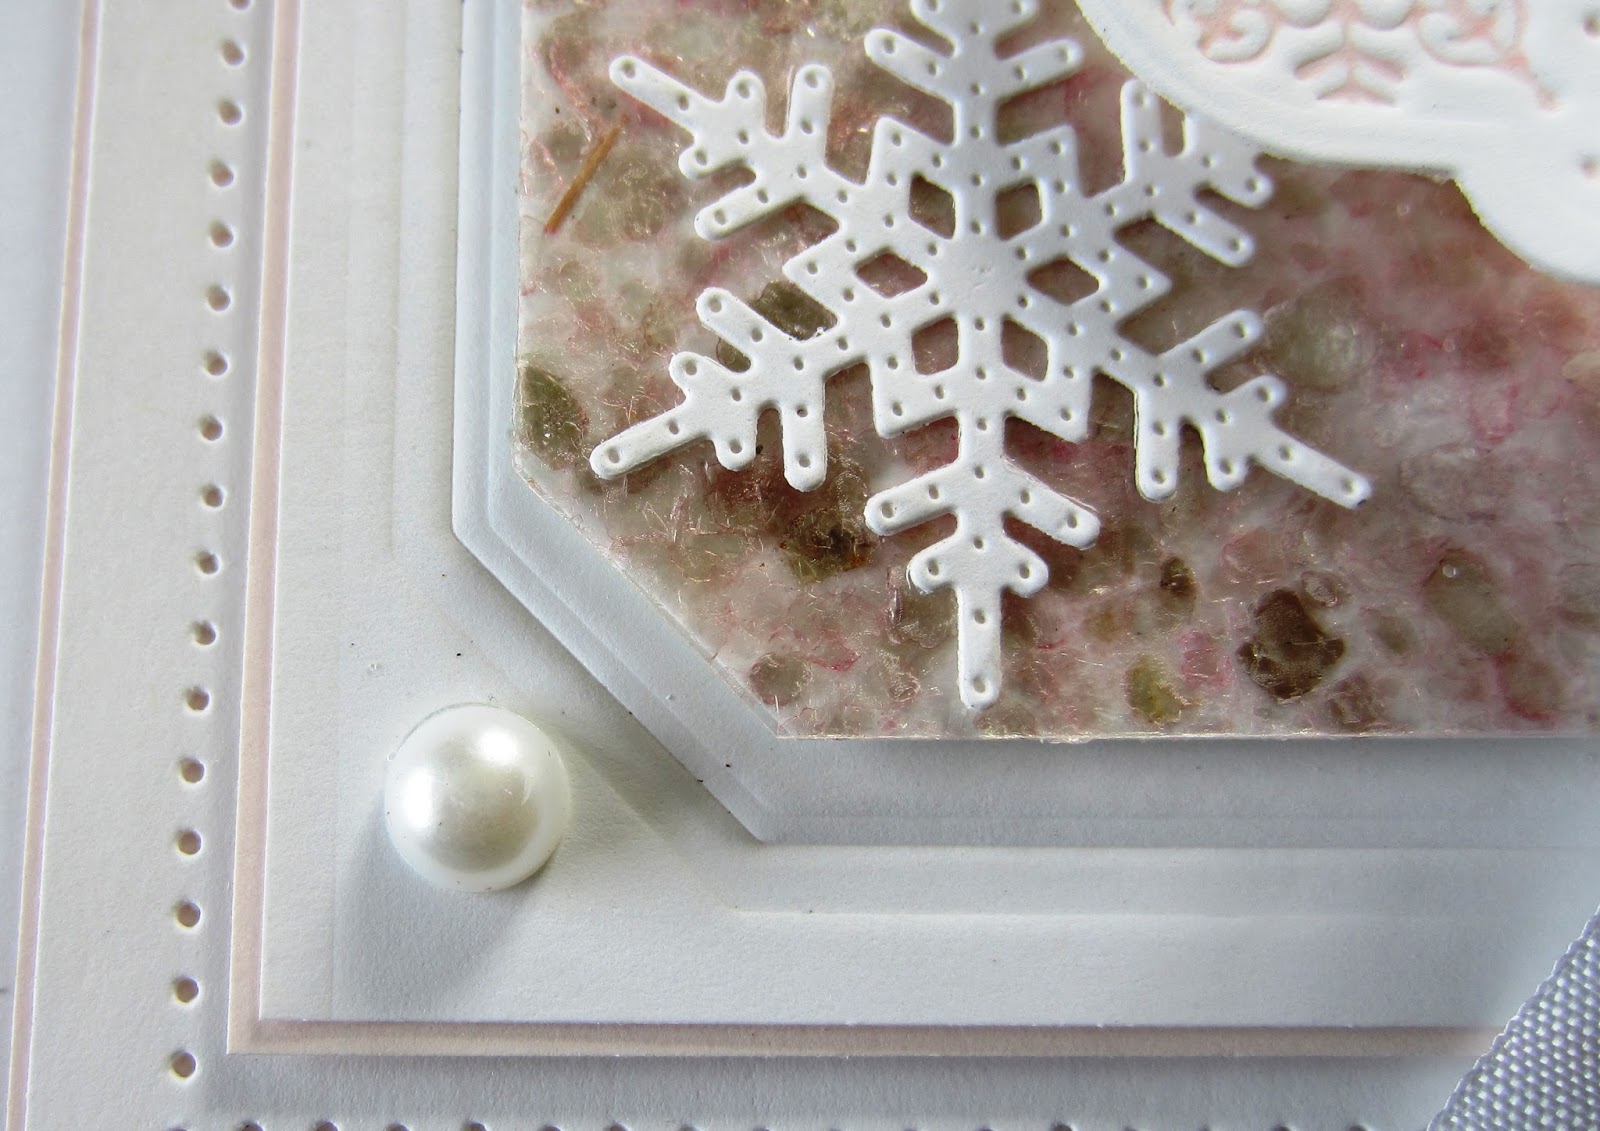
Hello crafters!  You have seen me use the sparkle texture paste through masks and to grout embossing folder patterns, but did you know that it can also be used to grout your die cuts too?  Today's video shows you how easily it is done.

I wanted to let you know that there has been a slight change in my Hochanda show hours.  Instead of doing a two hour show on Saturday morning, they have moved it to be a two hour show at the end of the day, from 6pm to 8pm on Sat.


 The finished dimensions are 8 1/4" x  8 1/4" in size.  All for now, Sue x
                                                          Follow my blog with Bloglovin

Wednesday, 23 September 2015

Wednesday Weekly Card Giveaway

Hello my crafty friends!  Another Christmas card giveaway from the demos that I did earlier in the month on my Hochanda shows.  This time I started with a piece of Blue dusk card and used the large oval die in the Lattice Snowflake set to cut an aperture in it.  Next I stamped the Shaded Poinsettia stamp all over the background with a clear Perfect medium pad for  watermark effect. You can really see the stamped image nicely in the close up pictures below.  I added some texture to the piece with the Star Swirls embossing folder.  Then once embossed, I lightly added pearl moon gilding wax to add a soft shimmer to the top of the embossed areas.  Next I cut two of the Dove of Peace in silver card and attached them at the body with some mounting foam.  This allowed me to bring the front wings forward to add some movement to the dove.  I cut two of the star sprays in white and added them around the back of the dove for embellishment.  On the lower part of the card, I cut the Joy Wreath in both white and silver card and offset them ever so slightly to create a shadow for the letters.  I completed the card by paper piercing with my piercing ruler around a piece of white card.  I added a thin mat of blue dusk card and a final white mat layer.  The finished dimensions are 6 3/4" x  8 1/4" in size.  Please leave me a comment on this blog post to be entered into the drawing to win this one.  I will be announcing the winner on Saturday's blog post.

If you want to see more Christmas card demos, I will be doing another One Day Special on Hochanda beginning Friday night at 8pm and then shows running all through the day on Saturday.  The show hours are listed on the right hand side of my blog.  These shows will feature this years Christmas dies that were not on the first set of shows!  All for now, Sue x


                                                       Follow my blog with Bloglovin


Tuesday, 22 September 2015

Sparkling Poinsettia


Hello bloggers!  Today's video shows you how to give your Christmas poinsettias a slightly different look and you can make a second card easily from the left over piece as well!  I just love a good two-fer, don't you? LOL

Julia Watts has the One Day Special on Hochanda starting this evening at 8pm.  She will return with shows all day Wednesday at 9am, 12pm, 4pm and 7pm  You are going to want to tune in to see her amazing demos!


 The finished dimensions are 7" x  7" in size.  All for now, Sue x
                                                       Follow my blog with Bloglovin


Monday, 21 September 2015

Thanks So Much

Hi crafters!  I'm back after a great weekend at Ally Pally!  I so enjoy seeing familiar faces and meeting new crafters from the blog too!  I was even able to sneak away for a few minutes and have a short get together with a group from Facebook and it was fabulous, a really great bunch!  Thank you for that and patiently waiting for all the comment game winners and card giveaway winners to be announced.  I will do that at the end of the post today.  For today's card, I have a lovely lilac floral themed creation.  I started by cutting a frame using the Ornate Pierced Design Noble dies.  While still in the die, I inked the frame with Shaded Lilac distress ink so you have a lovely white edge left once you remove it from the dies.  I added mounting foam to the back of the frame.  I cut a Lattice Arched Adornment out of white card and added it to the inside of the frame so the edge just caught on the mounting foam.   I embossed another piece of white card using the Linen Texture embossing folder and seated my frame over it, trimming away the excess from around the bottom of the frame.  I added the frame to a larger piece of coconut white card and added pearl designs into each of the corners.  I stamped the Shaded Peony stamps in black and cut them out with the matching die.  I inked them with Shaded Lilac to match my frame.  I cut the stamped leaves and Maidenhair fern pieces and inked them with Forest Moss distress ink and arranged them around my flowers which I seated in opposite corners.  I stamped my sentiment and cut it with the Pierced Flags and tucked the end under my larger flower.  The card was then finished with a white pierced mat, a wisteria mat and a larger white mat.  The finished dimensions are 7" x  8" in size.

The winner of this week's Wednesday Card Giveaway is:

Heather Rogers!!!


The winners of this week's Comment Game are:
Elsie Smith!!!
Mavis L!!!
Mrs. B!!!

For the extra qualifying post of Sept. 13, the winners are:
Clare W!!!
TDQ Karen!!!
Jayne S!!!

For the extra qualifying post of Sept 14th, the winners are:
Patricia Howarth!!!
Sued99!!!
Karen Derbyshire!!!

For the extra qualifying post of Sept. 16th, the winners are:
Carol Edwards!!!
Lisa Hamer!!!
Yvonne May!!!

Congratulations all!  Please email me at americansue1@gmail.com to confirm your address and claim your prize!  All for now, Sue x


                                                         Follow my blog with Bloglovin


Sunday, 20 September 2015

Just Wanted To Say Hello

Good Sunday morning to all!  Just a quick reminder that I am still demonstrating at Ally Pally all day today so the drawings for the card giveaway and the comment game will not be posted until tomorrow!  For today's card, I have a very unisex sort of card.  I started with a piece of sand card and stamped the background with a swirl stamp inked with clear perfect medium.  I dusted it with Angel Gold mica powder for a soft shimmer.  For the next layer, I used the Beaded Fanfare embossing folder and embossed a piece of taupe card.  I used the negative side of the embossing and rubbed it with Snow Cap Adirondack pigment ink to lighten all the raised areas for a faux letterpress effect.  Next I cut a thin frame out of the larger cutting dies of the Classic Adorned Squares and the Ornate Pierced Squares out of taupe card.  I used the Classic Adorned Square die again to create an aperture.  I glued my thin frame to it, then cut the slightly larger edge on the paper cutter, squaring the corners to match.  I used a darker shade of tan and cut the decorative inside area of the Classic Adorned square and recessed it into the frame.  I stamped my sentiment and cut it in a diamond orientation and added a taupe mat behind it.  I completed the card by adding a pierced milk mat, a thin taupe mat and a final milk mat.  The finished dimensions are 8" x  8" in size.  Hope to see you at Ally Pally today!  All for now,  Sue x


                                                       Follow my blog with Bloglovin


Saturday, 19 September 2015

Letterpressed and Snowflakes

Hello there my crafty friends!  Like yesterday's card, I have used mica Flakes in today's card, but this time they are available (colour called Marshmallow).  At least you can see how they are added as it is the same method as the previous card too.

In case you happen to be in the area, I am demoing this weekend at the Big Crafting Show at Alexandra Palace in London.  It is a great day out, open both Saturday and Sunday, with so many demonstrations, great crafting products and loads of fellow crafters.  I would just love it if you stopped by and let me know that you are on my blog!


 The finished dimensions are 7 1/4" x  7 1/2"
 in size.  All for now, Sue x


                                                         Follow my blog with Bloglovin