Thursday 30 November 2017

Under The Weather

Hello there my crafty friends!  I thought I would show some of the latest release dies today.  I have a very quick and easy card for you.  I started by cutting the Linear Leaf Background die twice, once out of coconut white card and once out of gold mirror card.  I offset the gold behind the white for a bit of a blingey shadow.  I backed it with another piece of white card, background base finished (see, it is simple!)  Next I cut the sentiment from the Rain or Shine die set twice, once out of gold mirror card and the other out of gold pearl card.  I offset the mirror card behind then glued it into place in the top of the background.  I decided to add a small accent using the Sycamore Branches,  I cut each of them out of white card.  I inked the leaves with Spiced Marmalade and Fired Brick Distress Oxides and the branch portion with Vintage Photo.  I flicked gold paint pen on them and then used a bit of Cosmic Lacquer on my finger and rubbed it on to them for a shine.  I allowed them to dry then glued them into place across the bottom of the card.  White and gold mirror card mats and layers were used to complete the card.  The finished dimensions are 5 1/2" x  7" in size.  All for now, Sue x


                                                        Follow my blog with Bloglovin

Wednesday 29 November 2017

Wednesday Weekly Card giveaway

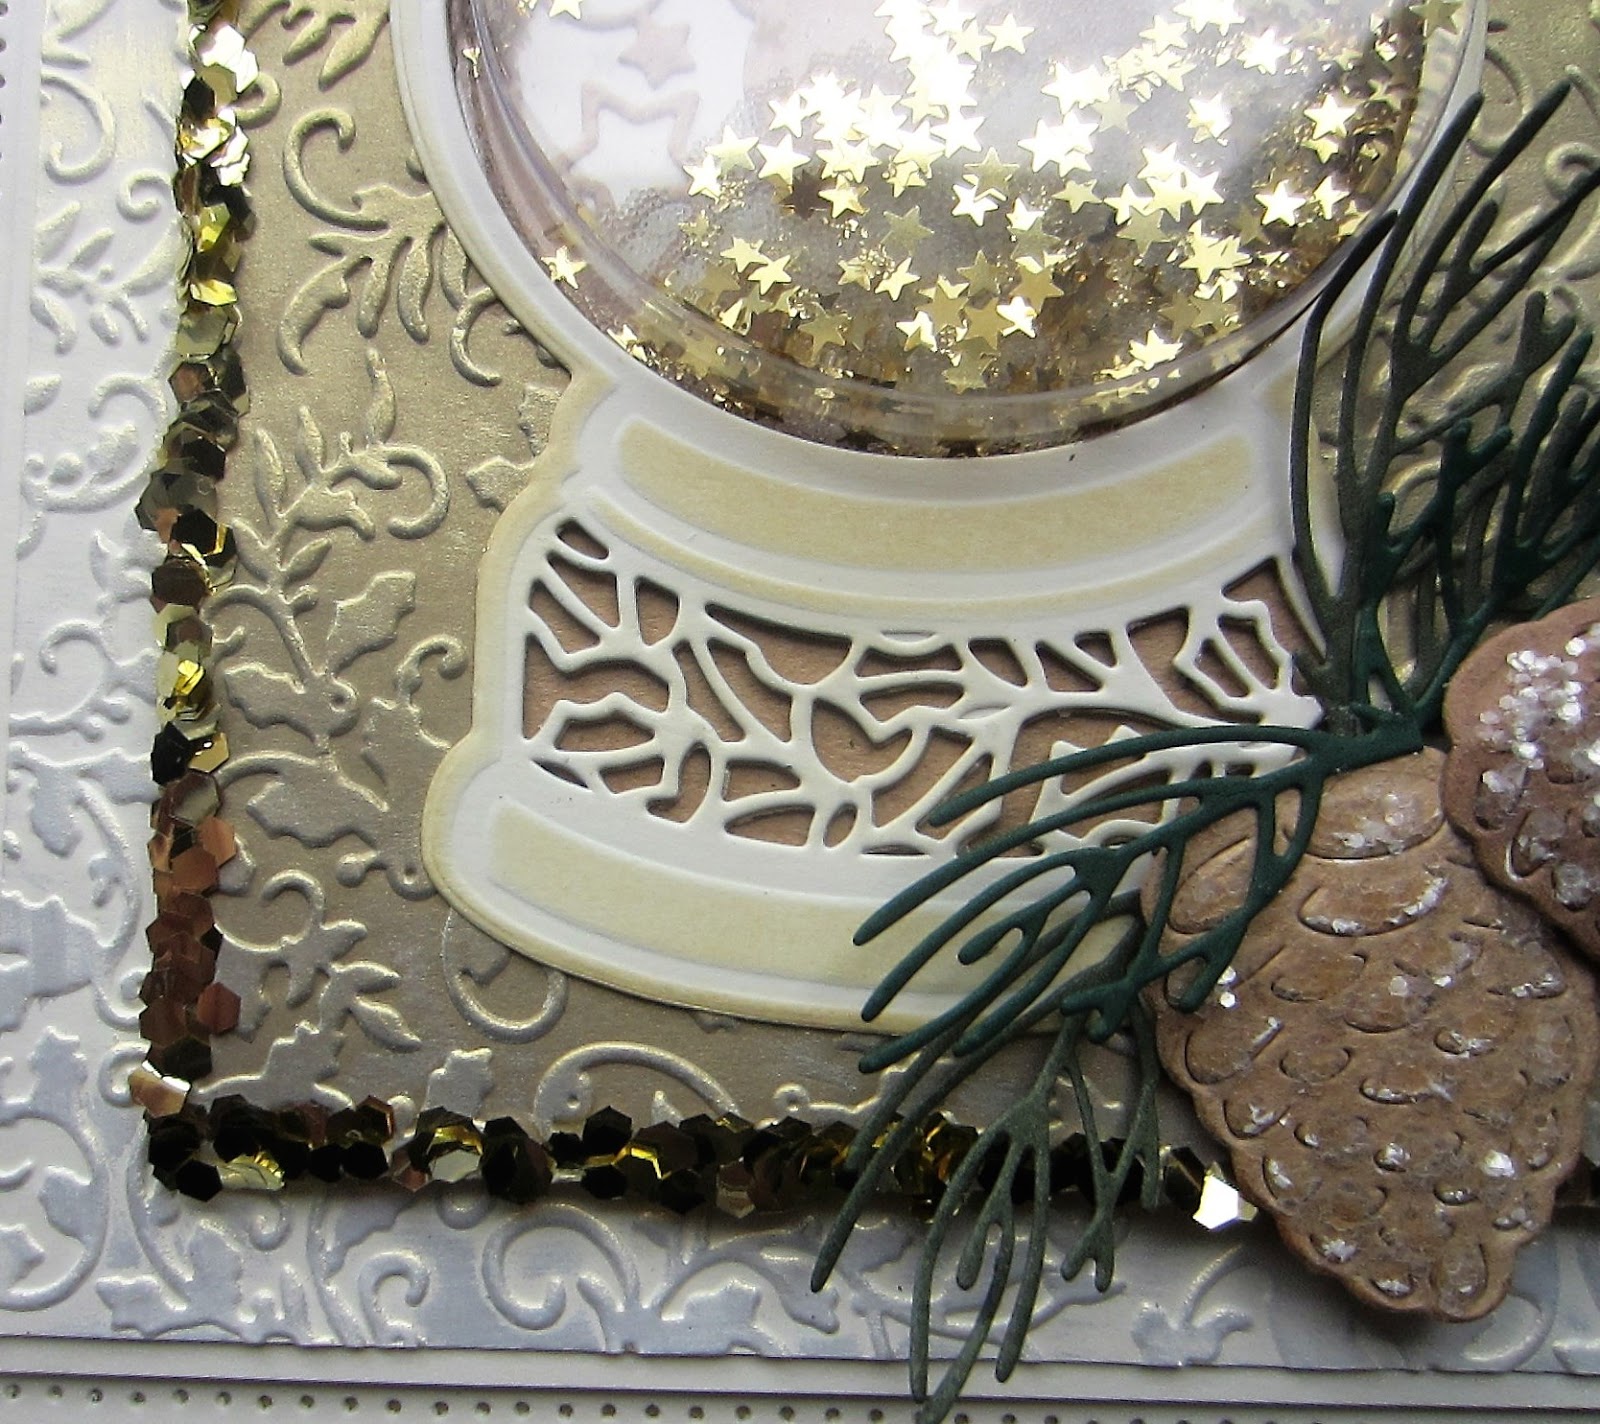
Hi crafters!  Today's card giveaway is a very pretty  milk card and enchanted gold gilded channel card.  You may have to look at all the pics to get a sense of the gold polish as it is very subtle.  I started with the background which uses a piece of milk card that has been cut into two parts (one large and one small).  I embossed both of the pieces with the Twisted Holly embossing folder for texture.  I used the Enchanted gold gilding polish over it to add some subtle highlights then added mounting foam to the back to raise it.  I attached it to another piece of milk card and left about an inch gap between them.  I cut the Holly Swirl twice out of gold mirror card.  I attached one across the gap, then added just the swirl from the second one to cover the entire length of the gap.  For the focal element, I cut the Noelle Frame in milk card and backed it with vellum.  I cut the inner decorative die in milk and backed it in vellum as well and layered it on top.  I stamped and gold embossed the sentiment then cut it out with the centre die from the set.  I rubbed a little bit of gilding polish around the edge and added it to the middle of the stacked die cuts.  I added cream pearl corners to the top and some cream flatback pearls to the focal element.  Milk card and gold mirror card were used to complete the card.  The finished dimensions are 7" x  8 1/2" in size.  Leave a comment to be entered into the drawing to win this one.  The winner will be announced on Saturday's blog post.  All for now, Sue x


                                                    Follow my blog with Bloglovin

Tuesday 28 November 2017

Celebration Shadow Box Card


Hi crafters! I love doing shadow box cards!  My goal with this video is to just give you a little bit of inspiration to start doing your own shadow box cards.  They are so much fun!  


The finished dimensions are 7 1/4" x  7 1/4" in size.  All for now, Sue x


                                                    Follow my blog with Bloglovin

Monday 27 November 2017

Feel Better Soon


  Morning all!  I have been playing with the hexagons for today's card.  I started with a piece of coconut white card and embossed it with the Aztec Flower embossing folder for texture.  Next I cut the outer decorative frame section from the Classic Adorned Hexagon Nobles out of both blue dusk card and black card.  I offset the black behind the blue and glued it to the card.  I cut the next section of the die in the same manner, but attached the left sides of the frame on top of the first one to offset the entire frame.  Finally, I cut the next section down in the set the same way and skewed it to the left as well.  All three frames and their shadows were lined up at the left corner and glued into place.  I stamped a sentiment and cut it out with the Stitched flags die, lightly inking the edges.  I stamped the Pinwheel Flower stamp in black and cut it out with the Pinwheel Floral dies, inked the edges with Stormy Sky ink and assembled into a 3D flower.  I mounted it on a thin white satin ribbon bow and added white leaves from the set as accents.  White, blue dusk and black mats and layers were used to complete the card.  The finished dimensions are
8 1/4" x  8 1/4" in size.  All for now, Sue x


                                                       Follow my blog with Bloglovin

Sunday 26 November 2017

Happy Birthday

Good Sunday morning all!  A simple barbeque card made with the King of the Grill die set.  I started with a coconut white card background and cut a Double Stitched Hexagon die multi layer frame out of red and black card.  I cut the barbeque out of red card for the inside of the frame.  I added the flames and a tool to hang from the side of it.  I cut the extra tire circle in black and added it over the top of the wheel.  I used the Happy Birthday die in black at the top of the card.  Three white Double Stitched hexagons for accents down the side and finished with the king of the grill sentiment in black, the chef's hat in white and the grill which I coloured with a silver paint pen and a vintage photo distress marker.  White, red and black mats and layers were added to complete the card.  The finished dimensions are 8" x  8 3/4" in size.

The winners of this week's Comment Game are:

Lynne L!!!
Tres!!!
Stitchingranny!!!

Congratulations all!  Please email me at americansue1@gmail.com to confirm your address and claim your prize.  All for now, Sue x


                                                      Follow my blog with Bloglovin

Saturday 25 November 2017

Reindeer Snowglobe Card


Hi there my crafty friends!  It's the reindeer's time in the snowglobe for today's video shaker card!  Doesn't he look amazing!  Hope you like it!

The winner of this week's Wednesday Card Giveaway is:

Jan L in Sheffield!!!

Congratulations! Please email me at americansue1@gmail.com to confirm your address and claim your card!


The finished dimensions are 72 x  8 1/2" in size.  All for now, Sue x


                                                     Follow my blog with Bloglovin

Friday 24 November 2017

Christmas Double Day

Hello bloggers!  I have two fun sort of Christmas cards to share with you today.  First up is a card which uses one of the Stamp To Die For range.  I started by embossing a piece of coconut white card with the Twisted Holly embossing folder for texture.  I cut two of the Garland Edgers with the wide border and the scalloped border next to each other and glued them on to the sides of the card.  Next I stamped the Presents Galore Stamp To Die For in black Archival ink.  I used Distress Markers to colour it in (Festive Berries Tumbled Glass, Forest Moss, Spun Sugar) and cut it out with the matching outer die from the Holly Lattice Frame.  I cut another of the same die out of white card using the decorative die then cut it in half and added it to the edges of the stamped image.  I stamped a sentiment and cut it out with the oval from the Frosty Frame and mounted it across the stamped image.  I attached the entire piece in between the borders.  I cut Pine Cones out of kraft card, adding white gel pen accents and Iced Snow and cut the greenery out of card from my stash.  I added them to the corner of the card. White and red mats and layers were used to complete the card.  The finished dimensions are 6 1/2" x  8 1/4" in size.  Scroll down for card number two.


Card number two is a cheerful Gingerbread man card.  I started with the background and embossed coconut white card with the same Twisted Holly embossing folder.  I cut one Lattice Ribbon die out of red card and extended the length on it.  I cut it directly down the centre of it to create two smaller pieces then added a thin strip of red card to both of the cut sides. I glued these along the edges, top and bottom, of my embossed background.  Next I cut three gingerbread men out of tan card.  I used Worn Lipstick through the die for their cheeks.  I added red bows and buttons and white icing strips on their arms and legs.  I used red and white Bakers Twine and tied bows between them and string them across the card so they looked like they were attached.  I cut the sentiment from the set and shadowed it in black and added it to the top of the card seated upon the oval from the Frosty Frame die set.  The card was completed with white, red and tan mats and layers.  The finished dimensions are 6 1/4" x  8 1/4" in size.  All for now, Sue x


                                                     Follow my blog with Bloglovin