Thursday 31 December 2020

Hummingbird Stained Glass

 Happy New Year's Eve!  I found this pretty stained glass card I missed putting on the blog so thought I would share it today!  I started by cutting the Hummingbird Stained Glass in white and leaving a wide margin on it.  I glued a piece of acetate to the back of it.  I used the Crystal Tints to fill in the sections on the die cut from the top.  Once it was dry, I die cut one more and glued it to the base die cut to cover any areas where the tint got on the die cut.  I cut a circle with a sticky adhesive sheet attached to it, then peeled off the backing paper and coated it with Frosted Sparkle Glitterbitz.  I attached the circle to another piece of white card then added mounting foam around the back of the Hummingbird die where I left the wide border.  I attached the die cut over the other piece of white card, lining it up so the sun was over the glittered circle.  The card was completed with simple white mats and layers.  The finished dimensions are 5 1/2"  x  7" in size.  All for now. Sue x


Wednesday 30 December 2020

You're Wonderful

Hi crafters!  I started with the Bordeaux Glitter Kiss and applied it all over a piece of card and allowed it to dry thoroughly.  Next I cut the Whitney Background out of white and black card.  I used the black die cut as a shadow behind the white one, then added the Glitter Kiss card as a backing.  The rich Glitter Kiss colour is really beautiful, you can see in the close ups.Using some of the leftover Glitter Kiss card, I used the Whitney Edgers and cut two of the decorative scalloped borders.  I added a solid white backing then offset a black shadow edge on them.  I added mounting foam to both of them, then added them on top of the background.  I stamped my sentiment in black, then cut a small oval frame using the Double Stitched Ovals and added it with foam over the sentiment.  I added the sentiment to the centre of the background with foam and added three small glittered flowers as accents.  The card was completed with white and black mats and layers.  The finished dimensions are &"  x  7" in size.  All for now. Sue x


                                                        Follow my blog with Bloglovin

Tuesday 29 December 2020

Strength Circle

 Hi crafters!  More pixie powder backgrounds from my craft stash of them!  I used Sun Yellow, Mango Blaze and Scarlet Mist on this one.  I used the inner die from the Millie die set to cut into the card randomly all over.  Just a little note when doing this, it is easier to use a full sheet of card so you aren't actually cutting off the edge of the card to start with.  That way, you won't lose the centres of the edge die cuts.  I added a sticky sheet of adhesive to another piece of white card, then added the decorative cut piece on top.  I used Frosted Sparkle Glitterbitz to the remaining exposed adhesive.  Next I cut the background down in size to the size I wanted to use and added a thin black mat.  With a leftover piece of the background, I cut the Strength Circle.  I cut it again out of black card and used it as an oddset shadow behind it.  I added it to the white shadow background cut with the larger die in the set.  I added mounting foam and added it to the top right side of the card.  I made three flowers using the Petal Pocket Flowers and cut centres from the pixied card.  I attached the flowers in a grouping in the corner, then added accents with the Lace Edged Leaves cut in white.  The card was completed with white and black mats and layers.  The finished dimensions are 7"  x  8" in size.  All for now. Sue x


                                                          Follow my blog with Bloglovin

Monday 28 December 2020

You Brighten My Day

 Hi bloggers!  I went back into my background stash pile and pulled out this pixie powdered treat!  It used Aqua Lagoon, Midnight Blue and Scarlet Mist Pixie Powders.  I cut the Cut Corner Rectangles and made a frame to go over the pixied background.  I made a background piece using the Diagonal Floral Vines embossing folder for the top and used a piece of white card that I scored all the way across for the bottom.  I attached the frame and pixied backing with foam to the embossed background.   I cut the Robin Family birds and nest out of tan card as well as the Cherry Blossom Frame die.  I used some Barn Door ink on their bellies and tips of the cherry blossom branch and then used Vintage Photo ink around the branch and bodies of the birds.  I glued the branch across the card, using a smaller branch to extend it.  I seated the nest over the join area and added the birds around and in the nest.  I cut the You Brighten My Day sentiment in white and glued it to the top area of the frame.  The card was completed with white mats and layers.  The finished dimensions are 7 3/4"  x  78 3/4"  in size.  All for now, Sue x


                                                      Follow my blog with Bloglovin

Sunday 27 December 2020

Baby


Good Sunday morning all!  I think I made more baby cards during their release than any other theme, so here is another for you!  This one is super simple and doesn't really need much explanation though.  I cut a wide strip of white card and used the Baby die from the Newborn Sentiments in a bunch of different shades of card (custard, salmon, powder pink, honeydew, duckegg blue, wisteria and blue dusk).  I raised the panel with foam and added it to the centre of another piece of white card.  I cut various animals from the Zoo Animals, Farm Animals and the Stuffed Animals die set and glued them around the edges.  The card was completed with white mats and layers.  The finished dimensions are 6 1/2"  x  7 1/4" in size.  All for now. Sue x


Saturday 26 December 2020

You're Wonderful

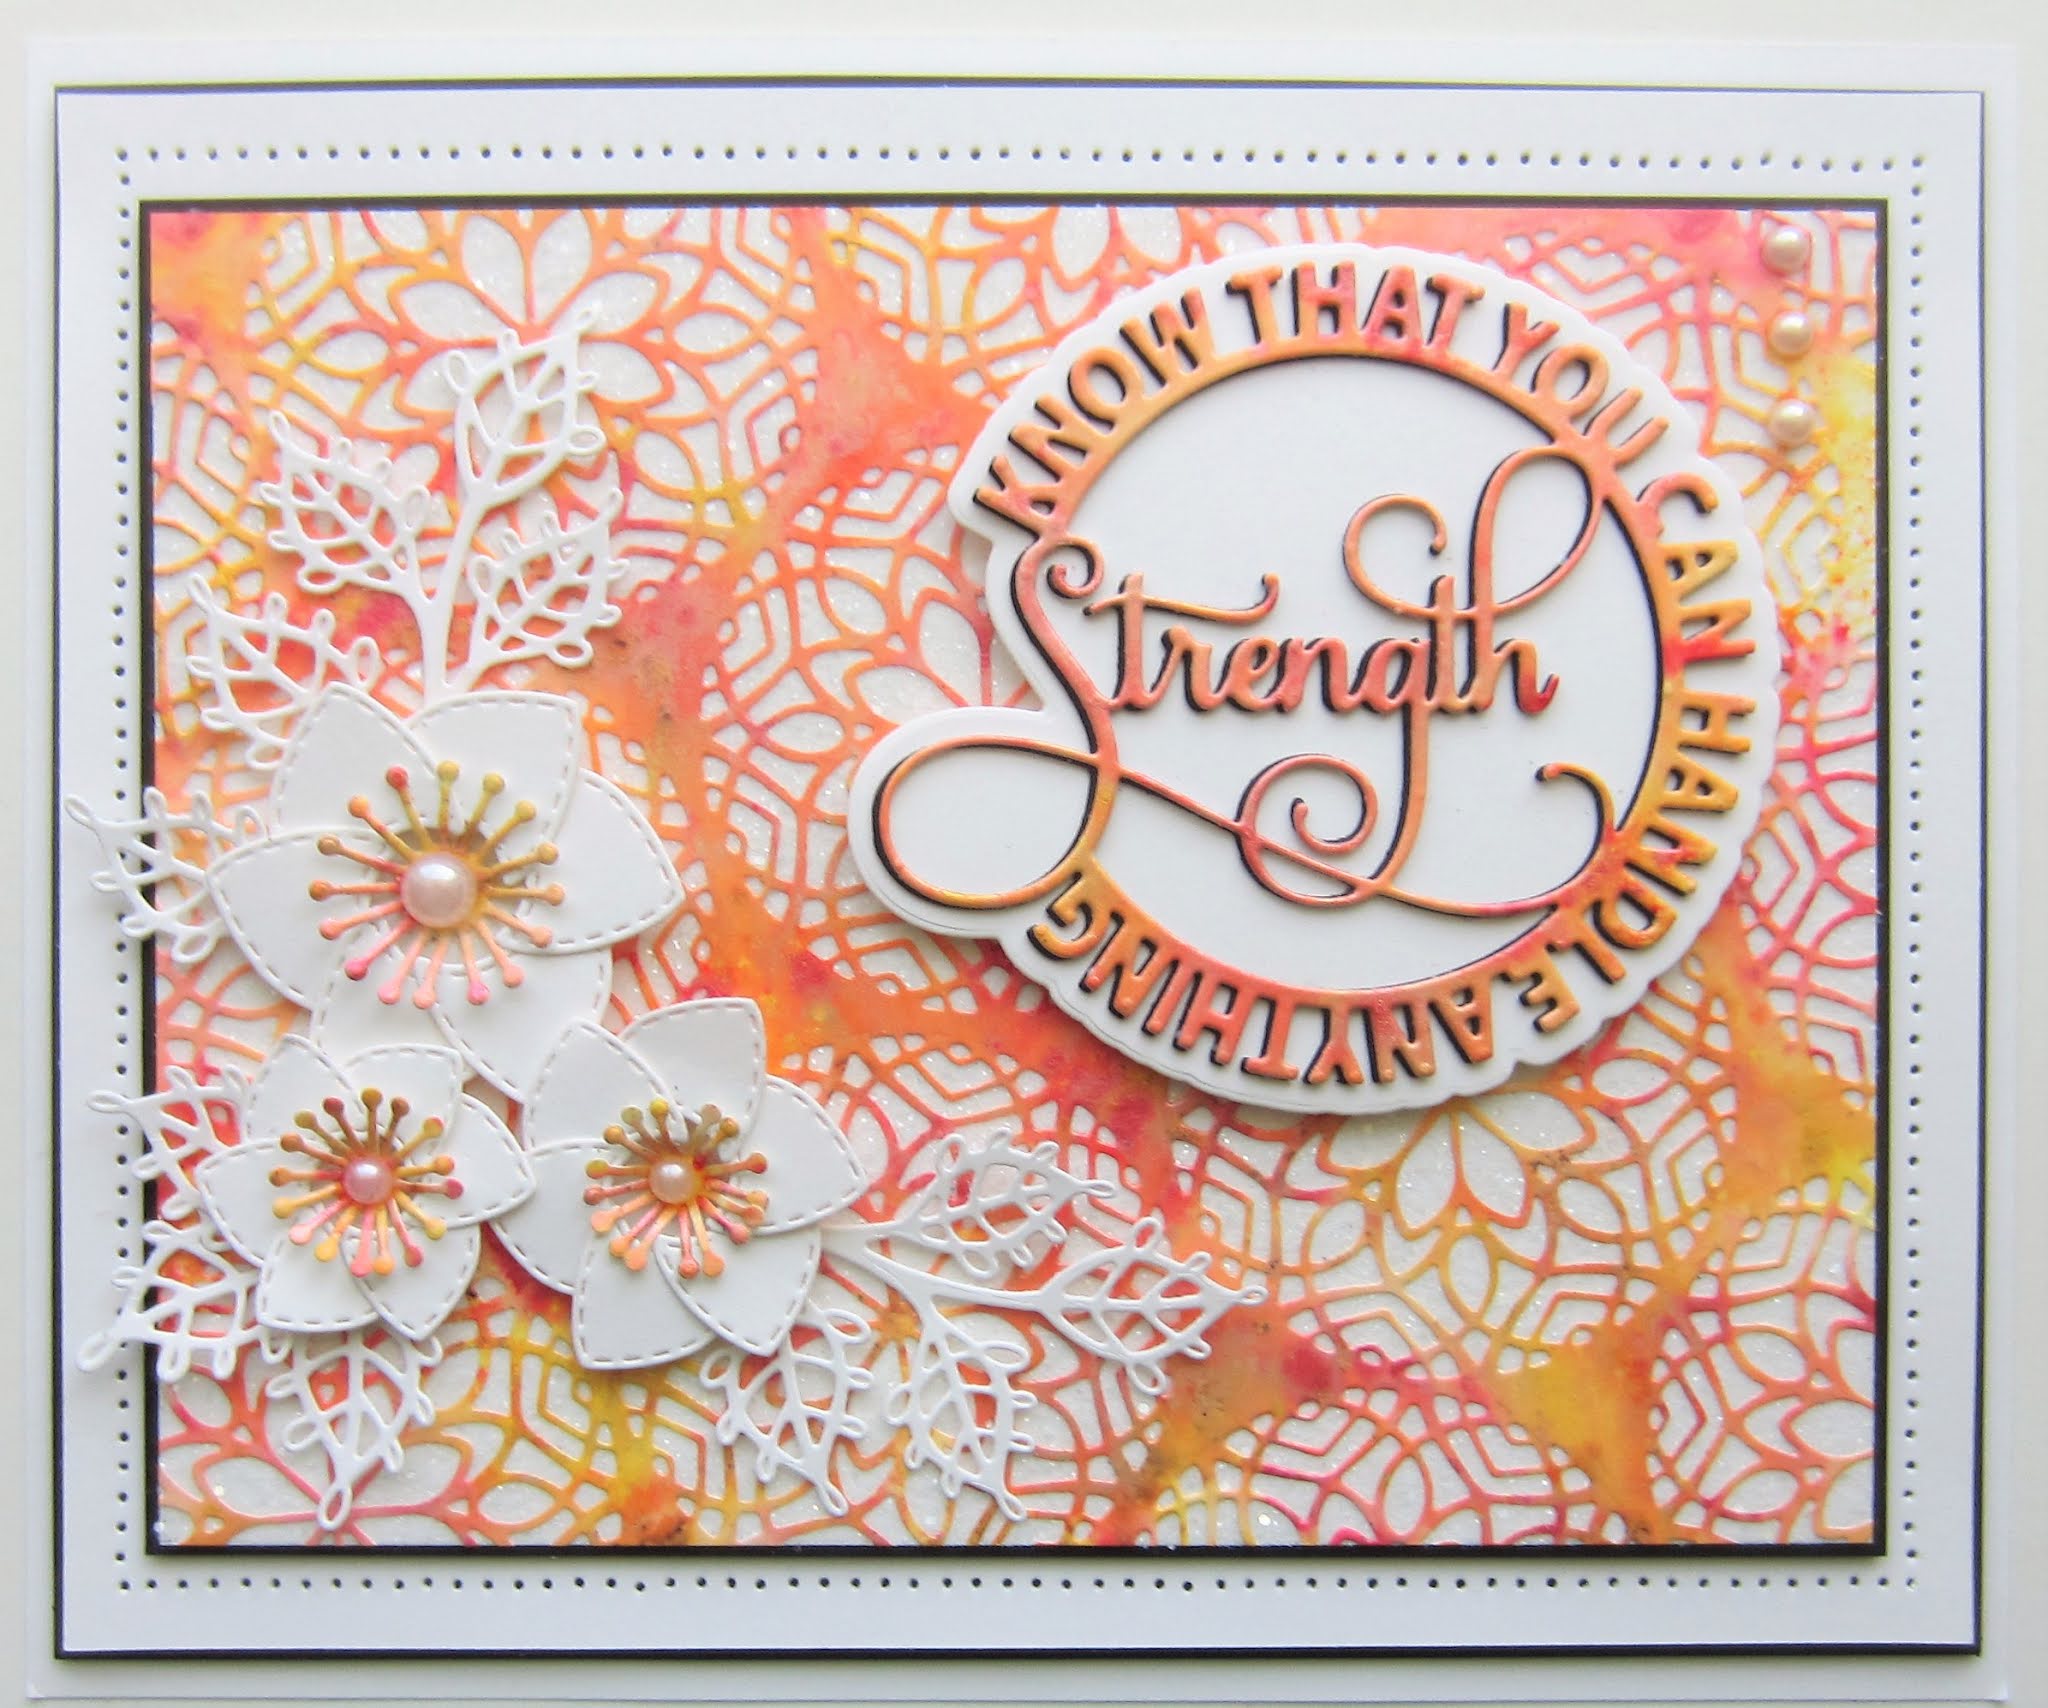
 Hello there my crafty friends!  I started today's card by covering a piece of card with a sticky adhesive sheet.  I peeled the backing paper off and sprinkle Golden Onyx Aurora Flakes all over it.  Using a piece of Rubitscrubit pad, I moved the flakes all over the card, then used it to refine and remove the leftover flakes.  Next I used the Paulette Background and cut it into the flake background.  I added a white backing card to it.  Next I cut a multi-layered frame using the Double Stitched Rectangles.  I added the frame with foam over the background.  Next I used the Joanie die and cut it in white and added a white backing to it.  I seated it in the centre of the frame in a diamond orientation.  I cut a small circle frame using the Double Stitched Circles out of a leftover piece of the flake background.  I stamped my sentiment then added the circle over it with foam.  I attached it to the centre of the Joanie die.  I made three small flowers and glittered them, then added them to the lower portion of the circle frame.  The card was completed with white and black mats and layers.  The finished dimensions are 7"  x  8" in size.  All for now. Sue x


                                                        Follow my blog with Bloglovin

Friday 25 December 2020

The Last Of The Christmas Cards

Merry Christmas all!  I hope you have a wonderful day today and if you are reading this, thank you for sparing a few minutes to pop by the blog!  The last of all the Christmas cards are here today.  I promise I won't post any more Christmas cards until at least June 2021! LOL    I would like to wish everyone a fabulous Christmas and a very happy and healthy (and Covid free) New Year.  With this blog being over eleven years old now, I must say a big thank you to everyone that has visited it over the years!  It really makes me happy when I think of that.  All for now, Sue x


                                                       Follow my blog with Bloglovin