Wednesday 28 February 2018

Wednesday Weekly Card Giveaway

 Hello there my crafty friends!   You may have spotted this card on my shows last week.  I thought it would make a nice giveaway today.  I started by cutting four of the Chantilly Lace Edger in white and gluing them to a piece of sky blue card.  I let them overlap naturally at each of the corners.  Next I cut the Poppy die in white and cut it down to make a square of it.  I added it in a diamond orientation to the centre of the framed background.  I cut the smaller die in the Sophia in blue and backed it in white and added it with foam.  The miss you mini expression was cut in white and added to the centre.  Using the Passion Flower die set, I cut three flowers, inked the edges very lightly with Tumbled Glass, sprayed them with spray adhesive and pearled and glittered them.  I added leaves around them as accents.  I cut a larger piece of blue card and ran strips of double sided tape around the edge and glittered them with Frosted Sparkle Glitterbitz and added the topper to the middle of it.  White and blue mats were used to complete the card.  The finished dimensions are 8" x  8" in size.  Leave a comment if you would like to be entered into the drawing to win this one.  I will announce the winner on Saturday's blog post.  All for now, Sue x


                                                       Follow my blog with Bloglovin

Tuesday 27 February 2018

Discover Art


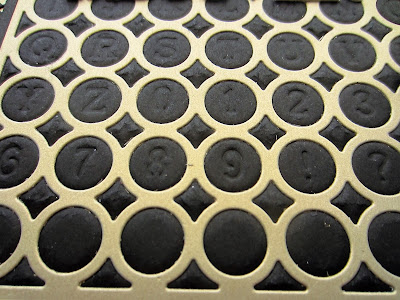
Hi bloggers!  One way to use the Typewriter Grid die is as a complete background with the letters embossed into it! It works well with all the Industrial Chic Collection to create beautiful cards!


The finished dimensions are 7 1/4" x  8 1/2" in size.  All for now, Sue x
                                                     Follow my blog with Bloglovin

Monday 26 February 2018

You're Special To Me

Hi bloggers!  Today's card was a bit of an experiment and I liked the way it came out!  I cut the outer section from the Ivy Garden Background die out of white card. Next I used some clear texture paste and added some Golden Mint and Emerald Green Pixie Powders to it.  I mixed it with a palette knife then spread it over another piece of coconut white card.  I placed the die cut piece with the four ivy corners cut out of it on top of the texture paste so that it came up through the ivy corners.  I set it aside to dry overnight then flattened it out a bit (it was a bit wobbly due to the water in the paste)  I added a multi-layered frame over it made from the Double Pierced Noble squares.  I cut a Sophia die out of white and added it with foam to the centre.  I cut the smaller die from the set and layered it up in the middle, then added the stamped sentiment framed with the Double Stitched Octagon Nobles.  White on white mats and layers completed the card.  The finished dimensions are 7" x  7" in size.  All for now, Sue x


                                                         Follow my blog with Bloglovin

Sunday 25 February 2018

Mom

Good Sunday morning all!  I have just realised how close we are getting to Mother's Day (at least in the UK) so I thought I had better share some of those cards with you.  This one uses the Mom version of the Mom/Mum  die.  I started with a Pixie powder back ground using the Aqua Lagoon and Emerald Green.  I made a large enough piece that I was also able to cut the backing pieces for Mom out of the extra bit so it matched with my background.  I cut the Mom die in white and backed the letters with the solid part of the die cut out of the pixied card and glued them together.  I made a frame out of the Background rectangles, but cut it down in the corners to fit more to the shape of the word.  I made a couple of Passion Flowers to hide the cut and decorate the card.  The backing for the flowers was cut out of a sticky adhesive piece attached to white card so I was able to assemble them and add some Frosted Sparkle Glitterbitz to the flowers.  I accented them both with white leaves.  White on white mats were used to complete the card.  The finished sizes are 6 1/4" x  10 1/4" in size.

The winners of this week's Comment Game are:

Jenny Briggs!!!
Eunice!!!
Sheila Hodges!!!

Congratulations all!  Please email me at americansue1@gmail.com to confirm your address and claim your prize.  All for now, Sue x


                                                       Follow my blog with Bloglovin

Saturday 24 February 2018

Lift Your Spirits Card


Hello there my crafty friends!  Do you know anyone that could use an uplifting card like this?  This one is sure to bring a smile to anyone's face!

The winner of this week's Wednesday Card Giveaway is:

Ursula!!!

Congratulations!  Please email me at americansue1@gmail.com to confirm your address and claim your prize.


The finished dimensions are 7" x  7 3/4" in size.  all for now, Sue x
                                                      Follow my blog with Bloglovin
Friday 23 February 2018

Just Wanted To Say

Hi guys!  I thought I would give you a sneak peek at one of the cards that I will be showing on Hochanda today at 3pm!  I have a one hour show that is just for showcasing the City Skyline Circle Scene die set (shown here)  I will be doing the ODS that starts tonight  with shows at 6pm and 8pm as well.  Today's card is such a quick and easy card to do.  I started with a piece of coconut white card and used the Spiced Marmalade, Fossilized Amber, Picked Raspberry and Worn Lipstick Distress Oxides to create the background.  I used the pad edge to just make stripes of colour out from a central point in the lower middle of the card. I used a gold paint pen and flicked it randomly to add a bit of a sparkle.   I set it with a heat tool to dry, then die cut the sentiment in black gloss card and glued it into the top of the card.  I used the larger building die from the City Skyline set and cut it across and extended it a bit using a piece of black gloss card.  I cut the other sentiment (Congratulations) in white and glued it below the buildings.  I attached the buildings to the bottom of the card, then completed it with white and black mats and layers.  The finished dimensions are 6 1/4" x  7" in size.  I hope you can tune in to see all the other lovely samples done with this die set and then later on for the tart of the One day Special!  All for now, Sue x


                                                      Follow my blog with Bloglovin