Saturday 31 March 2018

Sparkly Pina Colada Trio Card


     Hi crafters!  Want an idea for a clean and simple cocktail card, then here it is!  Add some
     glitter for a bit of bling and excitement.

Don't forget today's shows on Hochanda at 9am, 1pm and 5pm!  I have some lovely cards and demos to share with you!  Hope you can tune in then!

The winner of this week's Wednesday Card Giveaway is:

SHartl!!!

Congratulations!  Please email me at americansue1@gmail.com to confirm your address and claim your card.


The finished dimensions are 7 3/4" x  8 3/4" in size.  All for now, Sue x
                                                      Follow my blog with Bloglovin

Friday 30 March 2018

Happy Easter

 Hi bloggers!  Just trying to squeeze in another Easter card before the day!  I started with a piece of blush card and cut the egg shape aperture opening for the treat cup to go through.  I prepared the egg treat cup with white micro beads and some clear micro beads (helps keep stuff from sticking too bad to the cups) ad sealed it with a piece of acetate.  I cut the bunny design from the Easter Bunny Egg die set in white ad added some pink shading then glued it behind the treat cup that I put through the aperture opening.  I backed it with a piece of aqua card.  I cut two of the surround pieces for the egg, one in white and one in aqua card.  I cut the scalloped area away on the aqua card then layered it on top of the white one and added it around the egg shape.  I cut an aqua bow for the top of the egg and glittered it.  I used the Chantilly Lace Edger in white across the bottom of the card, then cut an assortment of the small decorative eggs in white with different coloured backings and glued them across the top of the border.  The card was completed with white and blush mats and layers.  The finished dimensions are 5 3/4" x  8 1/2" in size. 

I completely forgot to mention that I am doing the One day Special starting tonight at 6pm on Hochanda!  I have an 8pm show then Saturday's hours are 9am, 1pm and 5pm for the final show.  I do hope that you will be able to tune in!  All for now, Sue x


                                                       Follow my blog with Bloglovin

Thursday 29 March 2018

Pixies in Crystal Card


Hi bloggers!  Need a really quick card, but still want it to look as if you took forever?  Today's video shows you how to use the Pixie Powders in a caught in crystal technique.  You can make a bunch of these up ahead of time and just grab them as you need them.  Voila, a quick card!


The finished dimensions are 7" x
 8 1/4" in size.  All for now, Sue x
                                                        Follow my blog with Bloglovin

Wednesday 28 March 2018

Wednesday Weekly Card Giveaway

Hi crafters!  Today's card is pretty simple but very striking.  I am hoping that you will think it is a good enough card for a Wednesday card giveaway offering!  I started by cutting the Ray Of light Background die in Straw Yellow.  I backed it with Custard yellow card.  Next I cut the City Skyline die out of black gloss card.  I cut the two largest city dies and layered them across the card.  Next I used the Double Stitched Rectangles Set B to create a multi -layered frame in white.  I added it with foam over the background.  I cut the Hello Mini Expression die in black gloss card and added it at the top of the frame.  White and black mats and layers were added to complete the card.  The finished dimensions are 7" x  8 1/4" in size. Leave a comment to be entered into the drawing to win this card.  The winner will be announced on Saturday's blog post.  All for now, Sue x


                                                       Follow my blog with Bloglovin

Tuesday 27 March 2018

Leaf Resist Card


Hi Bloggers!  I was thinking ahead when I designed this card as I used the leaves to create a gorgeous resist pattern for my background,  then upcycled the leaves from this on to another card!  Such a fun way to get a two-fer!


 The finished dimensions are 7 1/2" x  7 1/2" in size.  All for now, Sue x


                                                      Follow my blog with Bloglovin

Monday 26 March 2018

Get Well

Hello there my crafty friends!  I have a lovely, but very simple card to share with you today.  I started by embossing a piece of Sky Blue card with the Splendid Garland 3D embossing folder.  I cut it into three strips and mounted it on another piece of coconut white card using mounting foam.  For the focal element, I cut the Summer Rose Frame in white (using two pieces of card so you get the lovely debossed effect in one pass).  I inked the flowers with Enchanted Blossom Chalk Cloud and the leaves with Subtle Sage Chalk Cloud using smoothies.  I added mounting foam to raise the frame and added it to the centre of the card.  I cut the Get Well mini expression die a couple of times in white and stacked them and glued them in the middle.  White and Sky blue mats and layers were added to complete the card.  The finished dimensions are 6 1/2" x  8" in size.  All for now, Sue x


                                                      Follow my blog with Bloglovin

Sunday 25 March 2018

Happy Easter

Good Sunday morning all!  With Easter fast approaching, I thought I had better get some Easter cards up on the blog (no doubt some will end up after the fact though!).  I started by cutting the Diamond Squares Background into a piece of coconut white card and extending it  to create a rectangle shape rather than a square.  I backed it with a piece of 
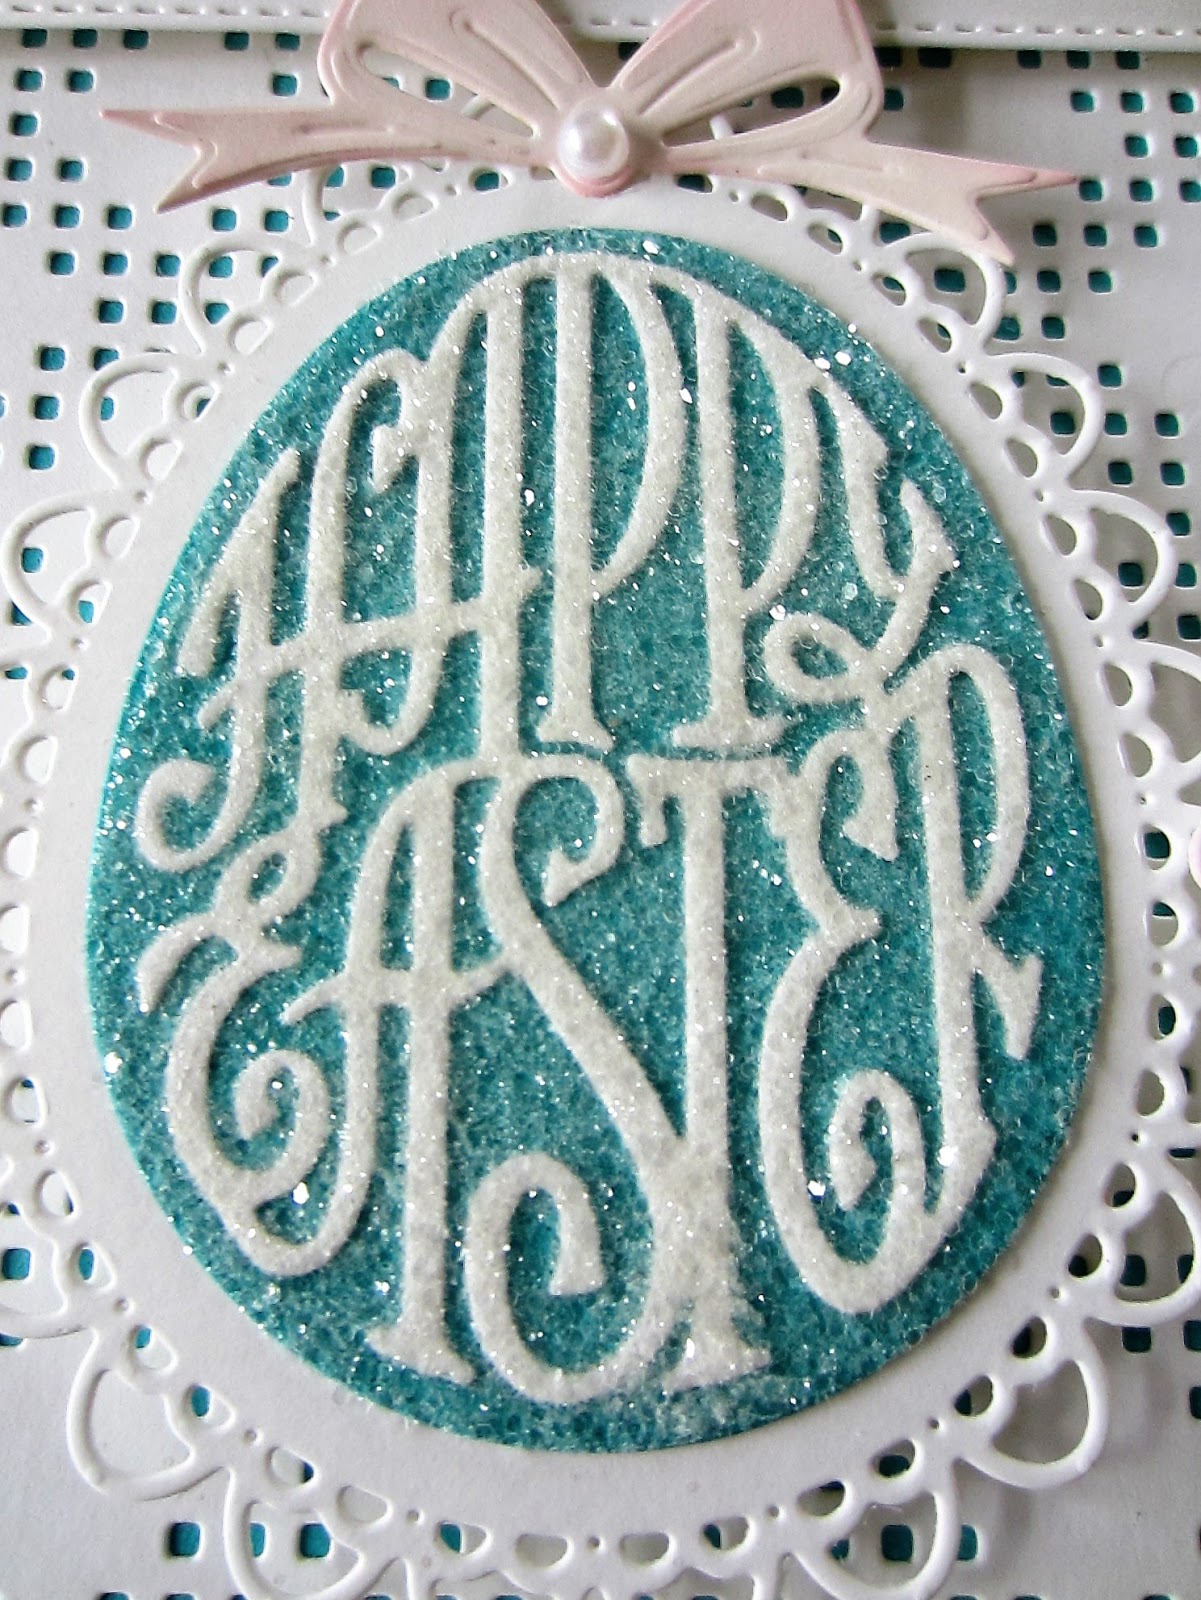
teal card.  Next I used the Double Stitched Rectangles and made a white, multi-layered frame and added it over the background with mounting foam.  For the focal element, I used the Happy Easter Egg die and cut the egg in teal as a background and cut the sentiment in white.  I glued it on then decided to glitter it so I used spray adhesive all over the top then added Frosted Sparkle Glitterbitz to it.  I cut the scalloped edge for the teal egg in white and added it with the egg to the background with foam.  I used the bow from the Easter Bunny Egg die set cut in blush and added it to the top of the egg with a pearl.  I cut the centre from the Easter Bunny Egg, then trimmed the bunny out of the scene, inked through the die with Spun Sugar to add some detail to the bunny and mounted it with foam at the edge of the frame with it's paw touching the decorative egg.  White and blush mats and layers were used to complete the card.  The finished dimensions are 6 1/2" x  7 3/4" in size. 

The winners in this week's Comment Game are:

dragonswing!!!
Lyn R in Warrington!!!
Sandra Smith!!!

Congratulations all!  Please email me at americansue1@gmail.com to confirm your address and claim your prize.   All for now, Sue x


                                                      Follow my blog with Bloglovin