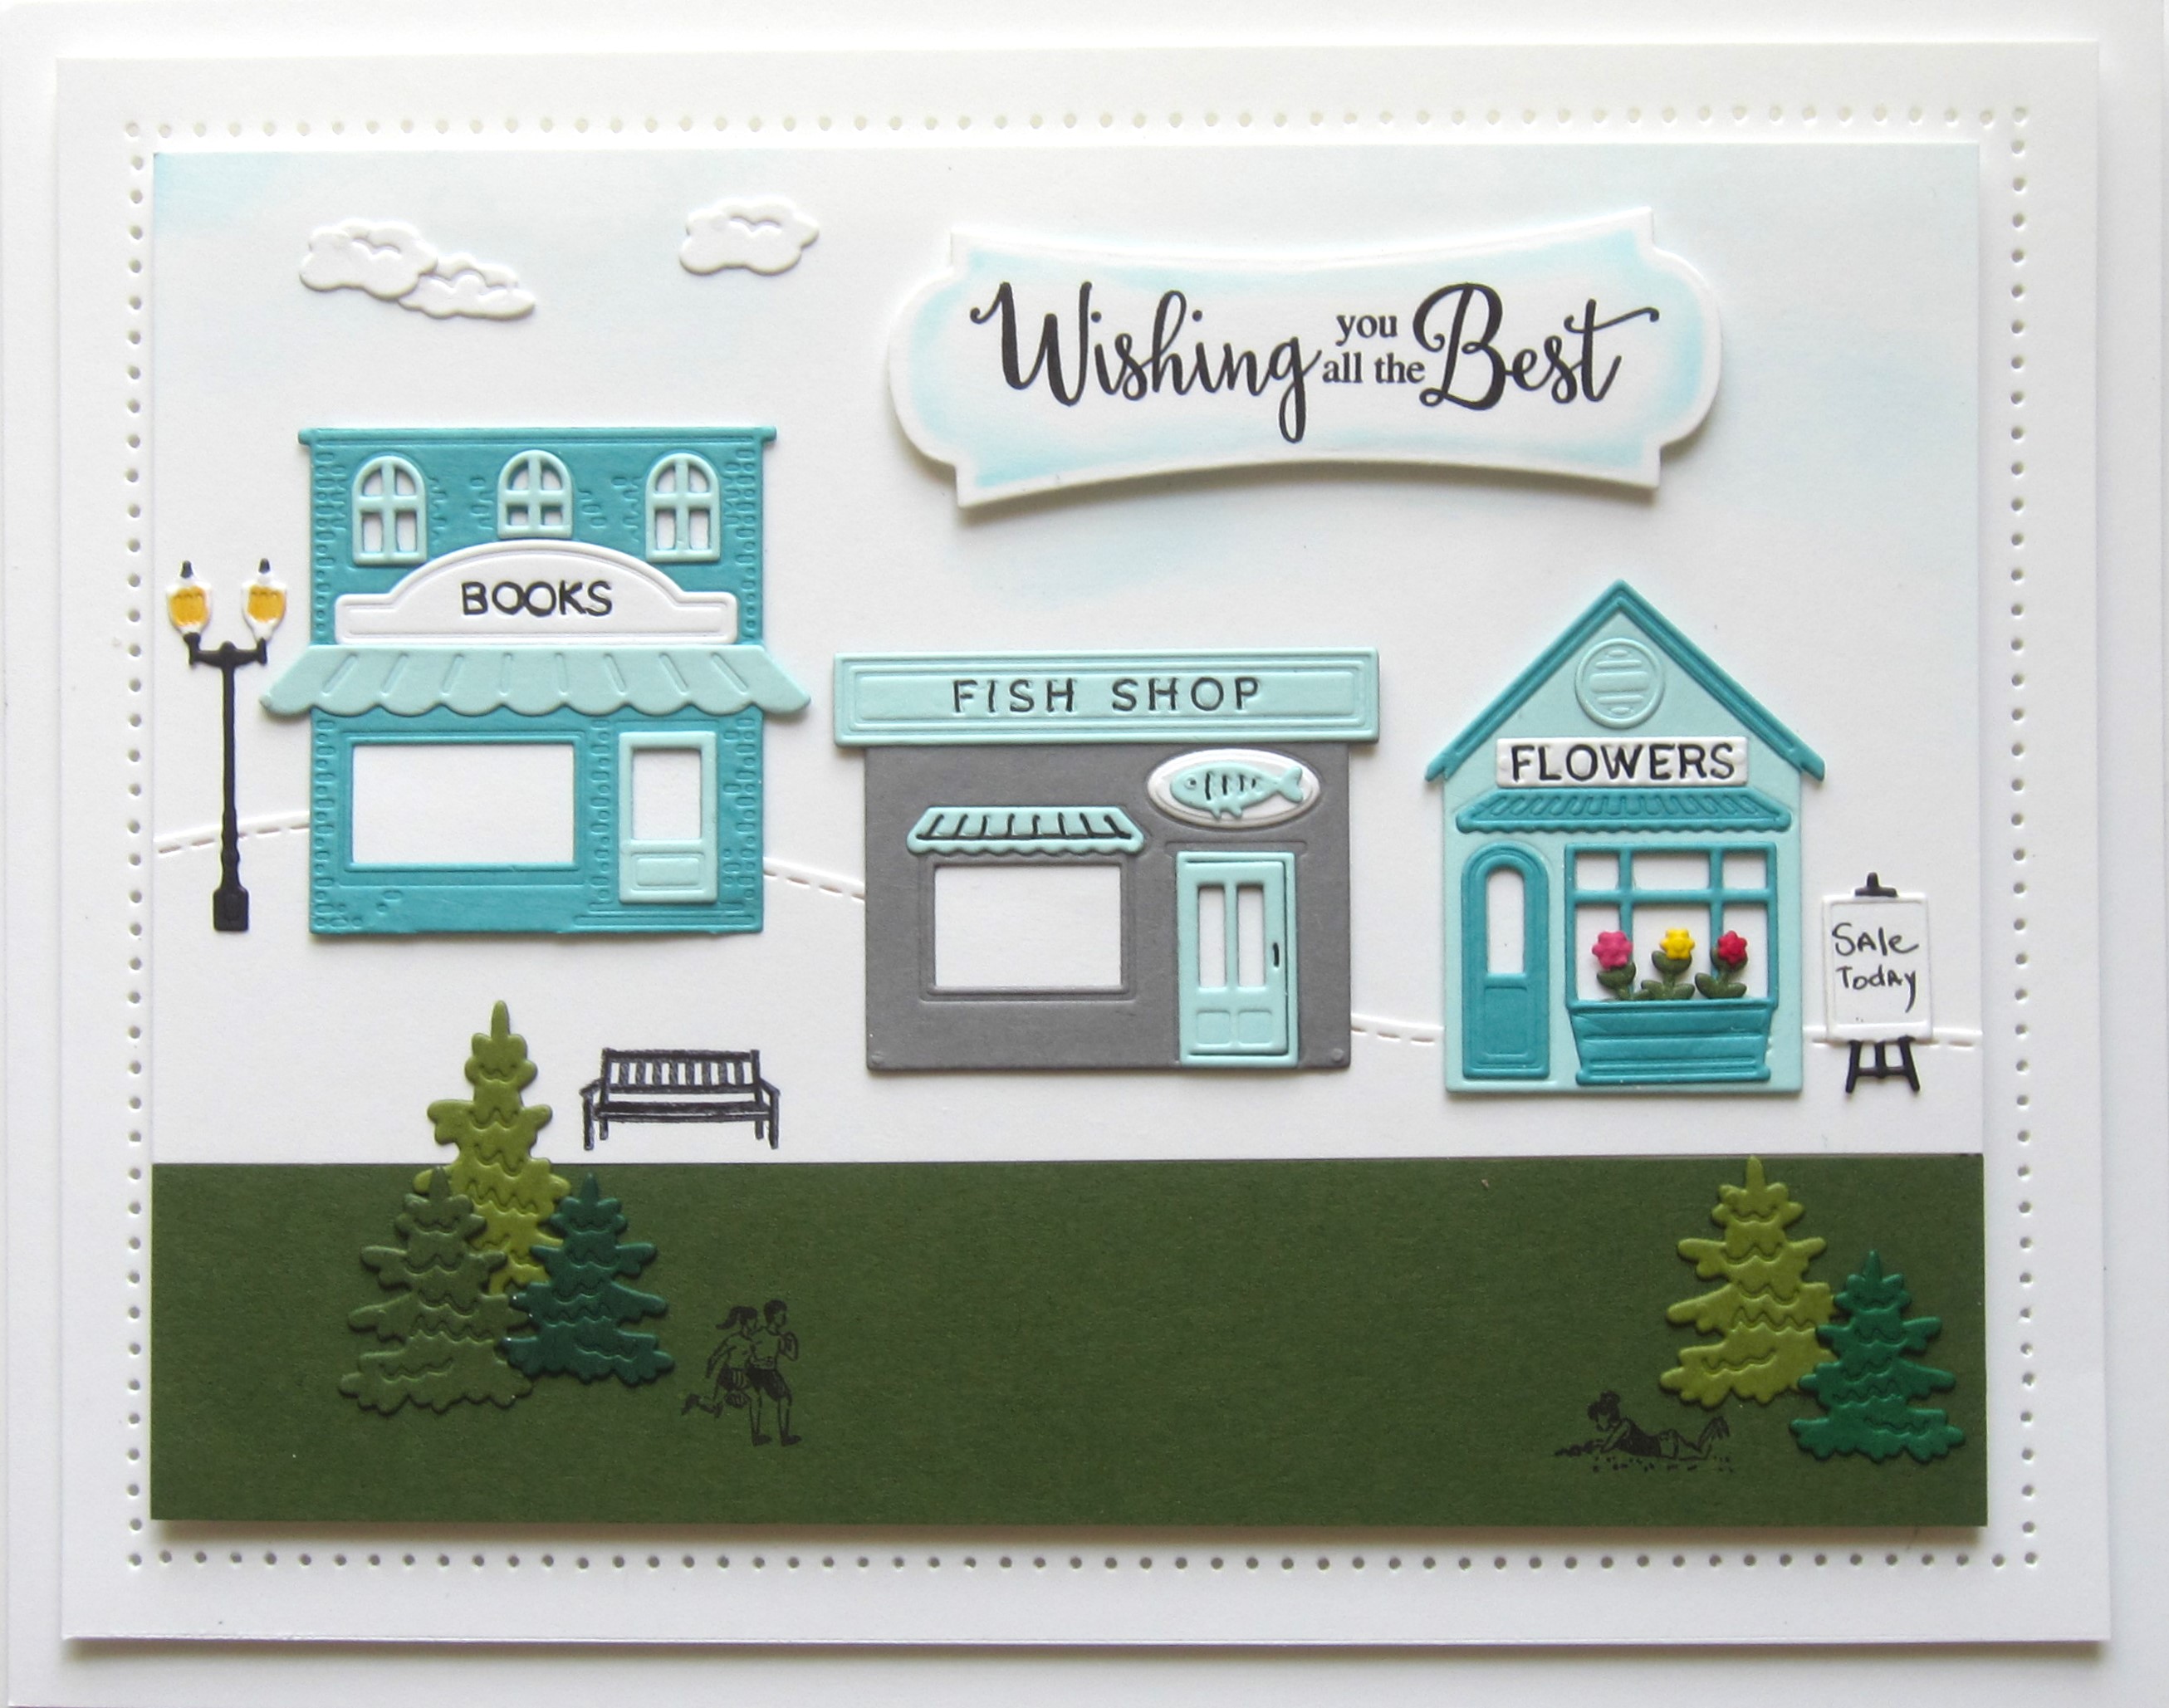
Sunday, 24 September 2023

Merry Christmas

Good Sunday morning all!  I started today's card by cutting the Starlight Background in white.  I backed it with a piece of pixie sparkled card that I used Boulevard Lights Pixie Sparkles on.  I cut the Vintage Bauble out of antique gold card, glittered it with Black Onyx glitter and added the pearly beaded string from the Bauble Branch die set to make it appear as it's hanging.  I used the Double Stitched Rectangles and added a white frame over the background.  I cut the Merry Christmas sentiment in both antique gold and black.  I shadowed the saying and glued it to the background.  Using the Classic Poinsettia die set, I made three different sized white Poinsettias and glittered them with Frosted Sparkle Glitterbitz.  The flowers were added in opposite corners.  The card was completed with white and black mats and layers.  The finished dimensions are 7"  x  8 1/4"  in size.  All for now, Sue x


                                                           Follow my blog with Bloglovin

Saturday, 23 September 2023

Believe In The Magic

Good Sunday morning all!  I embossed a piece of white card with the Tidal Sand embossing folder.  I used spray glue on it then coated it with Frosted Sparkle Glitterbitz.  I cut the Stained Glass Songbird outer die in green and glued it to a white backing piece.  I cut the Songbird die in white too and glued a piece of vellum to the back.  I used markers to colour it from the back for a soft look.  I glued a piece of white card behind it and attached it to the middle of the outer die.  I cut the Believe In The Magic sentiment from the Christmas Wordie Sheets and attached it below the focal element.  The card was completed with white mats and layers.  The finished dimensions are 6 3/4"  x  8 1/4"  in size.  All for now, Sue x


                                                        Follow my blog with Bloglovin

Friday, 22 September 2023

Witching You A Happy Halloween

 Hello bloggers!  I started today's card by creating a Caught In Crystal piece for the card.  I started with a piece of clear acetate and coated it with Cosmic Lacquer.  I used my finger to spread it all over the page.  I used Straw Yellow Pixie Powders in the middle and surrounded it by Burnt Orange then Lava Red Pixie Powders.  I scrunched up a piece of tissue paper and laid it over the piece and used a piece of kitchen roll to tamp it down. I set it aside to dry overnight.  I trimmed it to the size I wanted then added the flying Witch cut in Black as well as the Witching You A Happy Halloween sentiment both from the Witching Hour die set.  I used part of Frankie's Frame cut in black on the bottom of the card. I added the piece to a larger piece of black card and added some Black Onyx glitter around the edges.  The card was completed with white and black mats and layers.  The finished dimensions are 8" x  8"  in size.  All for now, Sue x


                                                        Follow my blog with Bloglovin

Thursday, 21 September 2023

For You

 Hi there my crafty friends!  First of all, I need to apologise as this card got damaged before I was able to photograph it, but I thought it was a pretty card so I wanted to share it with you, but you can see it has some waviness to the top piece of card.   I started with a piece of Antique Gold card and used the Art Deco Rosette to cut into the card.  I backed it with a piece of pixied card that was created using the Midnight Blue Pixie Powder on white gloss card then covered with a piece of cling film.  I cut the centre of the die out of the pixied card and added it to the centre of the card. I cut the Art Deco For You sentiment out of gold card.  I used the extra piece from the Art Deco Ornate Labels to add to the corners.  I cut them out of the pixied card and backed them in gold and glued them into the four corners.   The card was completed with white and gold mats and layers.  The finished dimensions are 7 1/2"  x  7 1/2" in size.  All for now, Sue x 


                                                         Follow my blog with Bloglovin

Wednesday, 20 September 2023

Love Peace Joy

Hello there my crafty friends!  I cut the Christmas Angel 2023 in milk card and antique gold card.  I coloured the hair, face and hands then cut the dress off of the antique gold die cut and glued it onto the milk die cut base.  I added the decorative accents to her dress out of black gloss card.  I cut the wings out of vellum and glued them to the angel.  I cut the Stained Glass Candle outer die out of both white and black card.  I shadowed the white die cut with the black one, then added the angel to it.  I added some gold and black stars randomly to the background.  I cut the Love Peace Joy sentiment from the Christmas Wordie sheets and added it above the angel.  I used the Double Stitched Rectangles and added a black gloss frame over an antique gold background and attached the angel with mounting foam inside the frame.  The card was completed with white, black and antique gold mats and layers.  The finished dimensions are 7"  x  8 1/2"  in size.  


Now for the winner of the September Blog Launch Die Release.  The winner is.................................................................................................................................................

                                              Elizabeth Bennett!!!

Congratulations!  Please email me at americnsue1@gmail.com to confirm your postal address and claim your winning die collection!  All for now, Sue x


Tuesday, 19 September 2023

Ghoulish Greetings

 Hi bloggers!  You may recall that I recently used a piece of pixied card that my grandkids made.  Well this card uses the other half of that pixied card.  It was created using Aqua Lagoon, Midnight Blue and Midnight Sky Pixie Powders.  I cut the Frankie's Frame in black.  I nipped Frankie out of the frame and added the pixied background to it.  I cut the frame again but in white this time and nipped the ghosts out of the frame and glued them onto the black die cut frame.  I added Black Onyx glitter to the bats and I cut a black frame using the Double Stitched Rectangles and I glittered that frame with Black Onyx glitter too.  I cut the Ghoulish Greetings in black and glued it inside the frame.  The card was completed with white and black mats and layers.  The finished dimensions are ???? in size.  All for now, Sue x


                                                        Follow my blog with Bloglovin

Monday, 18 September 2023

Season's Greetings

Hello crafters!  I just love the non traditional colours of today's card, hope it appeals to you too!  I started by cutting three oval frames in white using the Double Stitched Ovals.  I embossed a piece of white card with the Falling Snow Embossing Folder.  I added mounting foam to the back of each of the three oval frames and attached them to the embossed card.  I cut them to match the ovals and added them all to another piece of white card in a row.  I cut the small tree from the Snowflake Tree-O die set out of antique gold card three times, but I backed each one with a different jewel tone card.   I used teal, raspberry and amethyst card.  I added the trees to the frames using mounting foam.  I cut a poinsettia out of the Classic Poinsettia die set using each of the three jewel tones of card.  I added the amethyst and raspberry flowers to the left side of the card and the teal flower to the right side of the card.  I cut the Season's Greetings sentiment out of antique gold card and glued it between the three flowers.  The card was completed with white mats and layers.  The finished dimensions are 7 1/2"  x  11 1/4"  in size.  All for now, Sue x


                                                          Follow my blog with Bloglovin