Saturday, 31 May 2014

Welcome Sweet Spring

Hi bloggers!  Today's card is a bright cheerful one, let's hope the weather matches it  for everyone!  Once again, I am showing the Stitched Flowers from Justrite.  I really liked their whimsical quality.  I stamped each of the flowers on coconut white card and coloured them with Distress markers (Mustard Seed, Peacock Feathers and Spiced Marmalade) and used a white pencil for highlights then cut them out by hand.  The flowers are actually mounted on a piece of white card that has been cut on the diagonal and raised for dimension on to another piece of white card.  I stamped the tag from the set with a black Archival ink pad, added the sentiment and cut it out with the matching tag die.  I mounted it in the upper corner with foam.  I stamped the butterfly from the set and coloured it with coordinating markers and cut it out by hand as well.  Using a fine tipped black marker, I drew a scribbly frame around the top half of the card.  I added some small pearls to the corners and the tag and a thin black mat before finishing with a double white mat with a pierced inner layer.  The finished dimensions are 8" x 9" in size.  Just makes you smile, doesn't it! LOL

The winner of this week's Wednesday Card giveaway is:

Patricia Howarth!!!

Congratulations!  Please email me at americansue1@gmail.com to confirm your address and claim your prize. All for now, Sue x




Friday, 30 May 2014

Congratulations

Hello my crafty friends!  I still have few cards to show from my wedding show in April.  This one is relatively simple and probably doesn't need much in the way of an explanation, but at least I can give you the product names!  I started by stamping my sentiment on the bottom portion of a piece of milk coloured card with a clear Perfect Medium pad.  I heat embossed it with gold detail embossing powder.  Using another piece of milk coloured card, I embossed the background using the Couture Creations folder called Cabernet.  I cut the design so that I had an equal embossed shape around the centre square area.  I matted it with another piece of milk card and taped it in place above the sentiment.  I stamped the Romantic Heart stamp from the Creative Expressions Singles Range two times on to milk card.  I used a Clear Perfect Medium pad and heat embossed them with ivory powder.  I cut both of the hearts out by hand and then inked them with Antique Linen Distress ink to bring the rose pattern out more.  I mounted them on foam in the middle of the embossed background.  I finished the card with a double milk mat with a pierced inner layer.  The finished dimensions are 7 1/2" x 8 1/4" in size.  All for now, Sue x


Thursday, 29 May 2014

Elegant Bow Tie


Hi bloggers!  Another two-fer today!  The first card has the video explanation and you can scroll down to see the second card and how to explanation.

Buy from Joanna Sheen


Finished dimensions are 8" x 8" in size.


For the second card I have selected this cute handbag card which I did using the same paper piecing technique as yesterday's card.  I picked some papers from the Teresa Collins paper pad for my layout.  The peach polka dot paper was simple enough that I was able to stamp my sentiment in the lower corner in black.  I added a strip of darker paper as an accent and used the Decorative Labels Eight along one edge to dress it up.  I cut the Gold Labels Four in two sizes to use as my backdrop for my handbag and inked them both lightly with Tattered Rose.  I stacked them both horizontally across the top of the card.  I stamped the handbag onto a coordinating paper from the pad and cut out everything but the handle.  I stamped it again on to milk card and cut out the entire image and glued the handbag to the top.  I used some tiny dots of PVA glue along the handle and clasp.  I cut several flowers out of felt and inked the edges with Tattered Rose distress ink before assembling them. I used black flatback pearls for the centres.   I added them around the handbag with some black jute as an accent.  I matted the piece with a thin black mat before adding a double milk coloured mat with an inner pierced layer.  Finished dimensions are 6" x 7"
 in size.  All for now, Sue x


Wednesday, 28 May 2014

Wednesday Weekly Card Giveaway

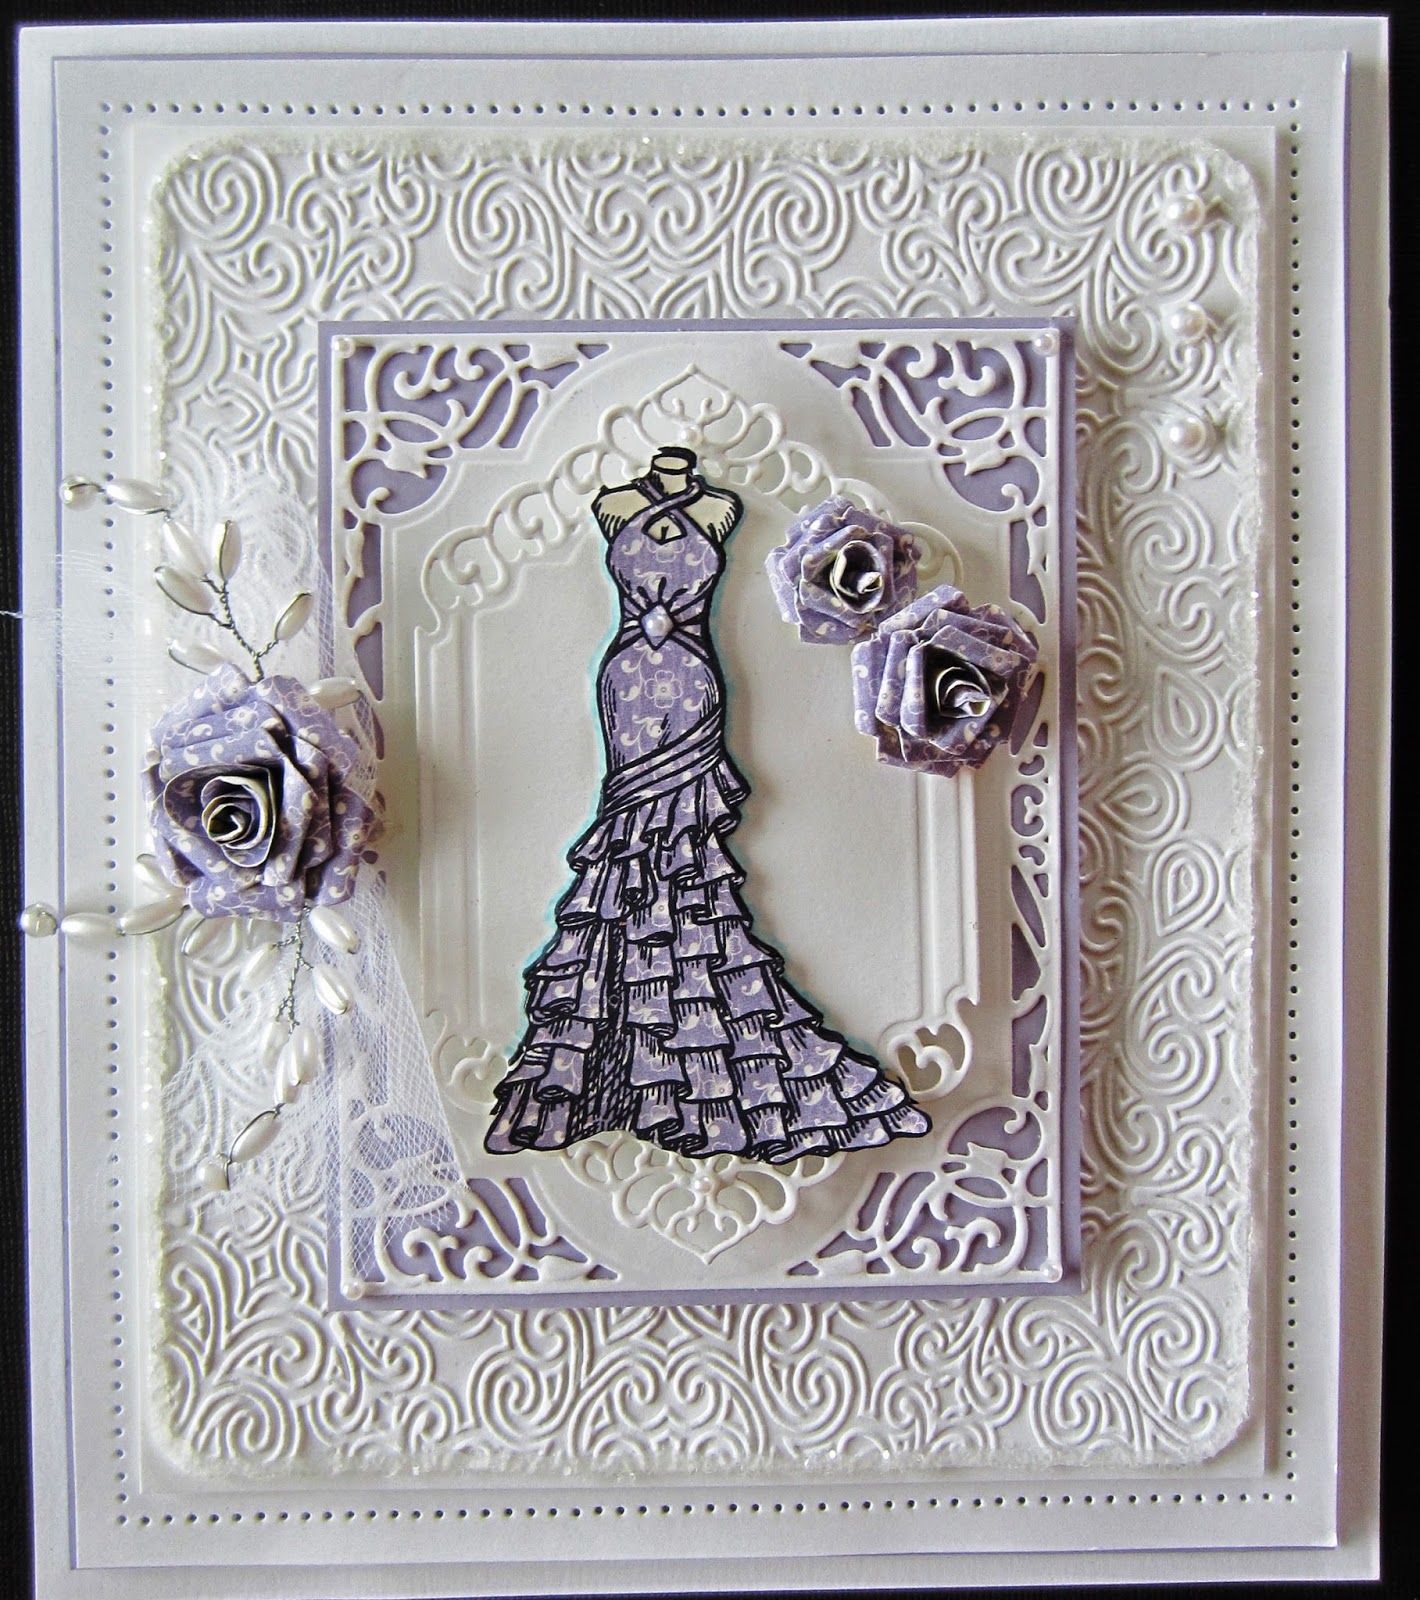
Hello my crafty friends!  I really liked this new die called Divine Eloquence and decided to use it and do a little paper piecing with the Creative Expressions Flamenco stamp from the Singles range to create today's card.  First, I created a textured background by embossing a piece of coconut white card with the Celtic Flower embossing folder.  This one is very detailed so I recommend a light spritz of water before embossing, it helps to soften the paper's fibres so they don't crack.  I used my Cosmic Shimmer dries clear glue around the edge and added some Iced Snow for a bit of bling.  I cut the Divine Eloquence out of white card and backed it with Lilac card cut just slightly larger.  I mounted it in the centre of my embossed background with mounting foam for dimension.  I cut the smaller die as a backdrop for my gown and mounted it with foam as well.  I stamped my ball gown image onto milk card and coloured just the shoulders and neck of the mannequin and cut out thee entire image (you only have to be precise around the top, the rest will be covered with the dress).  I stamped my image again on decorative paper.  I picked a small pattern for this and cut out just the dress.  I glued the dress to the cut out mannequin to complete my paper pieced stamped image.  I mounted the dress in the middle of my die cuts.  Using the same paper that I used for the dress, I die cut several flowers using my Classic Rose die and made three flowers and added them around the stamped dress.  I added some white tulle and a pearl spray with the largest flower and seated the smaller two on the opposite side.  I finished the card with a double white mat with a pierced inner layer and three flatback pearls in the upper corner.  The finished dimensions are 7 1/2" x 8 3/4" in size.  Please leave a comment on today's post if you would like to be entered in the drawing to win this card.  The winner will be announced on Saturday's blog post.  All for now, Sue x


Tuesday, 27 May 2014

Circle of Joy


Hello crafters!  Today's video is probably one of the shortest videos that I made (so no excuse not to watch! LOL)  I show how to use the dies to simply emboss and to cut the design on the same card.  There is a second card for you today since this one was shown during the die release blog hop in February so don't forget to scroll down to see it.

Buy from Joanna Sheen


Finished dimensions are 7 1/2 x 7 1/2" in size.

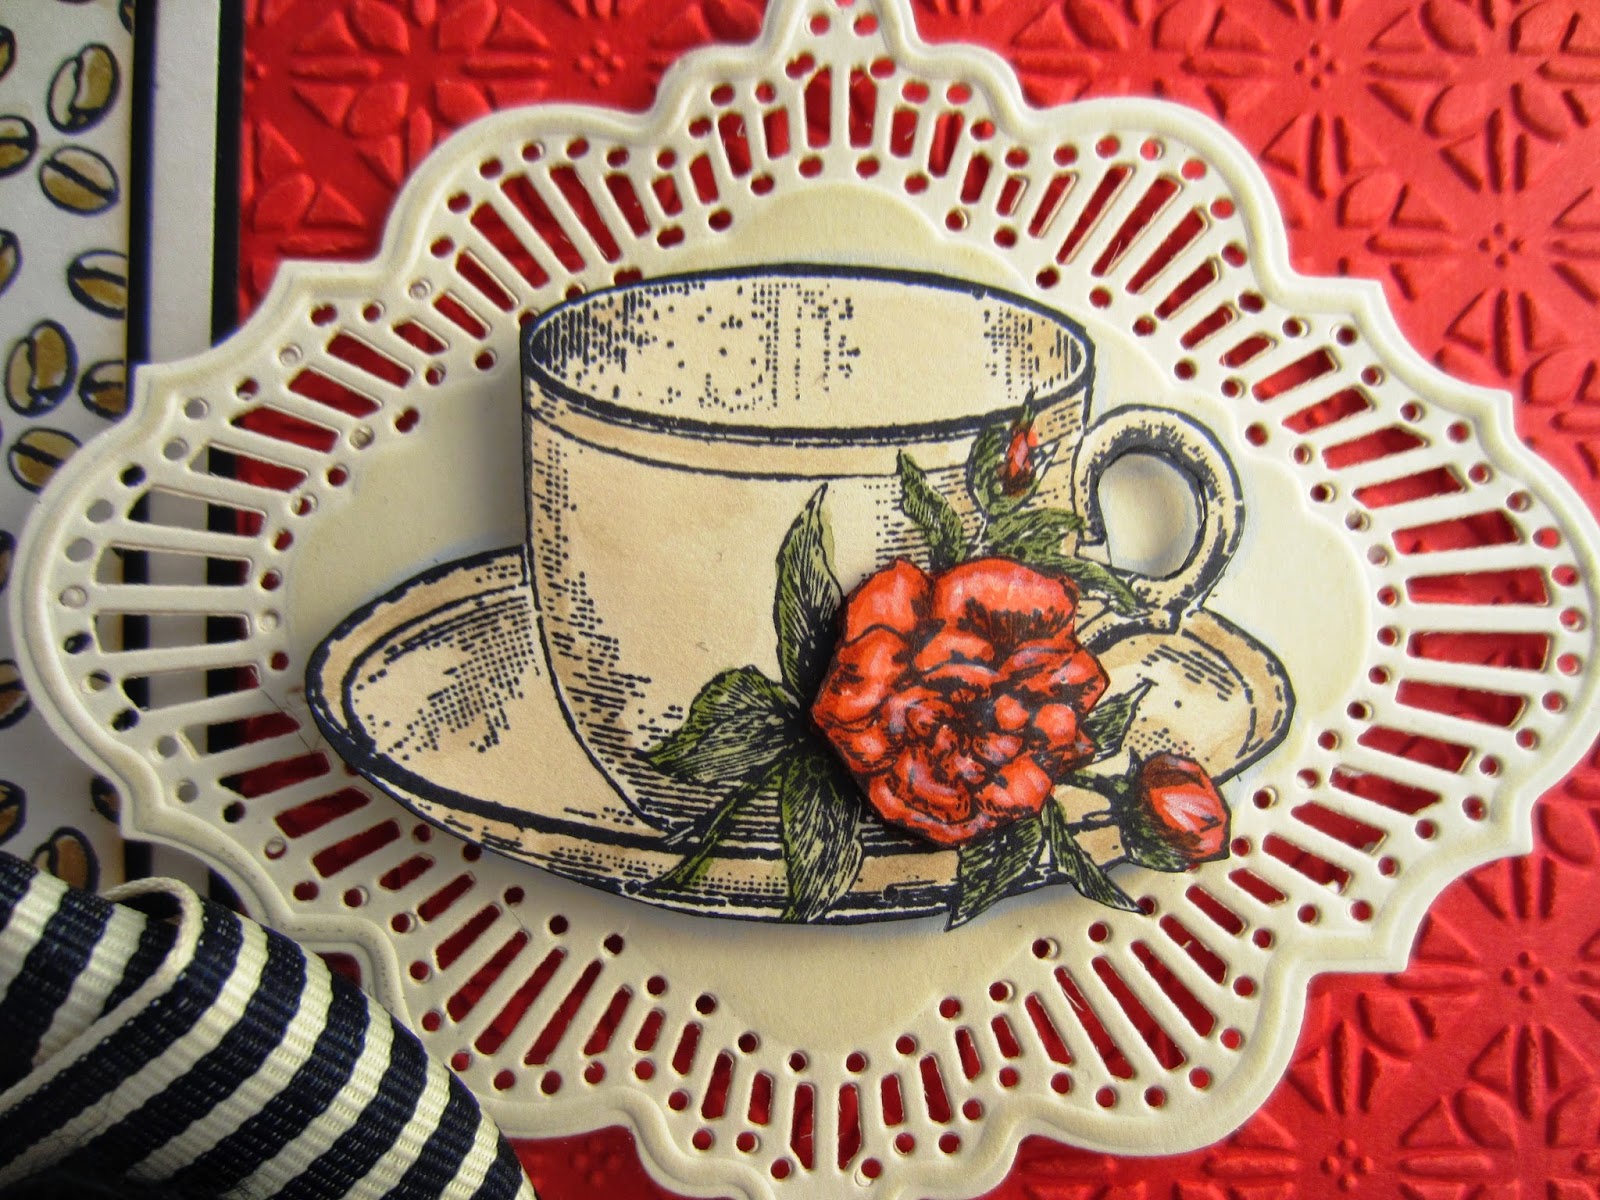
Today's second card features the Coffee Cup stamp set by Justrite for it's focal element.  I started with a piece of taupe card and stamped my sentiment in the corner in black ink.  I added a wide red panel that I embossed using the Quilted Flower embossing folder.  I made a vertical border using the small coffee bean stamp from the set by stamping it repeatedly on to taupe card.  I coloured it with Distress markers and matted it on black and taupe card.  I tied a bow out of the striped black and tan grosgrain ribbon and added a red Dazzler with the metal setting and some jute to the centre of the bow.  I cut the Beverly Hills die out of taupe card and inked it with Antique Linen before removing it.  I stamped the coffee cup twice on taupe card.  The first one, I coloured the cup and cut it out by hand.  The second one, I simply coloured the rose and cut it out and mounted it with foam on the first one. I matted the entire piece with a thin black mat before adding my double taupe mat with the pierced inner layer to complete the card.  Finished dimensions are
8" x 8" in size.  All for now, Sue x


Monday, 26 May 2014

Congratulations

 Hello crafters!  This one is by request from Janet today.  I started with the Cascading Fern Background by Justrite and inked it with Flake and Glitter Glue, stamping it onto white cardstock.  I inked it a second time with the Flake and Glitter Glue to extend the background.  Once stamped, I cleaned the stamp well with a Grime Boss wipe then gilded the stamped image with Calypso gilding flakes.  Using a rubit scrubit pad, I refined the image, removing the excess flake to bring the detail out on the stamped image.  I covered the entire background with a sticky self adhesive sheet.  I peeled the backing paper off and covered the entire piece with Glacier Ice (similar to Iced Snow, but with a cylindrical shape rather than round), giving me a completed "Fire and Ice technique" for my background.  I created a frame using the Grand Decorative Labels One.  I used the largest die, skipped a size and then used the next size down to cut the first frame.  While in the die, I embossed it with the Illusion embossing folder (using the open folder technique so as not to damage the folder).  I cut another frame using the second and third largest dies and mounted it atop the larger frame.  I added mounting foam to the finished frame and placed it over my background and trimmed away any of the background that showed from beneath the frame.  I stamped my sentiment and embossed it with Ancient Copper embossing powder and cut it into a forked strip.  I made three white rolled felt flowers of varying sizes by cutting spirals into circles of the felt then rolling them.  I seated the flowers on some white tulle with pearl strings.  I made two fancy stick pins and added them as well.  I finished the card by adding a double white mat and pearls in each of the corners.  Finished dimensions are 7 1/2" x 7 1/2" in size.  All for now, Sue x