Saturday, 24 April 2021

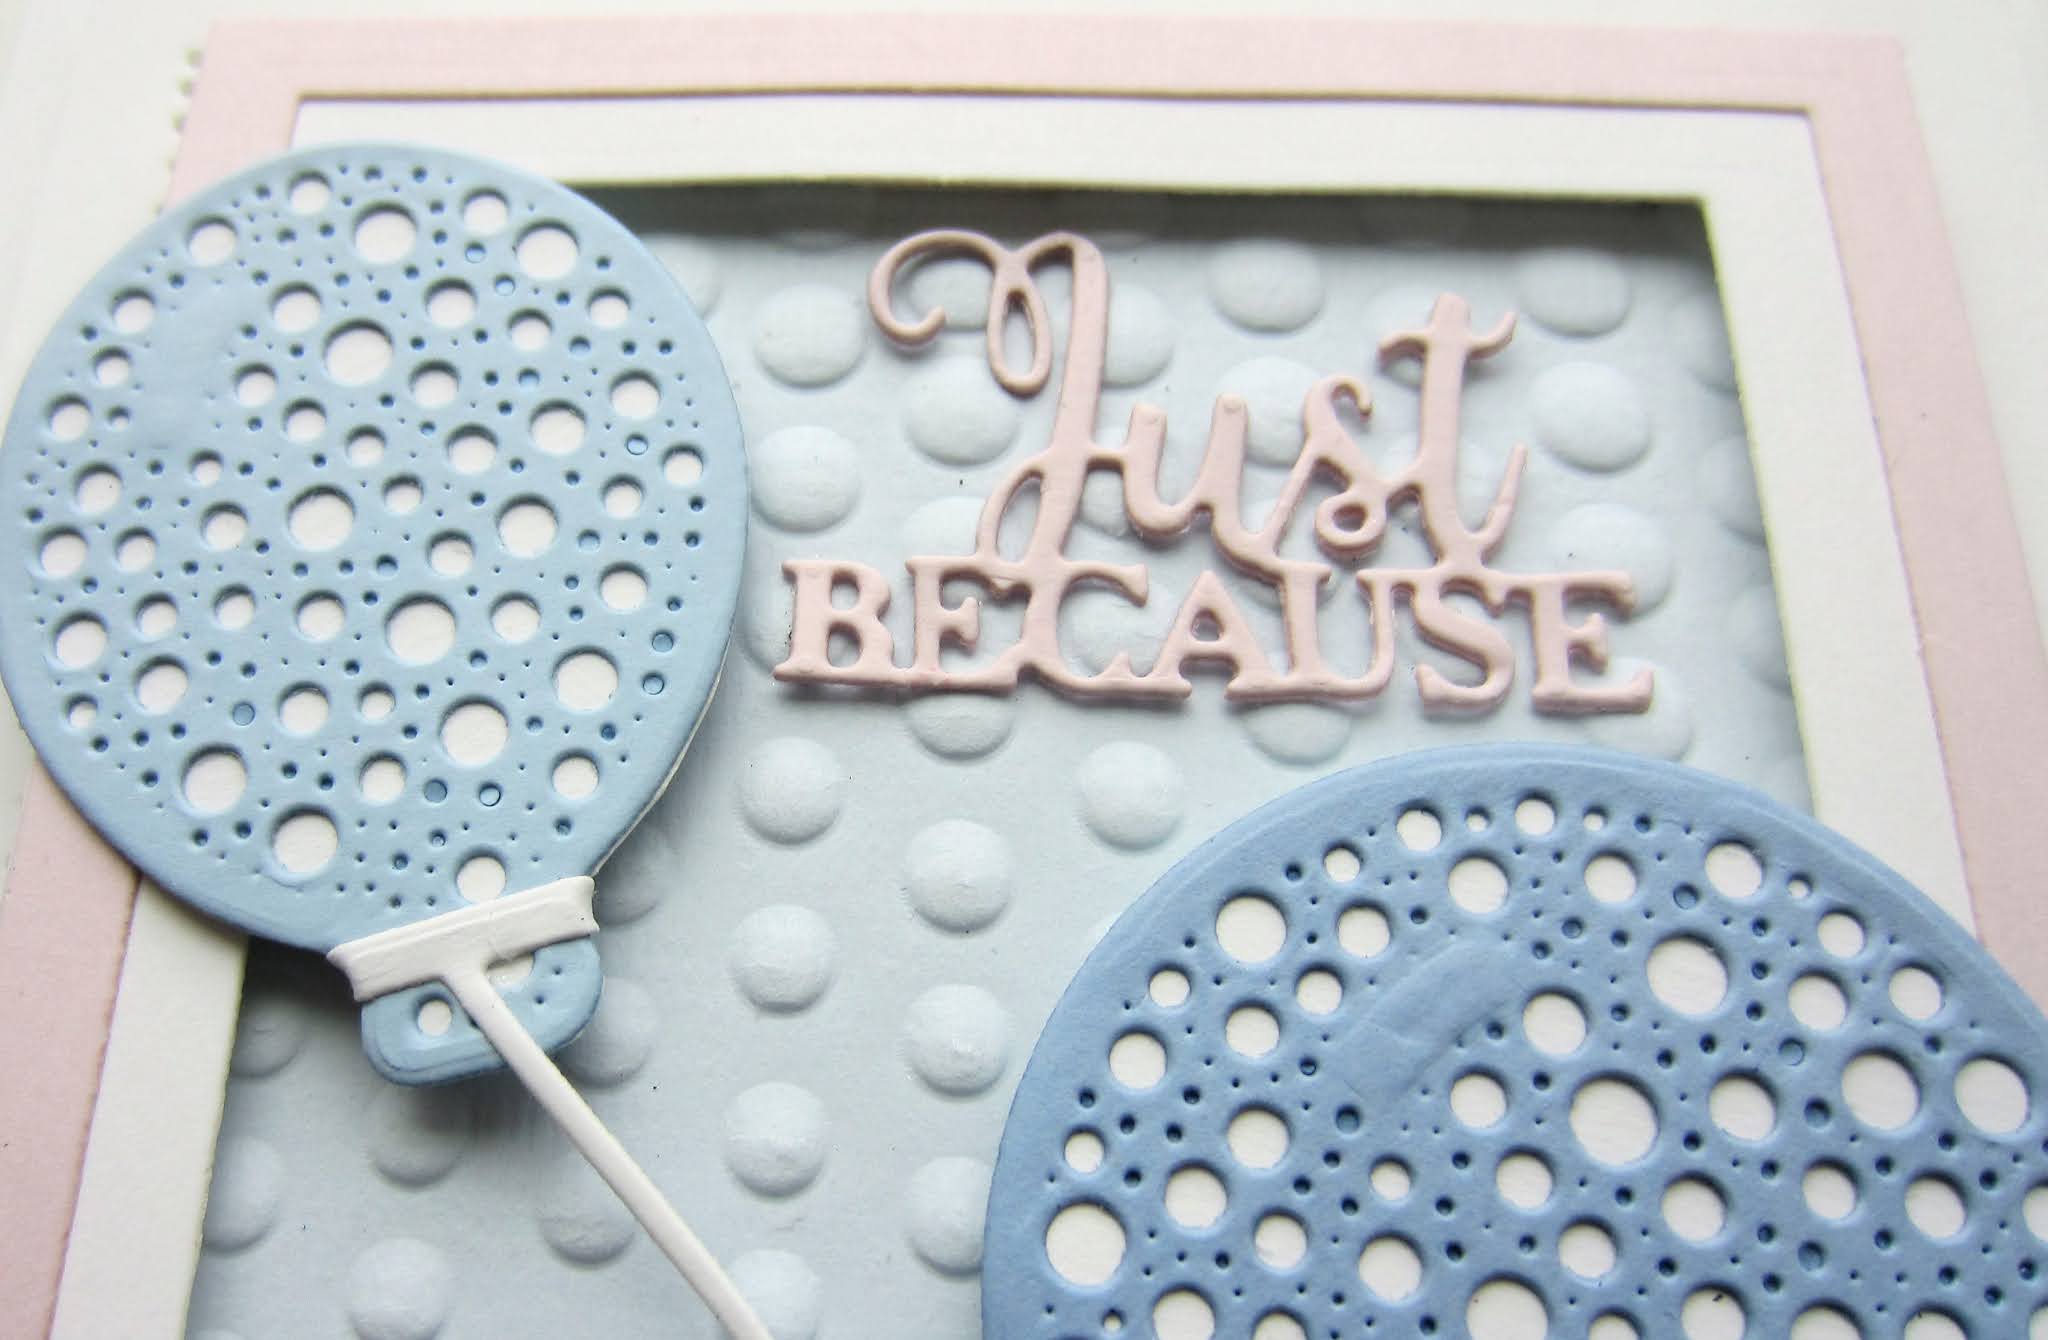
Just Because

Hello there my crafty friends!  I started today's card by embossing a piece of Arctic Blue card with the Graduated Dots embossing folder.  Next I used the Slimline Essential Frames die and made a muli-layered frame using white card for the wider bottom base and Old Rose for the thinner top part of the frame.  I used mounting foam to attach it and raise it for dimension.  Next I used the Dotty Balloon die set and cut the three different balloons out of Sky Blue, Blue Dusk and Powder Pink card.  I added three of the different strings to each of the balloon then added the balloons with mounting foam on to the card.  I cut two of the Just Because sentiment out of Powder Pink card and stacked them then glued them to the top of the card.  I completed the card with white mats and layers.  The finished dimensions are 4 3/4"  x  9 1/4"  in size.  All for now. Sue x


                                                        Follow my blog with Bloglovin

Friday, 23 April 2021

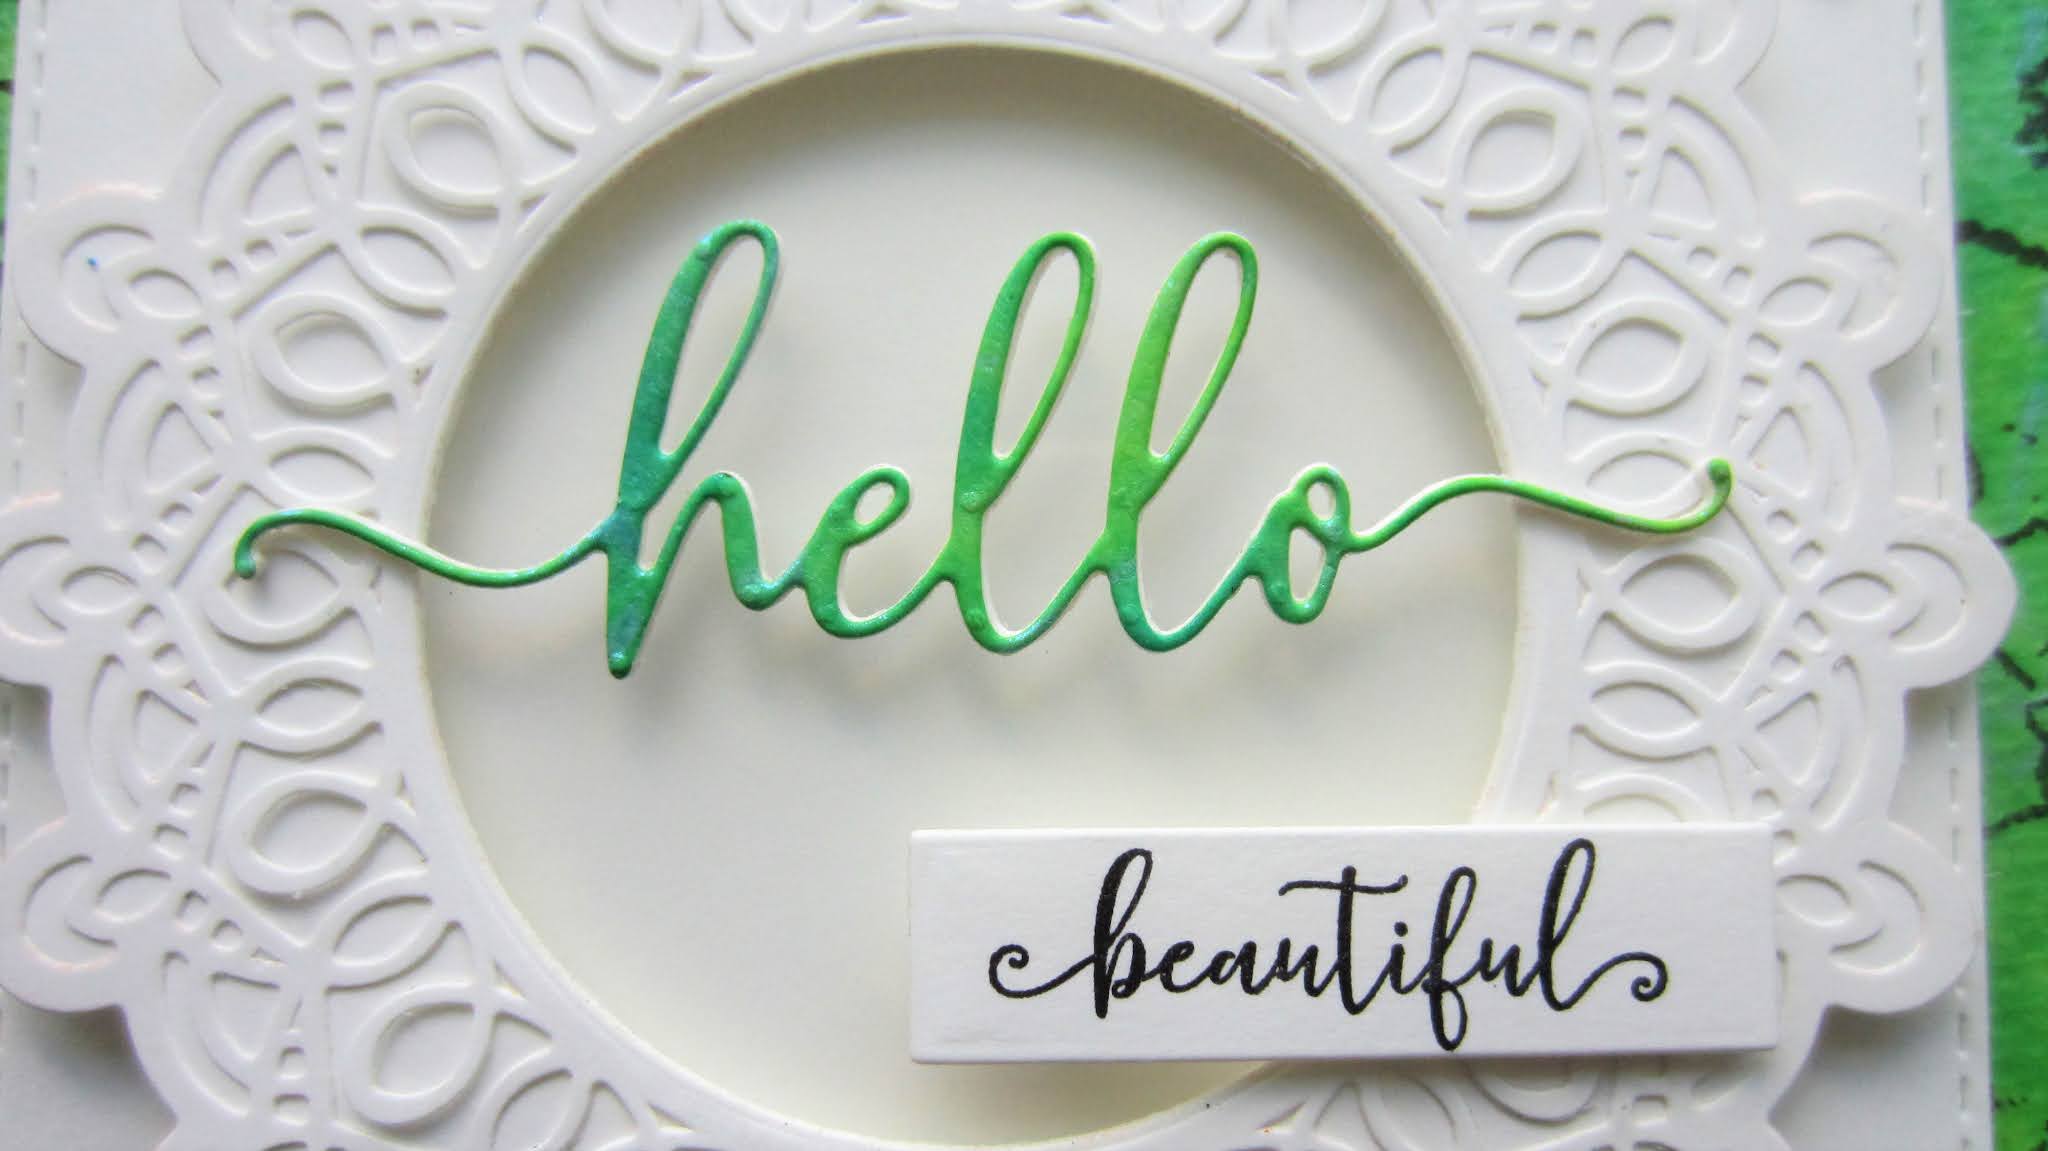
Hello Beautiful

 Hi crafters!  I have pulled the watercolour inks back out for this card.  I used the Lime Sherbert, turquoise Cascade and Ray of Sunshine Yellow Pearlescent Watercolour Inks all over the card.  I spritzed them with water then allowed them to move a bit before adding a piece of cling film and scrunching it.  I set it aside to dry overnight.  Once dry, I removed the cling film and  stamped the card with the crackle stamp from the Background Slices clear stamp set inked with Black Archival ink.  I cut the Eliza die in white, added a white backing then cut the centre out of it.  I added a piece of clear acetate then added mounting foam to raise it.  I added it to a white card cut with the Double Stitched Squares.  From the Hello Die/Stamp Bold Shadowed Sentiment set, I cut the word Hello out of some leftover of the water coloured card and glued it across the acetate.  I used the matching stamp set to stamp the word beautiful and cut it out with the tag die in the set then added it with foam.  The card was completed with white and black mats and layers.  The finished dimensions are 7 1/4"  x  7 1/4"  in size.  

I put the names of the die winners on the blog late yesterday.  Please scroll down to see if your name is on the list!  We still have several that were not claimed yet!  All for now, Sue x


                                                        Follow my blog with Bloglovin

Thursday, 22 April 2021

April Release Die Winners

 Hi crafters!  I hope you enjoyed the April die release!  I know that they are much shorter and sweeter than the larger releases we did last year, but at least you don't have to wait as long until the next one!  Without anymore delay, here are the winners:


Friend Die/Stamp:  Ursula Verwood!!!

Wishes Die/Stamp:  Magic Maggie (Bendy Yorkite)!!!

Hello Die Stamp :  KittyeDavies!!!

Because Die/Stamp:  Helen Bell!!!

Spring Roses and Daffodil Stampcut:  Karen Ladd!!!

Butterfly Stampcut:  Hazel Young!!!

Wild Rose Cluster Stampcut:  Judy from Prosser!!!

Postage Stamp Frames:  Lindyloo12 Somerset!!!

Butterfly Delights:  Elizabeth Bennett!!!

Button Flower:  Cr@fty Heather T!!!


Congratulations all!  Please email me at americansue1@gmail.com to confirm your postal address and claim your winning die.  Please add the name of the die to the subject line when you email me with your postal details.  All for now, Sue x

Sending Love & Hugs

Hello there my crafty friends!  This is one of the cards that I made when I was trying out the newest Vintage coloured Matt Chalk Polishes.  I started with a piece of white card and coated it with the Opulent Olive  Matt Chalk Polish.  Next I embossed it with the Graduated Dots embossing folder.  Using the Sky Blue Matt Chalk Polish, I went over the top of the embossing, just lightly picking up the dots with the blue colour to make them stand out more.  I made a white multi-layered frame using the Double Stitched Squares and added it with mounting foam over the embossed background.  I added a smaller white frame to the centre.  I cut the Sending Love & Hugs die in both white and black and shadowed it, then glued it to the centre of the card.  Using the Striped Nasturtium die, I cut three flowers all with a white base and a black striped piece added on top.  I attached the flowers in opposite corners and accented them with white Lace Edged Leaves.  The card was completed with white and black mats and layers.  The finished dimensions are 8"  x  8" in size.  

Don't forget to check back later this afternoon as I will be posting the names of the die winners from the recent launch.  All for now. Sue x


                                                       Follow my blog with Bloglovin

Wednesday, 21 April 2021

Wild About You

Hi bloggers!  How about this cute little sloth to start off your day!  I used milk card and embossed it with the Pebble Rush embossing folder for my background.  Next I stamped the Sloth stamp and cut it out with the matching Sloth die.  I coloured the stamped image with Distress markers, then added it to a piece of Arctic Blue card.  I cut the foliage from the Moonlit Owl die set several times and coloured the leaves with a Forest Moss distress marker.  Next I cut a frame using the new Postage Stamp Frames out of milk card and added mounting foam to the back of it.  I added the frame over the sloth card, then trimmed away the excess from around the edges.  I added the frame to the embossed background, leaving space below it for my sentiment.  I stamped the sentiment from the Wild About You clear stamp set and cut it out with the postage stamp frames.  I added it with foam below the framed sloth .  I added the foliage coming from the corners of the frame to give it a more dimensional look of a jungle.  The card was completed with milk and black card mats and layers.  The finished dimensions are 7 1/2"  x  8 1/2" in size.  All for now. Sue x


Tuesday, 20 April 2021

Baby

Hi bloggers!  Here's a sweet baby card that I'd like to share with you today.  I started by cutting the Slimline Stitched Oval Aperture Trio in white.  Next, I cut all the animals in assorted shades of pastel card.  I used animals from the Farm Animal die set and the Zoo Animal die set.  I selected custard, soft salmon, wisteria and honeydew card to cut the animals and the bunting in.  I added mounting foam to the back of the aperture trio and added in embossed white background using the Bubble Burst embossing folder.  I arranged the animals in pairs and attached them to the oval apertures with foam.  I cut the word Baby from the bunting die in the Noah's Ark die set and glued it along the top of the card.  I added small hearts cut out of pink card in between the aperture openings.  The card was completed with white mats and layers.  The finished dimensions are 5"  x  9 1/2"  in size.   All for now, Sue x


                                                       Follow my blog with Bloglovin

Monday, 19 April 2021

Happy Birthday

 Hello there my crafty friends!  How's this for a bright and cheery birthday card!  I started with a piece of white card and used Sun Yellow, Lava Red and Burnt Orange Pixie Powders all over it.  I dried it with a heat tool then used an anti static bag all over it.  Next I used the small birthday stamp that comes with the Happy die/stamp combo set and stamped it randomly all over the background piece using a clear perfect medium pad.  I coated it with clear detail embossing powder and heat set it.  It adds a nice subtle touch to the background, but if you would like it more prominent then you just need to do the stamping before you pixie, the words will stay the colour of the card.  I used the leftover piece of the pixied card and cut the Happy word out of it.  I kept all of the fall away pieces and paper pieced them back into the Happy die cut in black and glued to a piece of white card.  I stamped the birthday stamp again in black and cut it out with a tag and added it with foam to the bottom of the card.  The card was completed with white and black mats and layers.  The finished dimensions are 8"  x  9 1/2"  in size.  All for now. Sue x


                                                       Follow my blog with Bloglovin