Wednesday, 26 March 2014

Wednesday Weekly Card Giveaway/ It's A Two- Fer

Hello all!  I have a double card giveaway today.  Since I am no longer doing any of the Heartfelt Creations shows, I thought I would offer up a couple of the cards for the giveaway this week (and maybe next week too!)  We have one white and one black card, just for a bit of variety!  For the background of the first card, I stamped the Majestic Morning flowers all over using a Clear Perfect Medium.  I heat embossed them with white detail embossing powder for a tone on tone look.  In the centre of the card, I cut a Stately Circle die, giving me an aperture to use.  I added mounting foam to the back to raise it for dimension.  I added it to a thin periwinkle blue mat.  The Stately Circle cut earlier was recessed back down into the aperture, showing the blue card through the cut outs.  I stamped a sentiment from the Creative Expressions stamp set called Nature's Sentiments and cut it out with a smaller die from that set and added it in the centre.  I stamped the Majestic Morning flowers in black onto periwinkle card and cut them out with the matching die.  I added black glitter to the edges of each of the petals after assembling each of the flowers.  I tied a messy bow out of black seam binding, added some white tulle and pearl strings and seated the largest flower on it.  I added a few more flowers on the opposite side of the sentiment.  I made a stick pin using beads from my craft stash and added it to my bow.  I finished this card with a double white pierced mat layer.  Finished dimensions are
 7 1/4" x 8 1/4" in size.  Scroll down to see the second card on offer.


 Card no. two for today's giveaway.  This one was a demo during my last Heartfelt Creations shows in January.  I started with a piece of black card and stamped the background using a Clear Perfect Medium pad.  I heat embossed it with gold.  Using mica powders, I made a paint by adding some water and coloured all the flowers with it.  Mica powders really pop against black card, giving a cloisonne look to them.    I used a small circle die to cut the opening in the background area.  I masked some of the vines on the stamp and stamped the sentiment and cut it into a strip.  I tucked the end into the opening and gave it a bit of dimension.  I made a scrunched flower using the Majestic blooms cut out of lavender card.  I added the flower with a black jute bow to the corner of the sentiment strip.  I matted the background with a thin lavender mat, then added a black mat edged in Midnight Snow before finishing with a double gold pierced mat layer.  Finished dimensions are 6 1/4" x 7 1/2" in size.

If you would like a chance to win either of these cards, please leave a comment on today's blog post.  The winners will be drawn and announced on Saturday's blog post.

A couple of quick announcement to make too today.  Firstly, Julia Watt's showtimes have been changed for today.  They are now 10am and 1pm today so don't forget  to tune in and set your recorders!

The other thing that I wanted to say was a great big thank you for everyone that took the time to go vote for Nick!  Although the outcome wasn't what we had hoped for as C & C cancelled the competition before it ended.  While Nick does maintain an address in the UK and C & C emailed him to say that that was fine, there were others that complained, so they decided to just cancel it.  So many of you have emailed me about sending donations directly to Nick to help with his club and that is fabulous, but it is very expensive to ship to Bulgaria.  I know this first hand as I sent him a parcel last month.  He would be grateful for any donations and has said that I can even give out his address, you just need to email me.  Someone else suggested doing a donation in the form of vouchers for Joanna Sheen's website as she ships internationally for free.  I think that would be a better way to go and probably less expensive in the long run if you would like to help out.  Nick would even be able to pick out the consumable items that he needs the most for his craft club too that way.  He was so overwhelmed at the response from everyone and is just humbled and pleased that so many people want to help.  I told him that my blog family is like that!  (I am such a proud Mom!)  All for now,
Sue x


Tuesday, 25 March 2014

With Kindness

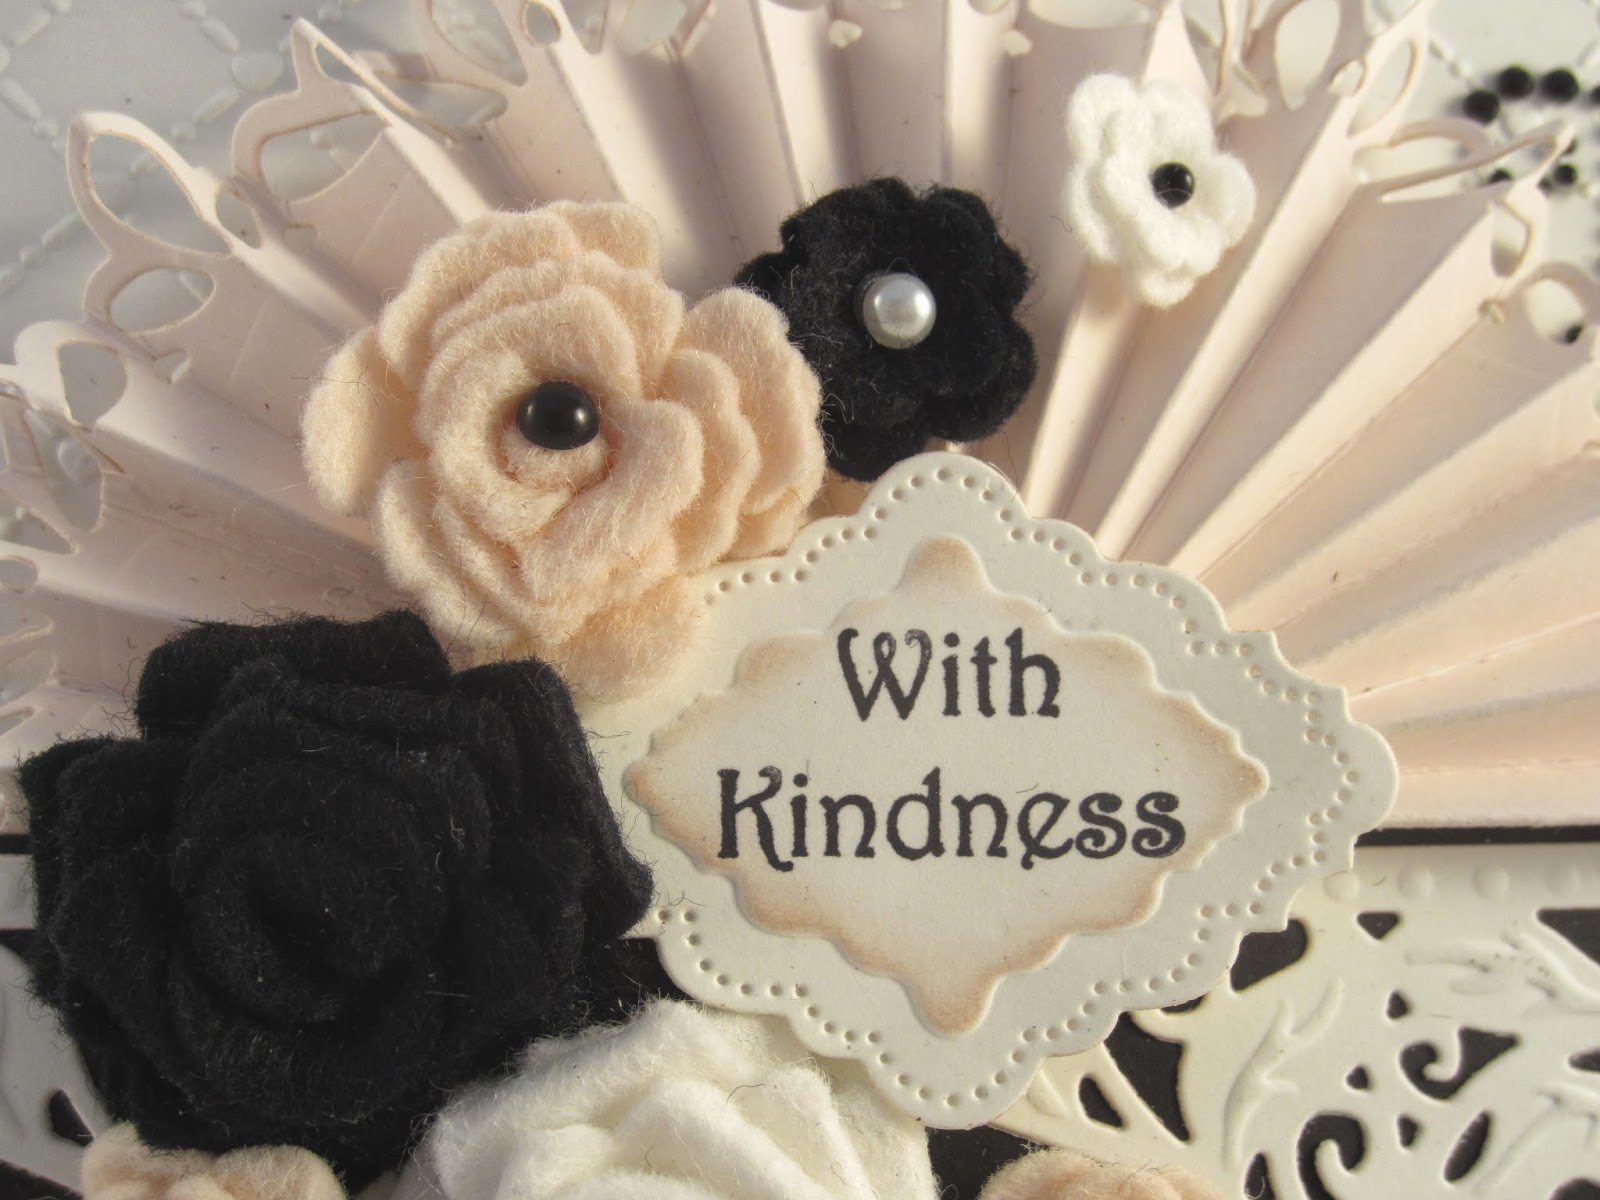
 Hello my crafty friends!  Here's a card I made using my new die line.  I started by embossing the background using my Heart Lattice embossing folder.  I used the Calabria die cut out of blush card.  I scored it and cut into the centre then concertina folded it to create a fan shape for the background.  I tucked the edges under the Spanish Collection border cut out of white card.  I cut a black strip to mat it with.  In the area below the border I cut a Hollywood die from the California collection.  I cut it in half and then used the pieces offset, tucking the ends under the border.  I stamped a sentiment and cut it out with Decorative Frames Set B and inked through the die with Spun Sugar  I mounted my tag in the middle on foam pieces.  Using the Classic Rose die, I created a variety of flowers out of blush, white and black felt and added white and black flatback pearls to the centres.  I arranged the flowers across the card and the fan as embellishments.  To finish, I added two black rhinestone swirls in opposite cards.  The last step was to add my double white pierced mat layers.  Finished dimensions are 8" x 8" in size.  All for now, Sue x


Monday, 24 March 2014

Welcome Spring

 Hi Bloggers!  The title is more of an invitation than anything! Well, here's hoping at least!LOL  I just loved these cute bunnies, so sort of Beatrix Potter looking I think.  This is from my last shows using the Justrite stamp set called Welcome Spring.  With Easter right around the corner, I thought I should post of few of these for you to see.  I started with paper from the Teresa Collins paper pack in the aqua colour.  I used the script for the background piece then created a side border using the coordinating harlequin print. For the main focal element I used the coordinating zigzag border pattern and stamped my sentiment in the lower corner.  I added an edge of Iced Snow to this piece as an embellishment.  On a separate piece of coconut white card, I stamped both bunnies and the basket.  The basket stamp is empty but there are a few other stamps that can be used to fill it up.  I selected the floral stamp and added it to the basket.  I coloured all the pieces with Distress markers and cut them out by hand.(yes that is still done! LOL)  I always run a black marker around the edges when I hand cut which takes away that unsightly white edge.  I added some Diamond Sprinkles to the flower centres and to the pink bow on the bunny.  I cut a Gold Element Four die and inked it with an aqua Adirondack pad through the die.  I mounted it on foam in the middle of the card and added my basket and one of the bunnies.  I mounted the other bunny below it.  I added a messy bow tied from turquoise seam binding and an aqua Bakers Twine bow before adding a small pearl embellishment to the centre.  I added a double white mat to the card and finished it with Cosmic Shimmer white PVA glue dots around the edge.  So sweet, isn't it!  Finished dimensions are
7 1/2" x 8" in size.  All for now, Sue x


Sunday, 23 March 2014

You're Amazing

Good Sunday morning all!  Another older card that hasn't had it's day on the blog yet!  I started by stamping the Vintage Alphabet Soup stamp from Justrite in black on coconut white card.  I covered it with a self adhesive sticky sheet, peeled the backing paper off and sprinkled polished silk Glitter over it in a random fashion.  I used the Vintage Violet, Ice Blue and Lavender Polished Silk Glitter for this background.  Once the glitter is on the sticky sheet, you need to use your finger to burnish it down well and dust away the excess.  Next step is to cover it with another piece of sticky adhesive sheet, peel off the backing sheet  and then coat it with clear micro beads. This gives a sort of holographic look to it.  A bit of work, but the finished result is really rather nice up close.  I cut it into a wide strip and matted it with a thin white and black border.  I cut a piece of coconut white card to use as a background and embossed it with the Wild Holly embossing folder from Couture Creations.  Using Becca Feeken's Vintage Label and Tag die, I cut two tags, nipped them in half and used three of the pieces to mount off the edge of my glittered strip.  I added a sentiment to the bottom of the card from the Bold Sentiments by Creative Expressions and cut thin black and white border to separate the two parts of the card.  Using some of the dark aqua felt from the Blossom felt package, I cut a flower from Spiral Blossom Four and rolled it. I added it atop a black seam binding messy bow with a jute twine bow.  I added a single black pearl in the centre of the flower.  Finally the card was completed with a double white pierced mat.  Finished dimensions are 7 3/4" x 8 1/2" in size.

The winners for this week's comment game are:
Fame01!!!
Norah McPhee!!!
Alimecca!!!

For the extra qualifying post of Mar. 18th, the winners are:
Nanny Jo!!!
Janet K!!!
Joanna Dickson!!!

For the extra qualifying post of Mar. 19th, the winners are:
Sharica!!!
Glennis!!!
Ladyweir!!!

Congratulations all!  Please email me at americansue1@gmail.com to confirm your address and claim your prize!

I just wanted to add that my next shows on Create and Craft have changed dates and they will now be on April 6th.  I have also added some dates for demos and exhibitions (Ally Pally!) on the right hand side of my blog.  I will be updated these with a few more dates and places once they are confirmed.  All for now, Sue x


Saturday, 22 March 2014

Vintage Rose

Happy Weekend all!  Another Justrite rose sample today.  I started with some card from my stash (can't really describe the colour except for a pinkish lilac maybe) and paired it with milk coloured card.  Starting from the background, I used the new Baroque mask and inked the mask with Clear Perfect Medium and carefully laid it on top of my card and letter pressed it through my GC to transfer the ink to the card.  I heat embossed it with our new Ivory embossing powder.  I love this as it matches our milk card so nicely!  I have never been able to find ivory embossing powder before so I am chuffed to bits to have this in our line now.  I decided to create a frame for my rose and background by using the Grand Square dies.  I picked a couple of sizes and used the in between sizes to create an embossed design into the frame.  I think that this is easier to do if you emboss first, remove the centre dies, then cut (it keeps that problem with the card coming out of the dies from happening). I added mounting foam to the frame and added it over my letter pressed background.  Next I stamped the Vintage Rose by Justrite using a Coffee Archival ink pad.  I coloured it with Distress Markers and cut it out with the matching die.  I stamped it again and coloured just the rose and fussy cut it to add to the original with mounting foam.  I decided to add a bit of a decorative backing to it so I cut one of my California Collection Decorative Frames with the centre cut out in the same pinkish card and underneath that I added a Gold element Four die cut out of milk card.  I liked the way these two layered up.  I tied a messy bow out of chalk seam binding and added a satin flower with a pearl centre from my stash.  Finished dimensions are 8" x 8" in size.

Time to announce the winner of the card giveaway.  This week's winner is:

Margarita Lady!!

Congratulations! Please email me at americansue1@gmail.com  to confirm your address and claim your prize.  All for now, Sue x


Friday, 21 March 2014

Friends Are The Sunshine Of Life

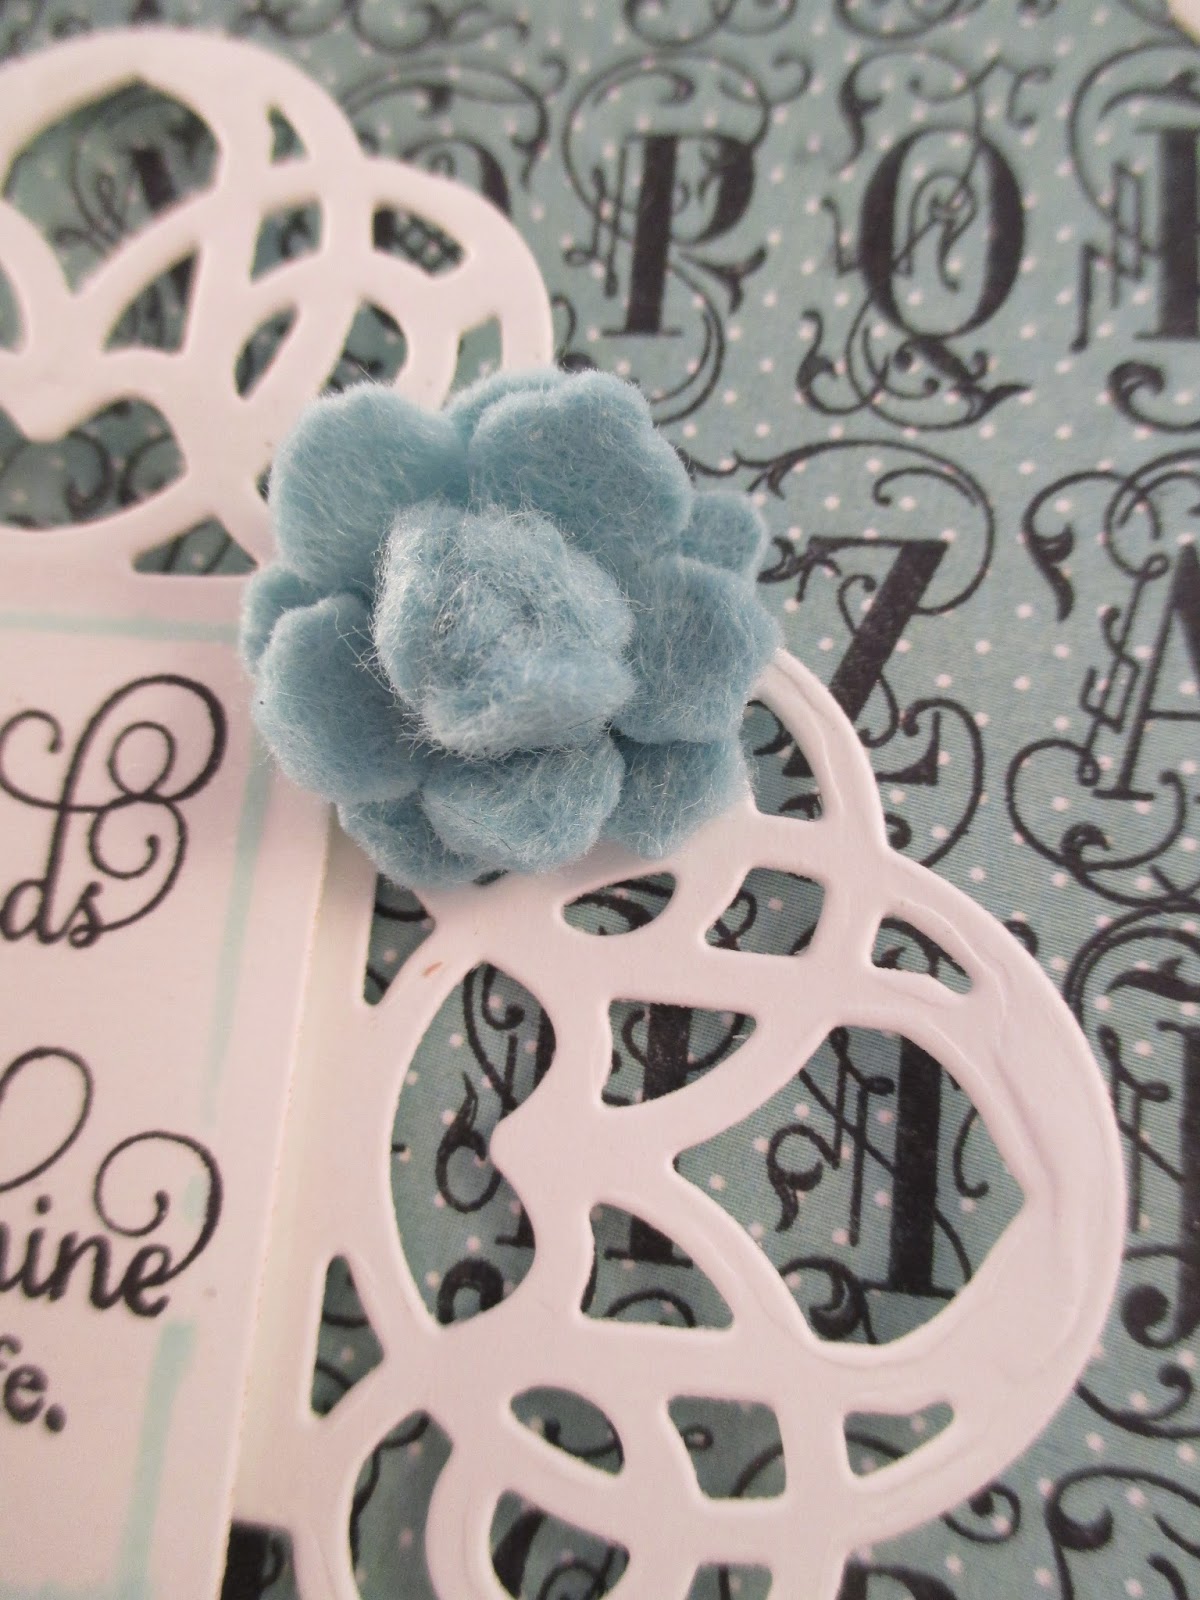
 Hi guys!  This card was a sample from shows in December that I missed.  I picked a piece of aqua decorative paper from the Teresa Collins paper pad exclusive to Creative Expressions.  I stamped the Vintage Alphabet Soup background by Becca Feeken on it using a black archival ink pad.  I trimmed and matted it with a thin white mat and a larger black mat.  In the corners, I used the small die from the Vintage Bracket and Label die set also by Becca Feeken.  I thought it just looked like it would be a cute embellishment in the corners to add some interest to the background.  I popped flatback pearls in the opening in the centres.  For the focal element, I went back to the same set and cut two of the tag dies in white card.  On one of them, I stamped my sentiment from the Sunflower Vintage Labels Five set by Justrite.  I inked it with Aqua Adirondack before removing it from the die.  I crisscrossed the tags to create a pretty focal piece.  Using the matching felt from the Blossom felt pack, I cut the Vintage Floret die to create a few flowers.  I added them around my sentiment with a messy bow tied from white seam binding and a black jute twine bow.  One of the flowers, I added a bud to the centre and the other was adorned with a pearl.  A real quickie of a card this one was and we always can use a few like that, don't you think!  Finished dimensions are 6 1/2" x
7 1/2" in size.
   I have a really big favour to ask of my blog family today.  I don't usually do things like this and I wouldn't ask if it weren't for a really good cause.  Nick Roberts is part of our blog family and he used to live in Barnsley, but has moved to a very rural village in Bulgaria for health reasons.  He has started a craft club for the kids in his village that has become very popular with the locals (in fact it is overflowing with people of all ages wanting to learn craft!).  Nick has done all of this out of his own pocket and with the help of only a few donations.   He is entered into a Scan and Cut contest sponsored by Create and Craft to win £500 of crafty goodies and I would like to ask if you could all place a vote for Nick's card so he can win the goodies to help support his blossoming kids craft club in his village.
The link is:  https://www.facebook.com/CreateandCraft/app_1418210811744035
This will take you to the voting page and you need to scroll down to vote.  His card is the one seen here and it has his email on it (Trent999)  It would be lovely for him to win so he can continue growing his craft club.  Voting ends at Midnight Saturday.  Thank you so much!  All for now, Sue x


Thursday, 20 March 2014

Thinking Of You

Morning all!  Here is another one of the cards using some of my dies in classic black and white.  Today's card features the Calabria set from the Italian Collection, the border from the Spanish Collection and the Classic Rose die set.  I stamped my sentiment from the Bold Sentiment set by Creative Expressions in black archival ink in the upper corner of my coconut white card.  I used another piece of coconut white and embossed it with the Extra Confetti folder by Couture Creations and cut one side on the diagonal, adding it to the bottom of my background.  I cut a border from the Spanish Collection, backed it with white and then matted it with a thin black mat.  I taped it on the diagonal between the two background sections and trimmed the edges.  Next I cut the Calabria die from the Italian Collection in black and then cut it down the centre.  I glued the halves above and below my border but offset them.  Using the Classic Rose die set, I cut several of them in both black and white in a variety of sizes with the decorative insert piece.  I cut a slit to the centre in each of them and folded one section behind so it turned them into five petals instead of six.  I curled the petal edges and added flatback pearls to the centres of each of them, giving you yet another style of flower from this very versatile set. I assorted them across my card diagonally, slightly overlapping some of them.  I added some black rhinestone swirls as embellishments.  I finished the card with a bit of black and white matting and a double white pierced mat.  Finished dimensions are 8" x 8 1/4" in size.

I just need to mention that if you use the blog to send any emails to me, I am not receiving them.  They actually come from "noreply@blogger" and for some reason I am not getting them.  If you want to email me please use americansue1@gmail.com that way I am sure to receive it and can reply back to you.  Thanks!  All for now, Sue x


See "Pin" button here!