Hi bloggers! I am going clean and simple for today's treat. These darling birdhouses from the Home Tweet Home set really lend themselves to this style too. I started by cutting a couple of white rectangles using the Double Stitched Rectangles Set B and stacking them for a background. I added them on to a piece of taupe card that I cut the sentiment out of the bottom edge. I added a red strip behind the sentiment to show through and a couple of the hearts that are the fallaway from the heart birdhouse. I did each of the birdhouses in taupe card and inked through them with Antique Linen to show off the wood grain look, but then added different coloured roofs. Although I used each of the different porches from the set, I did them all in taupe card as well as the bird house stands. I did add a single bird to the centre house (he is looking out for the rest of the flock to arrive soon! LOL) I couldn't resist a red and white Bakers twine bow in the corner. I finished the card with white, taupe and red mats and layers. The finished dimensions are 7 1/2" x 7 1/2" in size. All for now, Sue x
A daily papercrafting blog which features my handmade cards showcasing Creative Expression's products including my own line of cutting dies and embossing folders, Cosmic Shimmer, Ranger and more which use various techniques and ideas to hopefully inspire the creativity in you.
Tutorials
- Home
- My Ribbon Flower Tutorial
- Fancy Nestie
- Blossoms Five Flower Bud
- Blossoms Five Full Flower
- Easel Tutorial
- Wax Paper Embossing Folder Tutorial
- Caught In Crystal
- Shaving Foam Tutorial
- Quilt Card Tutorial
- Paved Pearl Technique
- Faux Leather Technique
- Plaited Ribbon Wreath Tutorial
- Paper Rose Tutorial
Thursday, 6 September 2018
Home Tweet Home
Hi bloggers! I am going clean and simple for today's treat. These darling birdhouses from the Home Tweet Home set really lend themselves to this style too. I started by cutting a couple of white rectangles using the Double Stitched Rectangles Set B and stacking them for a background. I added them on to a piece of taupe card that I cut the sentiment out of the bottom edge. I added a red strip behind the sentiment to show through and a couple of the hearts that are the fallaway from the heart birdhouse. I did each of the birdhouses in taupe card and inked through them with Antique Linen to show off the wood grain look, but then added different coloured roofs. Although I used each of the different porches from the set, I did them all in taupe card as well as the bird house stands. I did add a single bird to the centre house (he is looking out for the rest of the flock to arrive soon! LOL) I couldn't resist a red and white Bakers twine bow in the corner. I finished the card with white, taupe and red mats and layers. The finished dimensions are 7 1/2" x 7 1/2" in size. All for now, Sue x
Wednesday, 5 September 2018
Thanks So Much
Hi crafters! Here's a pretty card that uses the Phoebe die to make a lovely focal element. I started by cutting the Lattice Edging die twice out of milk card and gluing them to the sides of a larger piece of milk card. For the focal point, I cut four of the Phoebe die out of milk card. I backed one of them with Deep Blue card and cut one of them in half. I started building from the centre using the blue one and I attached two of the milk die cuts behind it to the top and bottom, slightly overlapping them. Next I glued the cut halves of the fourth one to the centre back on each of the sides and I mounted the entire piece in the centre so it was nicely framed by the Lattice Edging dies. I stamped my sentiment then cut it out with the oval from the Phoebe die and mounted it horizontally across the centre after lightly edging it with Chipped Sapphire distress ink. I used the small flower die from the Chloe set and added some matching Deep Blue card flowers scattered across the centre. The card was completed with milk and blue mats and layers. The finished dimensions are 6 1/4" x 9" in size. All for now. Sue x
Follow my blog with Bloglovin
Tuesday, 4 September 2018
Let it Snow Card
Hi bloggers! Here is a lovely card idea for your festive cards that is easy to do and doesn't take very log to create either. Perfect for those batch cards!
The finished dimensions are 7 1/2" x 7 1/2" in size. All for now, Sue x
Monday, 3 September 2018
I Do
Hello crafters! Need a nice wedding card? I think this one will fill the bill! I started with a piece of milk card and embossed it with the Swirling Hearts embossing folder. I used Spun Sugar Distress ink around the edges for a soft pink hue. I matted it with black then cut a smaller set of rectangles using the Double Stitched Rectangles set B out of milk and black I inked the milk card to tone in with the background. I cut a pair of champagne flutes out of milk card and the I DO out of milk and black card. I crossed the flutes then added the bow from the Happy Easter Egg set and added the sentiment with the black shadow next to it. In both of the opposite corners, I used the Passion Flower die set and inked the backing with Spun Sugar before assembling. Tiny pearls were added to the centres then I seated the large flower on a silk bow and added leaves to all the flowers. Milk mats were used to complete the card. The finished dimensions are 7 1/2" x 9" in size. All for now, Sue x
Follow my blog with Bloglovin
Sunday, 2 September 2018
Just Wanted To Say
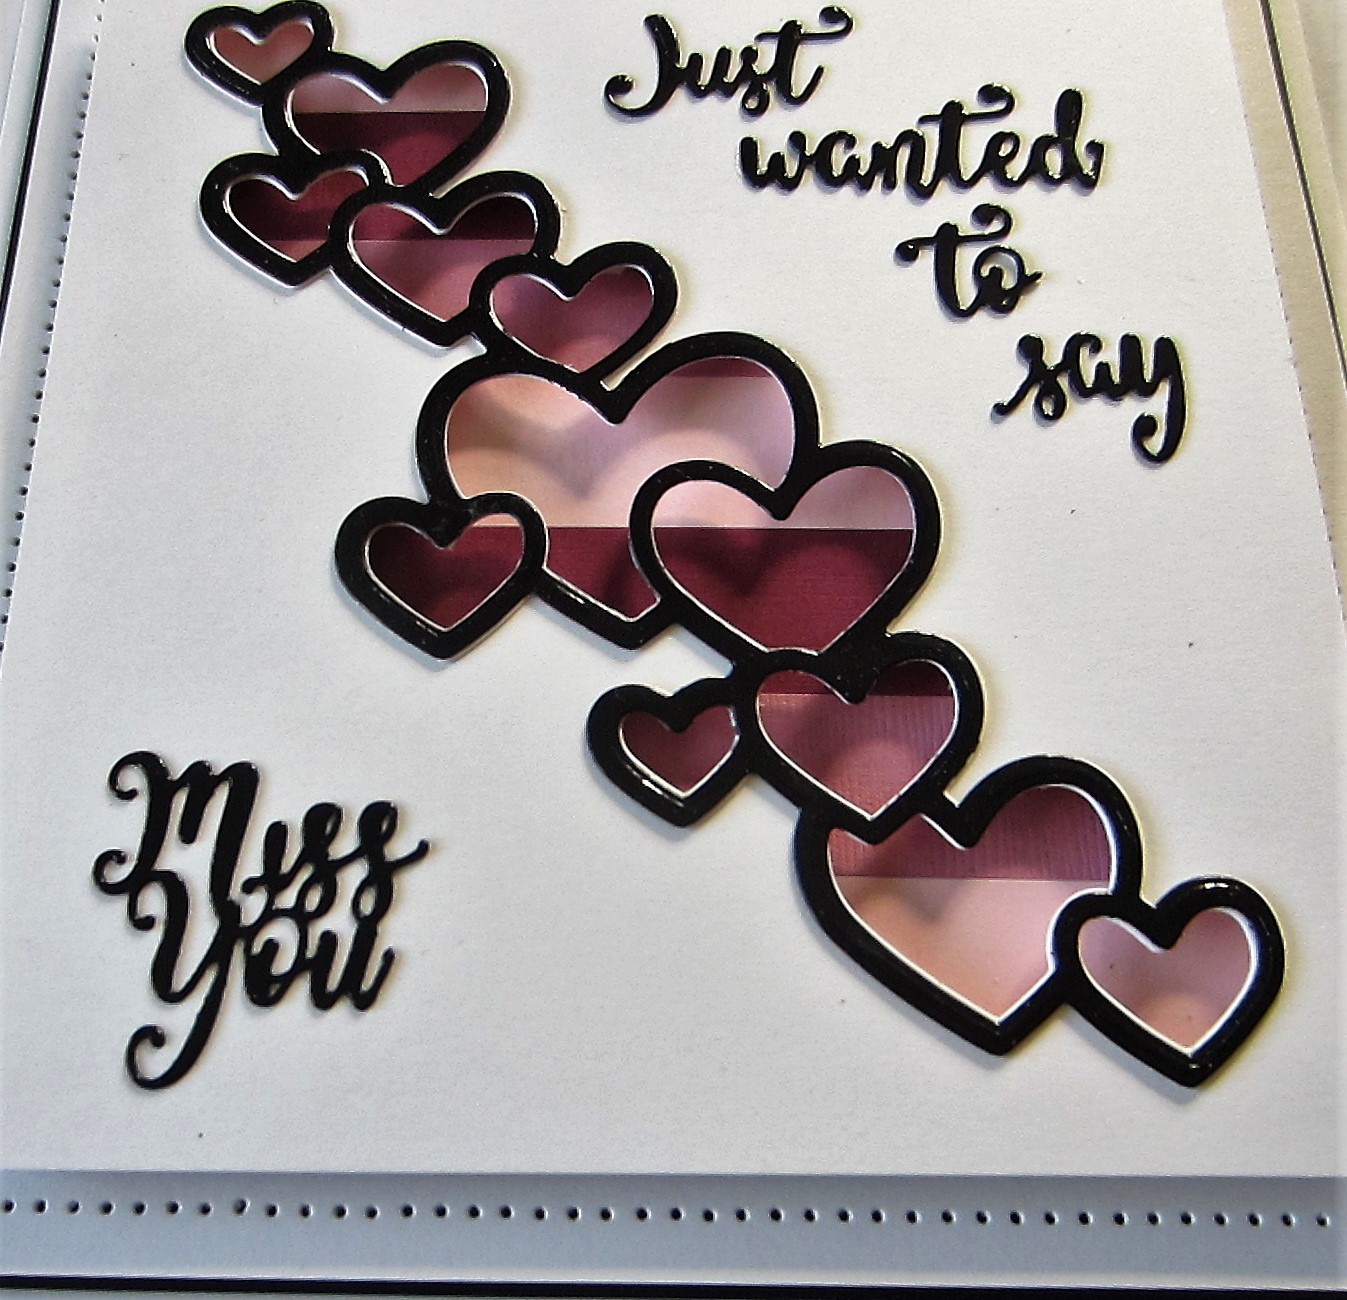
Good Sunday Morning all! I thought I had posted this one, but turns out it has missed it's day on the blog, so I am rectifying it now! I started by cutting an aperture in a piece of coconut white card using the Cascading Hearts die set. Next I headed to my rather large box of offcuts and pulled out several shades of pink and deep maroon and cut them into 3/4" strips and glued them on to another piece of card. I raised the aperture with mounting foam, then added it over my striped background piece. I cut an outline for my aperture in black gloss card and white card and left a small white shadow on it. Out of black gloss card, I added the mini expressions Just Wanted To Say and Miss You around the Cascading Heart aperture. White and black mats and layers were used to complete the card. The finished dimensions are 6 1/2" x 7" in size. All for now, Sue x
Follow my blog with Bloglovin
Saturday, 1 September 2018
Silver Bell Card
Hi crafters! More Christmas for you today, but this one is showcasing the Christmas Bell. It looks lovely when used in conjunction with the Overlay and a few other dies, add some gilding polish for a real showstopper!
The finished dimensions are 7 1/4" x 8" in size. All for now, Sue x
Subscribe to:
Posts (Atom)