Wednesday, 24 June 2020

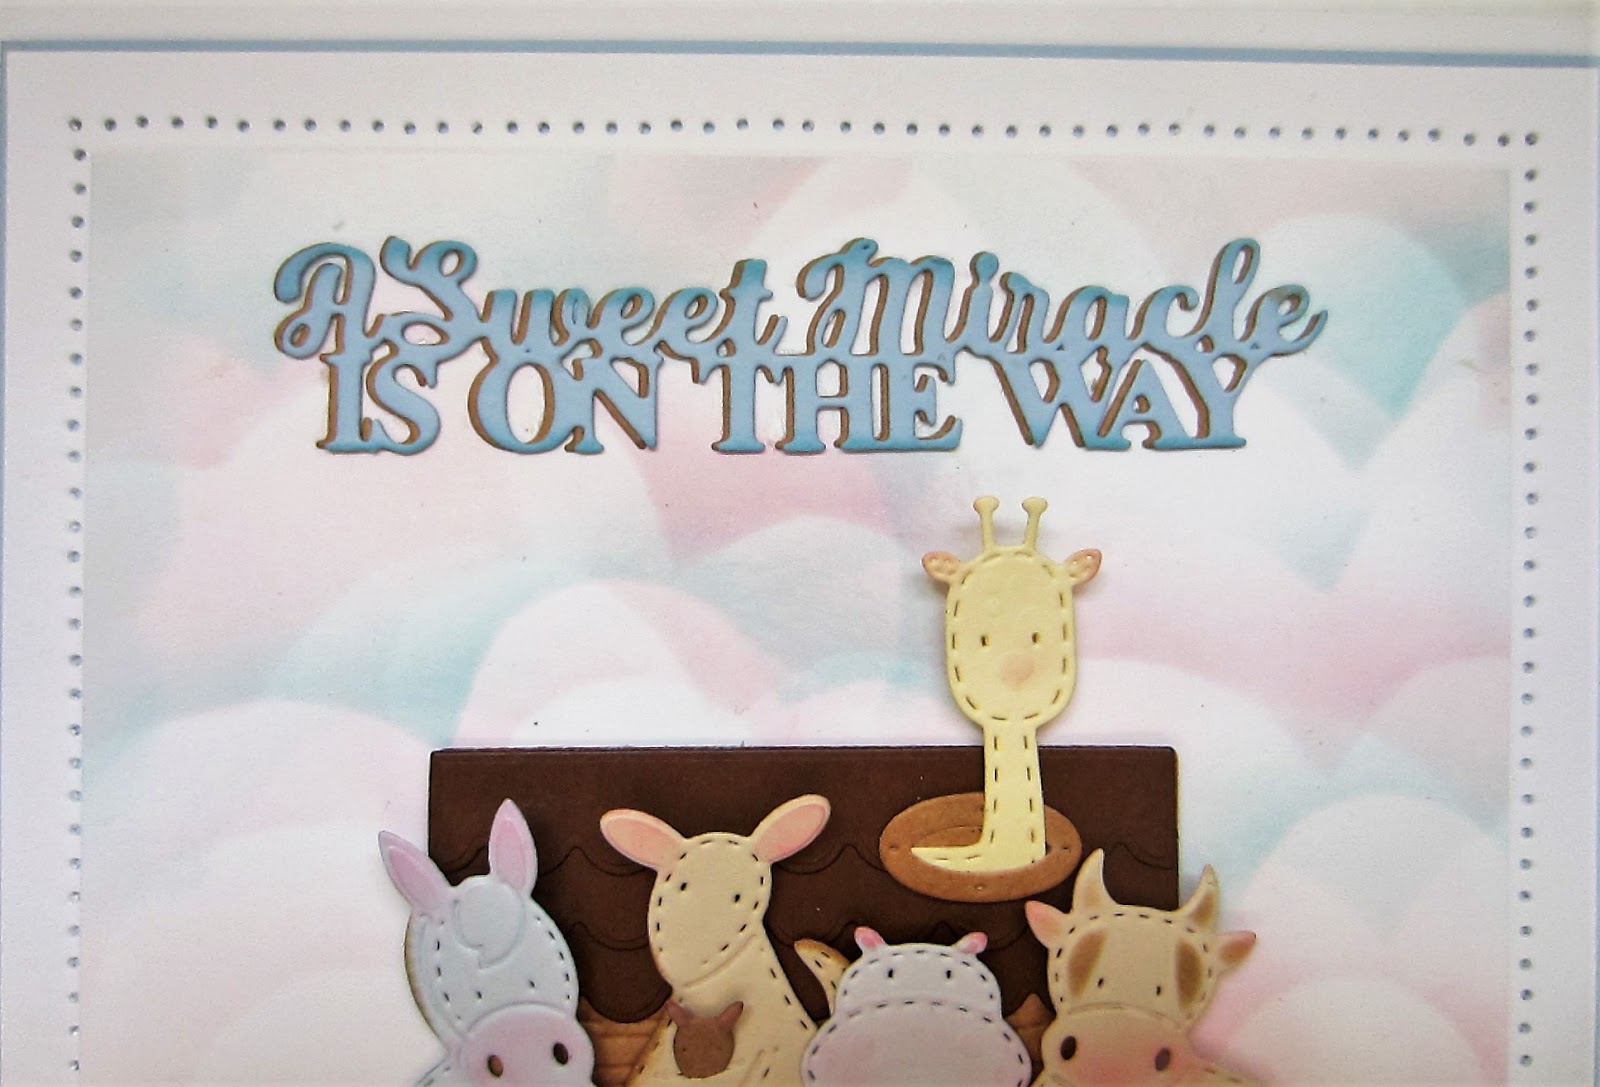
A Sweet Miracle Is On The Way

Hi bloggers!  I think it's time for a sweet baby card!  I started with a piece of white card and used the Double Stitched Clouds and Hill die to cut a cloud stencil to use.  I used Spun Sugar and Tumbled Glass distress ink to make the soft clouds in the background.  Next I cut the ark out of tan card and added a dark brown roof.  I used the "roof" die in the Noah's Ark die set upside down to create three rows of water under the ark.  I used the animals from the Farm Animals and the Zoo Animal die sets to add the animals on to the ark and the giraffe was from an older set called Stuffed Animals.   I added shading to the animals to bring out the detail.   I added darker portholes and attached the animals so they were coming out of them.  I did take a bit of artistic license and only did one of each animal instead of two (as the story goes, two by two).  I used the Sweet Miracle sentiment die cut in sky blue and added a tan shadow to it, then glued it to the top above the ark.  The card was completed with white and sky blue mats and layers.  The finished dimensions are 6 1/2"  x  7 1/2" in size.  All for now, Sue x


                                                     Follow my blog with Bloglovin

Tuesday, 23 June 2020

Sending Warm Wishes


Hello crafters!  Today,s card is a really quick one to do!  Start by cutting the Star Flower Flourish four times out of coconut white card.  Glue them to a piece of blue dusk card along each of the edges, slightly overlapping them in the corners.  Next cut a multi-layered frame using the Double Dtitched Circles out of white card.  Add the frame over the top of a piece of white card that has been embossed with the Rope Chain embossing folder.  Trim the excess card away around the edge of the circle then add to the centre of the card with foam.  Cut the Sending Warm Wishes out of blue dusk card and add the words to their backing shadow cut from white card.  Glued them in the centre of the card frame.  Cut one more Star Flower Flourish out of blue dusk card and use the fall away flowers to creat a small flower and add it the the side of the frame.  The card was completed with white mats and layers.  The finished dimensions are 8 1/4"  x  8 1/4" in size.  All for now Sue x


                                                        Follow my blog with Bloglovin

Monday, 22 June 2020

Happy Everything

Hello there my crafty friends!  This card is all about the Deliah Background and Edgers!  I started by cutting the Delilah Background out of Blue Dusk and Black card.  I used the black die cut as an offset shadow behind the blue dusk version.  I added a white backing to the background then used the Delilah Edger set to cut the side sections off of the background.  I added mounting foam to them and added them next to the remainder of the background.  I decided to add one more step up so I cut the Delilah Background again in white and added a black shawdow to it.  This time I added a Blue dusk card backing to it then cut the sides sections with the edger set.  I added these sides to the card but with an extra layer of mounting foam to raise them up higher.  I used the Decorative Flag die to cut a double ended flag by cutting half way then moving the die and lining it up on the other end.  I glued it across the card from side to side.  I cut the Happy Everything sentiment in both Blue Dusk card and black card and shadowed it then glued it to the centre of the flag die.  Using the Cosmos Flowers, I cut several of them out of white card with a sticky adhesive sheet added to it.  I glittered the flowers with Frosted Sparkle Glitterbitz prior to assembling them, then added them to both sides of the flag around my sentiment with white leaves from the Cosmos  Flower set.  The card was completed with white, black and blue dusk mats and layers.  The finished dimensions are 7 3/4"  x  7 3/4"  in size.

The winners of the Festive Collection dies from the recent blog launch were posted late yesterday so you just need to scroll down to the blog post underneath this one to check the list and see if your name is among the winners!  There are still quite a few of the dies to be claimed too.   All for now Sue x


                                                      Follow my blog with Bloglovin

Sunday, 21 June 2020

2020 Festive Collection Die Winners

Hello bloggers!  Thank you for the stellar reception to my new Festive Collection!  I was so pleased to read all the amazing comments that were left on the blog posts!   I won't keep you from the list of winners any longer!  Here they are:

2020 Christmas Angel:  Denise Bryant!!!
Mosiaic Ray Background:  Theresa W in Berks!!!
Snowflake and Swirls Background:  Bejay Roles!!!
Nothing Warms The Heart Like Friends:  Stella Munn!!!
Deco Snowflake Background:  Judy Hollers!!!
Deco Trees Background:  Michelle Stanley!!!
Merry And Bright All In One:  Betty McAlister!!!
Keep Christmas In Your Heart All Year:  Yorkie Girl!!!
Merriest Christmas Wishes:  Heidi MT!!!
Believe In The Magic Of Christmas:  Dawn Holben!!!
We Wish You A Merry Christmas: Ursula from Verwood!!!
All Is Calm All Is Bright: Pawprintx4 (Stephanie K)!!!
Bauble Background:   Tressa (Teresa)!!!
Bauble Edger:   Barbara V!!!
Jewelled Background:  Ann Topp!!!
Jewelled Edgers:   Chantal S!!!
Snowflake Adjustable Frame:   Jen from Bognor!!!
Bell Adjustable Frame:  Liz Cavill (Crafty Sunflower)!!!
Poinsettia Adjustable Frame:   Kitty Davies!!!
Warm And Cosy Christmas:  Gwen 70!!!
Polar Bear Playtime:  Trudy Aylott!!!
Penguin Palace:   Eileen Elder!!!
Greetings Of The Season:   Crafty Cruiser (Doreen R)!!!
Jolly Die/Stamp set:  Pauline Austen (from Teeside)!!!
Believe Die/Stamp Set:   Eunice From Edmunton!!!
Peace Die/Stamp Set:   June Ballenger!!!
Happy Die/Stamp Set:  Sandy h (Hull)!!!
Snow Die/Stamp Set:  Jan on the Fosse!!!
Festive Wishes:  Helen Terry!!!
Snowflake Silhouette:  Princess Pixie!!!
Decorative Holly Accents:  Cr@fty (Heather Toms)!!!
Poinsettia Stem:   Carol Edwards!!!

Congratulations all!  Please email me at americansue1@gmail.com to confirm your postal address and claim your winning die set.  Please put the name of the die you won in the subject line and your postal address in the email.  It makes it easier for me to forward all the details to my coworker at Creative Expressioms to have your die sent out to you.  Thank you so much for all your support on the blog, I really appreciate it!  All for now Sue x

Guess Who Thinks You're Special

Good Sunday morning all!   I decided to pull out the Gliding Flakes for this one!  I covered a piece of card with a sticky adhesive sheet then used Gemstones Gilding Flakes on the exposed adhesive.  I used a RubitScrubit pad to move the flake around and then refine and remove the excess flakes.  Next I embossed it with the Dotty Flourish embossing folder for texture.  I used a very light inking of Black Soot Distress ink around the edge of the background, then matted it in black card.  Using the Double Stitched Ovals, I cut a multi-layered white frame and added it to the centre with mounting foam.  I used the extra flowers from the Magnolia Corner die set to add three flowers in the lower left corner of the frame and three in the upper right hand of the frame.  I used the Magnolia Corner cut into smaller pieces as accents for the flowers.  I cut the Guess Who Thinks You're Special sentiment in black twice and stacked it then glued it into the centre of the frame.  The card was completed with white and black mats and layers.  The finished dimensions are 7"  x  8 1/4"  in size.  All for now. Sue x


                                                       Follow my blog with Bloglovin

Saturday, 20 June 2020

Wishing You Well

Hello bloggers!  I tried a new combnation of pixie powders for the background on this card.  I used Golden Mint, Sun Yellow and Mango Blaze pixie powders.  I really liked the fresh, bright colour it gave me, so different from any I have done before!  I cut the Butterfly Frame in both white and black and used it as a shadow, then glued it over the pixied background.  I cut the centre square out of the die into a leftover piece of the pixied card and glued it in the centre of the frame.  Using the Wishing You Well sentiment, I cut it in both white and black, shadpwed it and glued it in the middle.  The card was completed with white and black mats and layers.  The finished dimensions are 6 1/2"  x  6 1/2"  in size.  All for now. Sue x


                                                      Follow my blog with Bloglovin

Friday, 19 June 2020

For You

Hi Crafters!  We are back to one post per day again! LOL  I started this card by stamping the Jasmine Stamps all around the edges of a piece of Old Rose card using a black Archival ink pad.  I covered it with a piece of sticky adhesive sheet and glittered the edges with Frosted Sparkle Glitterbitz.  I put mounting foam in the centre of the adhesive sheet, then worked on the centre piece.  I used a piece of Old Rose card and embossed it with the Quilted Hearts embossing folder.  Next I cut the Martha Background twice out of white card and used the Martha Edgers to cut away the zigzag borders on the backgrounds.  I glued them to the edges of the embossed card and slightly overlapped them in the corners.  I added this piece to the mounting foam on the background.  Using the outer dies from the Joanie die set, I cut a thin frame out of black card and glued it inside the embossed card area.  I added the For You cut in black and added to a white shadow backing.  I stamped several more of the Jasmine Flowers and cut them out.  I assembled them and added them to the corner with small pieces of the Magnolia Corner as accents.  The card was completed with white, Old Rose and Black mats and layers.  The finished dimensions are 8"  x  8"  in size.  All for now. Sue x


                                                     Follow my blog with Bloglovin