Tuesday, 7 February 2012

Embossed I Do

Hi blog friends!  This card may seem very familiar because I have used this layout many times.  I particularly like the embossed background on the back piece and on the foreground.  I find that if I am even a tiny bit stuck for an idea, this type of card is my "go to" layout.  It always seems to give me some inspiration.  I thought it would make a nice wedding card (in this case, but Valentines, anniversary or birthday too with small changes).  Truth be told, I made the card so I could use the rose
lace that I had in my stash!  I picked the cream and pale pink colours to compliment the lace piece.  I used the Floral embossing folder to create the background pieces and matted both with pink card.  I stamped my rose and sentiment and cut them out with an oval nestibility die.  I cut a slightly larger oval die in pink to mat it.   I used an older Spellbinders die and cut an accent piece for the top of the oval.  I used Spun Sugar distress ink to give the accent piece some coordinating colour.  I finished the card with a double bow from pale pink satin ribbon and a couple of pink heart stick pins from my craft stash.  It's a girly girl card, but it is still one of my favourite types of cards. 
I've got some more pics from CHA that I took so I will be putting the rest of them in another post later today at 3pm again.  All for now, Sue x

Monday, 6 February 2012

Ranger Special Event

 Hi guys!  I was invited to attend a special event at the Ranger booth at CHA that took place before the opening of the show on Monday morning.  I was over the moon to be asked as there were only 45 people invited to attend this special demo by three of the Ranger designers, Tim Holtz, Dyan Reavley, and Jess from Vintaj.  They split the group into 15 people each and we rotated to watch all three demos.  My group was first up with Tim and he showed the brand new Distress markers and the new specially coated stamping card.  Wait to you see how stamped images look on this card.  The finish is stunning it is so beautiful.  I can't wait to try out the new markers on it!  The new markers come in all the 36 colours of the Distress inks plus there is a white Picket Fence marker too!  You can use these markers to blend directly on your stamps and the results are incredible. 

I was quite taken with the designer challenge pieces.  They were all given a paper mache bodice to decorate with Ranger products (and other bits and bobs).  It looked like so much fun, I really would have liked a go at it!  I've taken a bunch of pics for you to see most of them.  What's your favourite?  I truly could not decide, they were all amazing!


A lovely pic of Dyan.  She is such fun, I really enjoyed watching her demo.  She showed us how she works in her journal books using color spray washes and her new stamp line Dylusions.  Very bright and colourful.  I tried to capture some of her work here behind her and in the last two pics here.
Sadly, the battery went dead on my camera so I didn't get any pics of the final demo, but you will just love the new Vintaj line that Ranger is carrying.  It is aimed more towards the jewelry makers out there, but there are definitely card making possiblities too. 


More Kraft

 Good morning all!  More play time with Kraft card and I am loving it!  I can't seem to get enough of it, either plain or patterned.  This was a really quick sample that I made to showcase the holly accents and motifs.  I cut out the motif in the centre of my patterned kraft card, keeping the negative piece as my background.  I used the die cut piece also, but rotated it a quarter of a turn so that the pattern was offset.  I used black glitter card in the background just to give it a touch of bling.  I cut one of the smaller holly accents in black for a centre piece.  I stamped a sentiment using black archival ink directly on to the kraft card (a bit busy but still readable). I sewed around the edge on the card.  I haven't had a lot of experience with a sewing machine, but since my Mom had one handy I decided to give it a go.  I rather like the results so you may have to see if I improve at all over time!
 I used some Bakers twine as a accent around the card and added a black button.  I pulled the twine through the button and tied a final bow.  I added some faux stitching with a fine tipped black marker to the outside kraft mat.  All in all a really simple card for any occasion or any recipient.  I hope you can get some inspiration from it. 

I don't often do two posts in a day, but I have another post later this afternoon with some pictures from CHA.  If you are interested, pop back by at 3pm.  All for now, Sue x

Sunday, 5 February 2012

So Grateful For You / And Winners!

  Good morning!  I just love Nestabling and it adds just the right amount of bling for the focal element here I think.  If you haven't tried it yet, Nestabling is pearls or black rhinestones that have been done in the exact shape of the Nestibility shapes.  Here I have used Labels 18 and the pearl Nestabling.  I added a couple of end pieces which were cut from the Ironworks dies and then inked.
I embossed the background with the itty bitty dot mask for texture.  I cut three of the lace doily borders, two from dusty rose card and the other one from cream card, giving the card a pretty petticoat look.  I love doing that as it adds some femininity to the card, but also adds texture and a lovely accent for a simple card.  I added a messy bow tied from basque red vintage ribbon.  I topped the bow with some pink Bakers twine and a wood button.  Two decorative pearl stick pins completed the accent to the bow.  I added pearl PVA glue dots to frame the edge of the card.  Another quick and easy one for any occasion.  I hope you like it!

It's time again for the new list of current winners of the Comment Game!  Thanks for all your support.
January 28th post: randomly selected number 8 which is the comment left by Tom!!!
January 29th post: randomly selected number 45 which is the comment left by Hazel!!!
January 30th post: randomly selected number 30 which is the comment left by Jenny L!!!
January 31st post: randomly selected number 61 which is the comment left by Kate's Cards!!!
February 1st post: randomly selected number 84 which is the comment left by Plum Tuckered Paper Plays!!!
February 2nd post: randomly selected number 17 which is the comment left by Hellma!!!
February 3rd post: randomly selected number 69 which is the comment left by Claveh!!!
Please email me at americansue1@gmail.com and verify your address to claim your prize.
All for now, Sue x

Saturday, 4 February 2012

Lacy Thank You

.Hi guys!  It's back to frilly and lacy for today's post.  This card used a combination of quite a few of my favourite die templates from Spellbinders.  For the border, I used lace doily border dies on either side of a strip of card embossed with the lattice embossing folder.  I added a messy bow made from lilac vintage ribbon, a couple of crystal decorative stick pins and a fancy crystal button from my craft stash.  For the focal element, I cut two of the lace doily accent pieces and mounted them to the left and right of the card.  I stacked a teardrop circle cut from aubergine coloured cardstock and then a Holly motif cut from white card.  I stamped my sentiment (from Creative Expressions) on lilac card and cut it out with a small teardrop circle.  I used dusty concord distress ink while the die was still in the template to create a soft frame for the sentiment.  I used the pearl PVA glue to add some accents to the edge of the sentiment piece to complete the card.  A fun card that would work with any colour combo and for any occasion with a switch of the sentiment.  All for now, Sue x 

Friday, 3 February 2012

For The Guys

Hi my crafty friends!  Today's post was selected with the requests I've had for male cards in mind.  We have all struggled with making a card for the males in our lives, haven't we?  Here I have tried to stay with a distinctively masculine colour palette which is half the battle for these types of cards.  The other half is picking die templates to use.  I started with a background paper (Graphic 45) and added Fleur de Lis borders around the entire edge.  I cut these using a coordinations cardstock and then sanded back the embossed design for a distressed look.  The focal element was created using Labels twenty three, which I also sanded for distress.  I cut a smaller one in a lighter shade for contrast.  The sentiment was stamped and cut out with one of the Fancy Tags and inked with Antique Linen through the die.  Another was cut in black, cut in half and then attached as a shadow accent. I cut a couple of fleur de lis accents to hug the top and bottom of my sentiment.   Paper piercing and a final black mat finished off the card for me.  If you wanted to keep the card simple with a Happy Birthday or Happy Father's Day sentiment, it would work great for that too, don't you think?  All for now, Sue x

Thursday, 2 February 2012

Floral Doily Fun


Hi guys,  this card was one of those cards where I had a clear idea in my head of what I wanted it to look like, but it just wasn't falling in to place!  I have about a three hour time limit before I just have to set a card aside and walk away!  This sat on my table in the corner for about two weeks before I finally picked it back up and finished it.  I loved the lacing on the borders because that is so my style and taste, but the rest of the card didn't sing to me.  I finally finished it and still wasn't completely happy with it, but I saw the problem.  It was several months back but I did demo this card on C & C, but I am not sure if you recall it, but I did the demo with the card in purples and lavender instead of the brown tones used here.  It made all the difference for me in those colours!  The only problem is that I did not get a chance to photograph that card before they sent it off to the person whose email I picked!  So picture this card done in purple tones with a white background as it works so much better that way!  The border was done with two of the floral doily borders and the vintage ribbon was used to lace between them.  The background was embossed using the floral embossing folder.  The focal element used the beaded square die template in the background.   Then it was layered up using the floral doily motifs in two colours (one was cut in half and used as a shadow) then a smaller beaded square and the sentiment was stamped and cut out with the floral doily accent piece.  I finished the card with a couple of floral doily corner pieces to fill in as accents.  Change the sentiment or the colours and the card can be used for a number of other occasions!  Hope you like it.    All for now, Sue x

Wednesday, 1 February 2012

White Wedding

Morning all!  How about a very simple wedding ( or anniversary) card done in black and white?  I love these stamps which were designed by Sam Poole last year.  The tag here was designed to be used with the Spellbinder's Labels fourteen die templates.  I like this shape as it layers up really nicely with so many other dies.  I have used it by itself here, but I did cut a faux nestie in black as a mat for it.  The background which is difficult to see here was done using the faux silk technique.  It is a very touchy feely type of technique so you don't appreciate it until you can hold it in your hands.  To give a quickie rundown for it though, I coated my white card with a mixture of Cosmic Shimmer dries clear glue and water.  You want the glue to coat your card, but not be too thick or dry out too quickly so you need to water it down a bit.  Next Take a piece of plain white tissue and crumple it up, then open it back up and lay it over your glue mixture.  I use a a damp paint brush and tamp all the tissue to the card well.  Now you can do a bit of stamping on your tissue first, but I just wanted the texture for this card.  I let it dry for an hour, then I used the flourish embossing folder (also designed by Sam Poole) and embossed the background.  You get some soft wrinkles in the tissue that look like raw silk paper with this technique.  It is very subtle, but elegant in its finish.  I added some organza ribbon from my stash (it has this pretty embroidery in the centre) and finished the bow with a white organza flower, some pearls and decorative pins.  I paper pierced the edge and added a few pearls to the corners to finish it.  All for now, Sue x


Tuesday, 31 January 2012

Fluttering By

Hi blog friends!  A quickie card here which is always nice if you need an all occasion type card.  This one is workable in any colour combinations to so you can use up left over papers like I have done here.  I used one of the edgeabilibity dies to create a border between my two decorative papers.  I used a small piece of the striped paper behind the butterfly.  I used the outside edge of the die to cut a faux nestie shape for this so you would see the stripes through the lacy look of the butterfly.  On a whim, I decided to use a pair of decorative pins for the butterfly antennae.  It's a large butterfly die so size wise it kind of works okay (it was a bit of fun!).  I stamped the sentiment directly on the background papers and added some swirls of rhinestones for fill in accents.  All for now, Sue x

Monday, 30 January 2012

Beauty In The World

Good morning everyone!  Ribbon overload here.  I have had this ribbon in my stash for ages and I have been trying to use it for a while now.  Not sure that it works here, but at least I got it out of my system! LOL  Sometimes you just have to give in to it before you can move on, huh?  I used the elegant posts in the corners for accents but I cut the top of them so they would create a nice corner.  The background was created using black card embossed with the Intrinsic embossing folder.  An aperture was cut from decorative paper using the Fleur de Lis rectangle die templates.  The sentiment was stamped and cut out with Labels four and mounted in the centre.  I made a flower using the same decorative paper and a spiral flower from felt.  I added a black organza rose (from Creative Expressions)  to create a trio of flowers of different colours and textures.  I love different mixtures like this, it just seems to make everything more interesting!  I added some leafs that I punched and ran them through a paper crimper for texture.  No surprise to see paper piercing though, huh?  I do have to admit that when I do a card and don't pierce around the edge, it doesn't seem finished to me.  It is kind of like a signature to me, like dotting the "i's" and crossing the "t's" so to speak!  Oh, and just in case any of you were going through any TWS (teal withdrawal symptoms), this one is for you (Lynne M) he he!  All for now, Sue x

Sunday, 29 January 2012

Ethel And Friends!

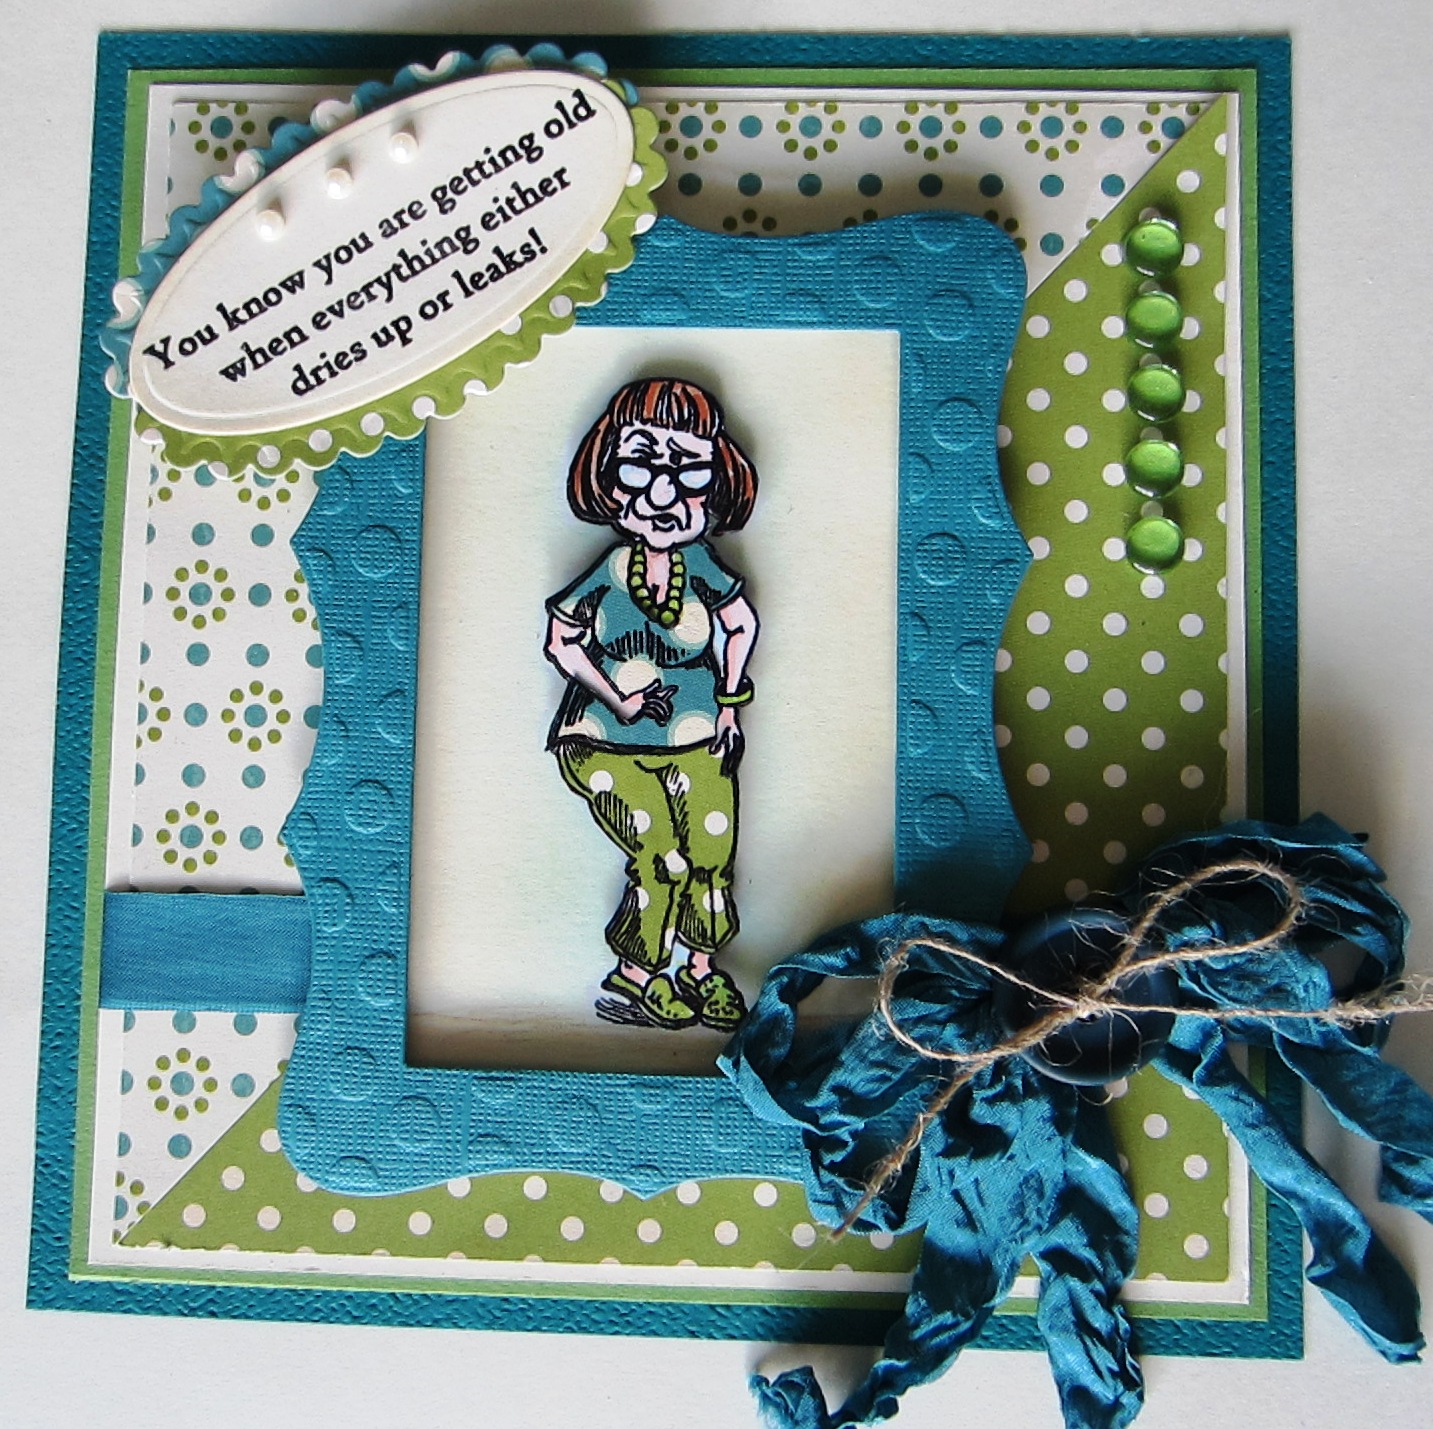
Good morning blog friends!  Be prepared for a good giggle at today's post.  I have loaded four cards for you to see today, mostly because they are all very similar and a bit of fun.  The sentiments are the best!  I shouldn't laugh at them as they are hitting really close to home these days!  My 55th is looming only a few months away now and I will officially get my senior citizens discount here in Florida, (maybe even in the UK, I'll have to check on that!) but if you can't laugh at yourself.... then everyone else will do it for you, huh! LOL  These characters are part of our Murray and Ethel line of rubber stamps.  This first card is Ethel herself!  Don't you just love that mug (and those hairy legs, really Ethel!)  I feel her pain where that sentiment is concerned, though!  The ladies in the last three cards haven't been officially named yet.  Maybe you could help me out there and give me some ideas.  What do they look like? 

 I made all of these cards last year when I was here and since my supplies were a bit limited, I paper pieced all their outfits with the matching background papers rather than trying to colour them with the six coloured pencils and handful of distress inks I had at the time.  They are really good fun if your recipient has a good sense of humour.  I didn't get any cards made with Murray, but he is a gem too.  I won't go into any detail on the cards as they are all fairly similar in style.  If you have any questions about them, feel free to email me.  I hope you have a good chuckle at them and they start your day off right!  All for now, Sue x


Saturday, 28 January 2012

I Had This Idea

Hi guys,  I should have titled yesterday's post "the love/hate card" as I thoroughly enjoyed reading all the different reactions to it!  It really polarised the comments you left, but that is what makes crafting fun for me.   I don't even like every card I make so I certainly don't expect you to either.  As long as you kind (remember thin skin here), please be honest and let me know what you think as I love to read every ones opinions!  Today's post was truly an exercise in patience!  Whenever I say "I have this idea", I should listen to myself and think about this card!  I had this idea and I just had to do it, but about half way through, I thought "what am I doing!"  I was too far committed at that point not to finish.  It is probably difficult to see this in the picture but with some explanation, I think you will follow.  I stamped the leaves on white card so that all of them were just barely touching each other in some way.  I embossed them with clear powder (black archival ink was used) and I inked them using mustard seed, fired brick and rusty hinge distress inks.  Then, and this is where the fun started (not!), using an exacto craft knife, I cut away all the background white area.  The leaves have this kind of wood block look to them so I thought cutting around them and leaving it a bit jagged would add to this look and give a very rustic look to the left over piece.  After about an hour of cutting because there were way more tiny spaces than I realised, I finished.  What a task!  I mounted that piece using double foam pieces so it really looks like it is floating above the background piece of white card.  I cut a double black frame for it and pierced the top piece.  I matted all of it on a final piece of black card and stamped a sentiment in white on a die from the Samantha Walker Twisted metal tag set.  I cut another tag in white and cut it in half to use as a reverse shadow for the black tag.  After I got the whole card assembled and taped together, I thought it might have looked nice to stamp the leaves again in the background in a pale colour just to add interest (but I wasn't taking that puppy apart after all that!) LOL  So, it is what it is!  Another different looking card for me! 

I have been very bad lately in keeping up with the comment game, but I am getting it caught up now!
Jan17th post: randomly selected number 5 which is Inkypinkycraft!!!
Jan18th post: randomly selected number 33 which is Desiree!!!
Jan19th post: randomly selected number 50 which is Nattyboots (Elaine H)!!!
Jan 20th post: randomly selected number 125 which is Tracy Heaton!!! 
Jan. 21st post: randomly selected number 10 which is Heather!!!
Jan. 22nd post: randomly selected number 58 which is Sue Parish!!!
Jan. 23rd post: randomly selected number 21 which is Jacqui's little piece of England!!!
Jan. 24th post: randomly selected number 42 which is Nzillingworth (Nadine)!!!
Jan. 25th post: randomly selected number 73 which is Elaine W!!!
Jan. 26th post: randomly selected number 56 which is Crafty Jo!!!
Jan.27th post: randomly selected number 23 which is jean.phillips1!!!
I need all the winners to email me at americansue1@gmail.com to verify their addresses
and claim their prizes please.
All for now, Sue x