Hello crafters! Since we have just launched our new Cosmic Shimmer Pearl Tints recently, I thought I would share a card I made with them! In fact, our Gwen Fletcher is doing a show on Create & Craft this week on the 15th with them! I started by cutting the Happy Big Bold Word die out of black card. I glued it to a piece of clear acetate. Working from the reverse side, I used the Pearl Tints to fill in all of the letters. The colours I used were Chateau Rose, Blue Diamond, Racing Green, Canary Song and Heavenly Pink. I covered a piece of white card with a sticky adhesive sheet, then peeled the backing paper off and coated it with Frosted Sparkle Glitterbitz. I cut a frame from the Clipped Corner Rectangles and added it with mounting foam to the Happy die (once the pearl tints were good and dry). Next I added the frame piece to the glittered background. I stamped the sentiment and cut it out with a tag die, then added it to the lower corner of the card. The card was completed with white mats and layers. The finished dimensions are 7" x 8 1/4" in size. All for now, Sue x
A daily papercrafting blog which features my handmade cards showcasing Creative Expression's products including my own line of cutting dies and embossing folders, Cosmic Shimmer, Ranger and more which use various techniques and ideas to hopefully inspire the creativity in you.
Tutorials
- Home
- My Ribbon Flower Tutorial
- Fancy Nestie
- Blossoms Five Flower Bud
- Blossoms Five Full Flower
- Easel Tutorial
- Wax Paper Embossing Folder Tutorial
- Caught In Crystal
- Shaving Foam Tutorial
- Quilt Card Tutorial
- Paved Pearl Technique
- Faux Leather Technique
- Plaited Ribbon Wreath Tutorial
- Paper Rose Tutorial
Tuesday, 13 April 2021
Monday, 12 April 2021
Home Tweet Home
Hello there my crafty friends! I just love this sweet birdhouse card, it really works with the slimline profile I think! I started by cutting the Slimline Decorative Oval Aperture Trio die out of white card. I added some mounting foam to the back then attached an Arctic Blue card backing. Next I cut two of the birdhouses from the Home Tweet Home die set out of tan card, adding a red roof and front. I cut the branch from the A Little Birdie Told Me set out of tan card, then added the green leaves with a Forest Moss distress marker. I attached little bits of branches to all three apertures, then added the birdhouses with mounting foam. I cut the sentiment several times out of Ruby Red card and stacked them, then glued it into the centre opening. I added a couple of flying birds to the top corners. The card was completed with white and red mats and layers. The finished dimensions are 5" x 9" in size. All for now, Sue x
Sunday, 11 April 2021
Hope Your Birthday Is Unforgettable!
Good Sunday morning all! I selected the A5 Pebble Paving Mask and taped it to a piece of milk card. I randomly applied Vintage Photo, Weathered Wood and Bundled Sage Distress Oxide inks through it. Next I stamped the Elephant and cut it out with the matching Elephant die. I coloured the stamp with Distress Markers (Weathered Wood, Antique Linen, and Tumbled Glass). I inked a piece of white card with Tumbled Glass and used it behind the elephant, raising the die with mounting foam on it. I added the elephant to the right side of the card, then stamped the sentiment from the Wild About You clear stamp set. I cut it out with the Safari Tags die set and added it with foam to the left hand corner of the card. The card was completed with milk card mats and layers The finished dimensions are 6 1/2" x 8 3/4" in size. All for now, Sue x
Saturday, 10 April 2021
Happy Birthday
Hi crafters! Here is a super bright and fun card when you next need a Birthday card quickly! I started with a piece of white card and used several Distress Oxide inks one it in diagonal stripes. I used Shaded Lilac, Spiced Marmalade, Worn Lipstick, Fossilised Amber, and Peacock Feathers. I repeated the colours until I filled the card. Next I used the Slimline Decorative Squared Stripes and cut into the card. I backed it with a piece of white card that had a sticky adhesive sheet added to it. I used Frosted Sparkle Glitterbitz to fill in the remaining exposed adhesive and give the background a sparkly look. Next I added a multi-layered frame using the Slimline Essential die set, cut out of white card. I cut the Noble Happy Birthday sentiment out of white gloss card and added it with mounting foam across the card. The card was completed with white mats and layers. The finished dimensions are 5" x 9 1/4" in size. All for now. Sue x
Friday, 9 April 2021
You Are The Best
Hi crafters! I thought the Daisy Blooms Stampcuts die would look lovely as a wreath, don't you? I started by inking the Daisy Blooms die and cutting it five times. Using Distress markers, I coloured all of them. I used Shaded Lilac, Spun Sugar. Mustard Seed and Crushed Olive Distress markers. I added glue to the centres of the daisies and added clear medium sized micro beads to them for texture. I cut a white background and embossed it with the Graduated Dots embossing folder. I arranged the five Stampcuts into a circle and added them with mounting foam, slightly overlapping each one. I cut the You Are The Best sentiment out of Blue Dusk and black card. I used the black as an offset shadow behind then glued the sentiment into the centre of the wreath. The card was completed with white mats and layers. The finished dimensions are 7" x 7" in size. All for now. Sue x
Thursday, 8 April 2021
Because
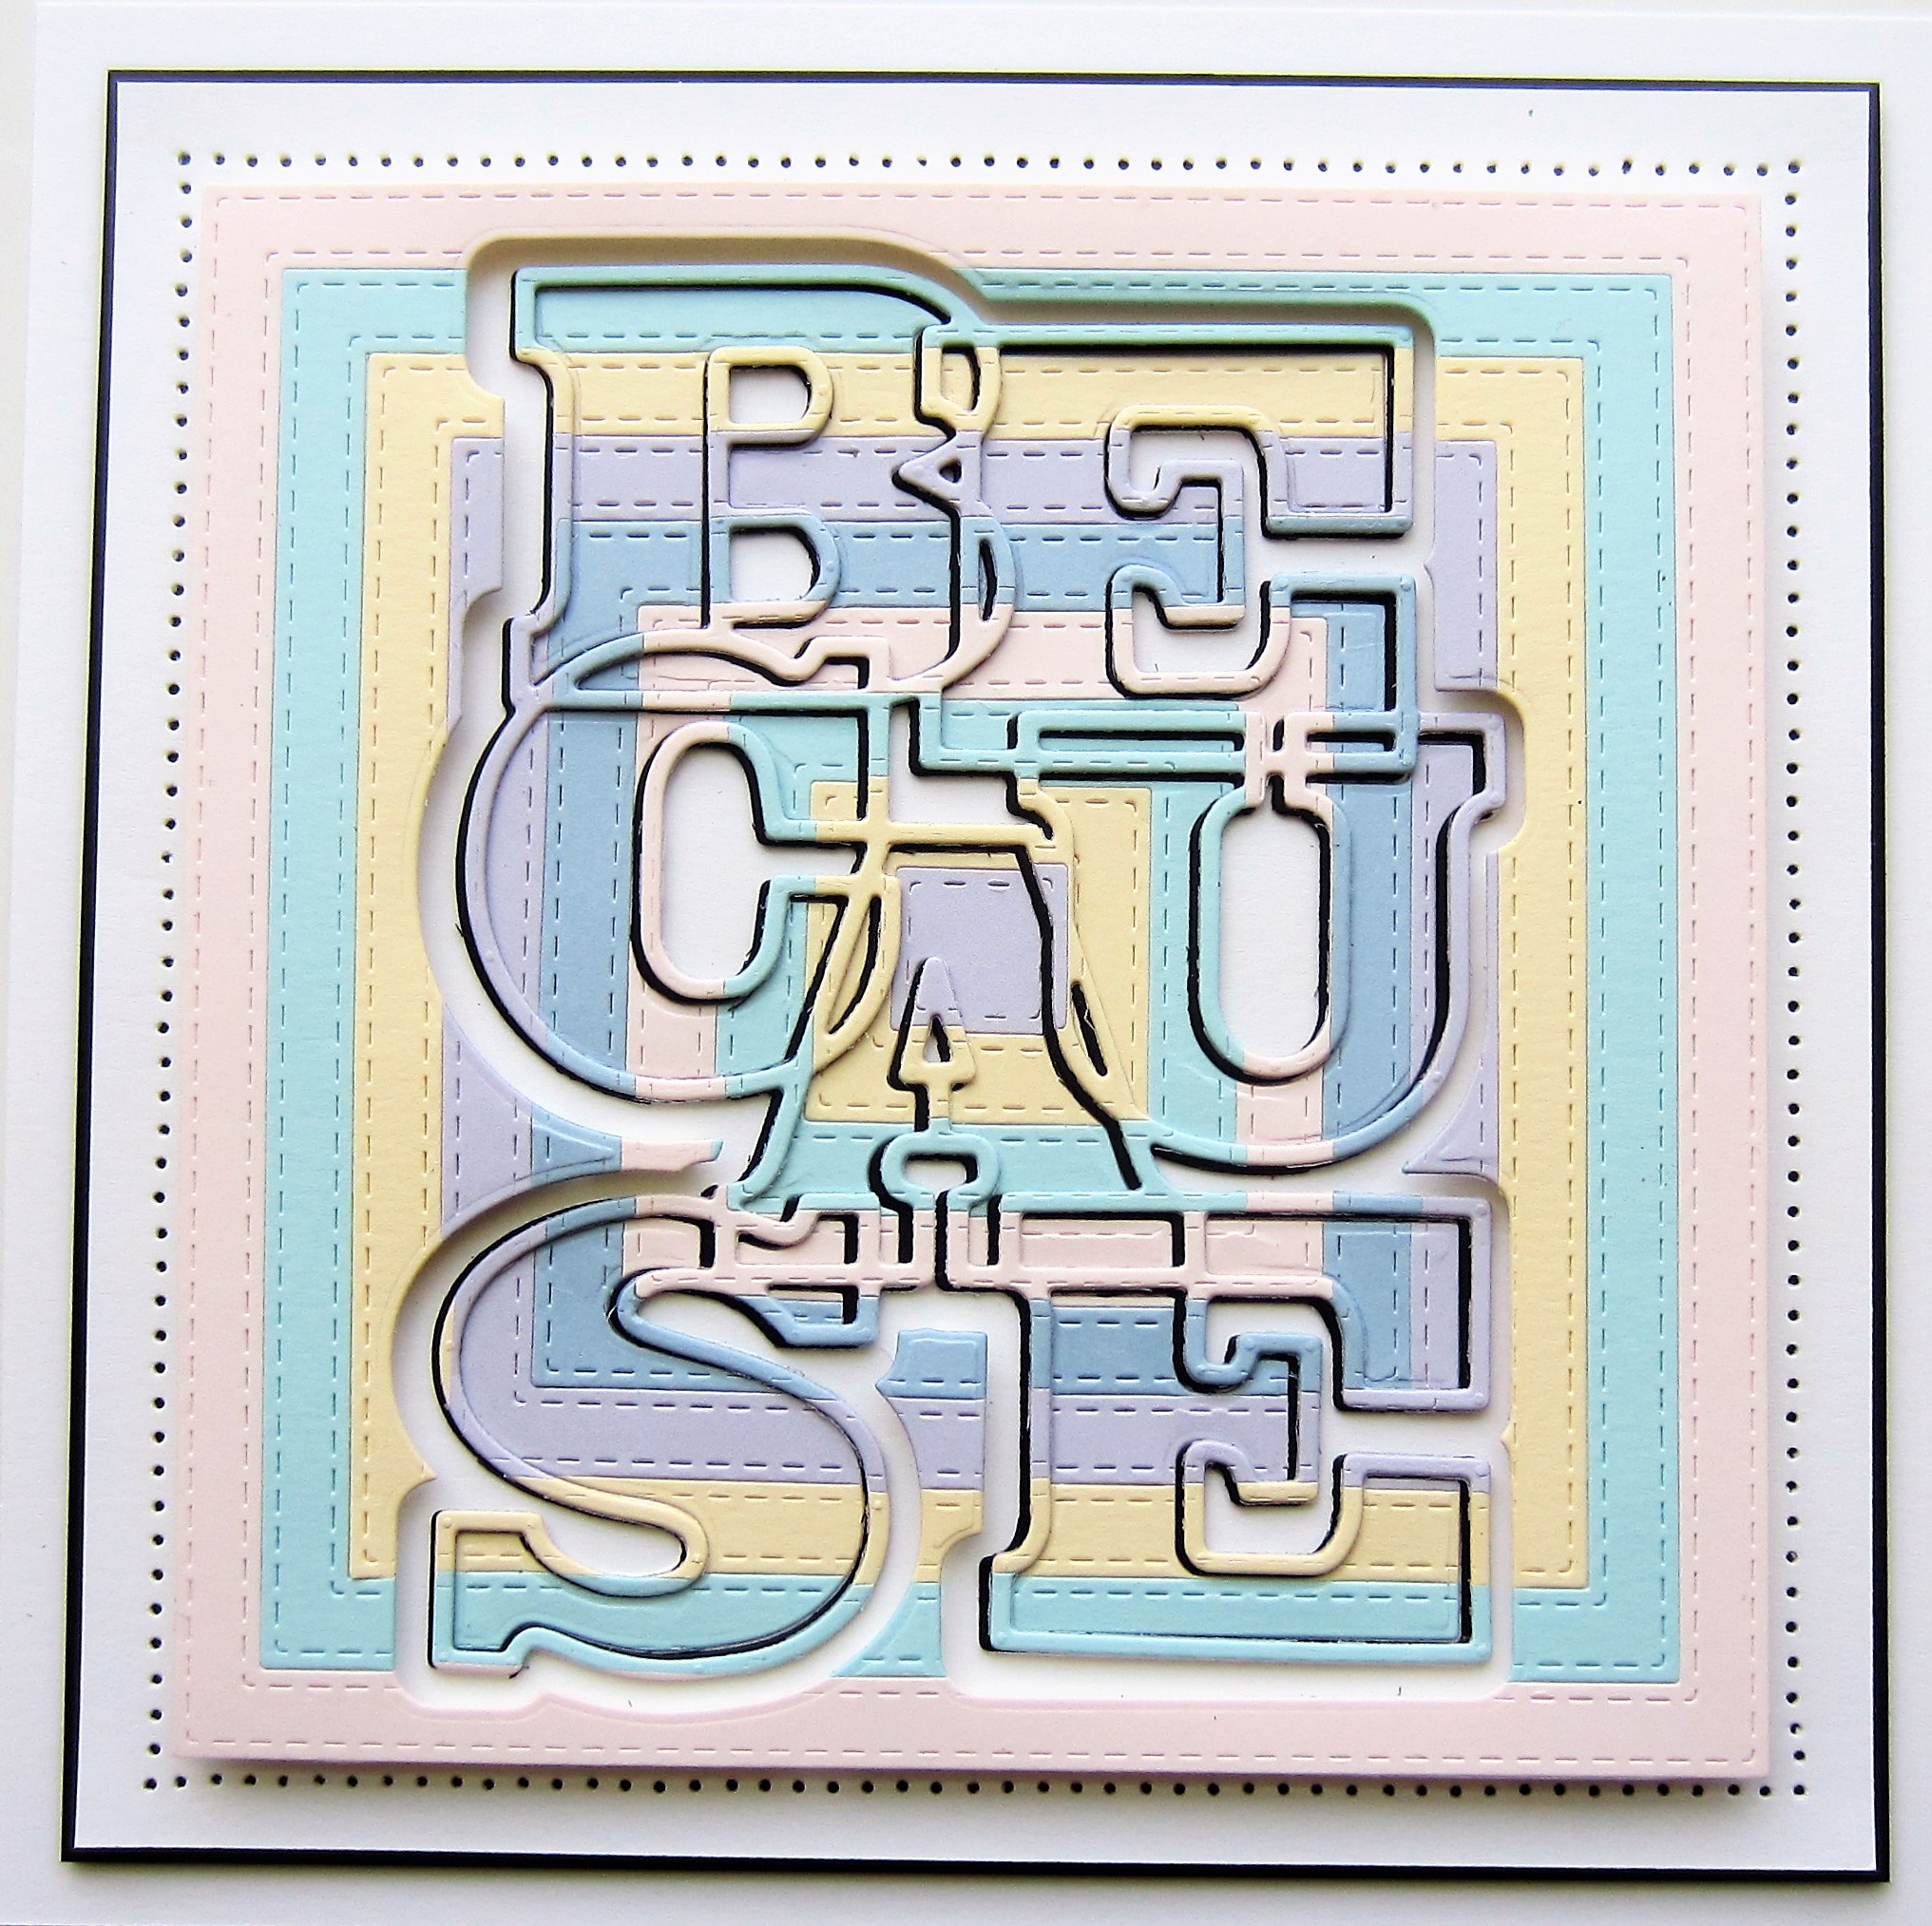
Hello bloggers! This one has a bit of an optical illusion to it, but it is a fun and easy technique. I selected several shades of pastel card; powder pink, custard, aqua, sky blue and wisteria card. Using the Double Stitched Squares, I cut each of the colours into square frames (I set up the dies together so they cut each colour into multiple frames.) I added the frames to a piece of copy paper covered with a sticky adhesive sheet (the copy paper keeps it thinner and easier to die cut through). I alternated the colours until the square was filled in. Next I used the shadow die from the Because Big Bold Word die and cut it into the centre of the frames. I added mounting foam to the remaining outer piece of the frames to use as the background and added it to a piece of white card. Next I cut the Because die in black, so it is handy to use for the next step. I cut the Because die out of the piece I removed from the shadow die. I carefully removed the Because outline, then used the black version as an offset shadow behind it, to help bring the sentiment out a bit against the background. I glued that into the background of the card. Next I used all the fall away pieces and paper pieced them back into the Because die. The card was completed with white and black mats and layers. The finished dimensions are 7 1/4" x 7 1/4" in size. All for now, Sue x
Wednesday, 7 April 2021
Sending Love & Hugs
Hi crafters! I grabbed the Slimline Basket Weave stencil to create the background on today's card. I used Wisteria Matt Chalk Polish through the mask. Next I created a multi-layered frame for it using the Slimline Essential Frames with a wider white base and a thinner wisteria frame on top. I added the frame with mounting foam. I cut the Starflower Cluster die twice in white and twice in black card. I used the black behind the white die cut as a shadow. I cut the separate flower die in wisteria with black centres and I added the to the top of the cluster dies, using Medium sized Clear Micro beads as accents. Next I attached them on the sides of the frame. I used the Sending Love & Hugs sentiment cut in black and wisteria and added it to the centre of the card. The card was completed with white, black and wisteria mats and layers. The finished dimensions are 5 1/4 x 9 1/2" in size. All for now, Sue x
Subscribe to:
Posts (Atom)