A daily papercrafting blog which features my handmade cards showcasing Creative Expression's products including my own line of cutting dies and embossing folders, Cosmic Shimmer, Ranger and more which use various techniques and ideas to hopefully inspire the creativity in you.
Tutorials
- Home
- My Ribbon Flower Tutorial
- Fancy Nestie
- Blossoms Five Flower Bud
- Blossoms Five Full Flower
- Easel Tutorial
- Wax Paper Embossing Folder Tutorial
- Caught In Crystal
- Shaving Foam Tutorial
- Quilt Card Tutorial
- Paved Pearl Technique
- Faux Leather Technique
- Plaited Ribbon Wreath Tutorial
- Paper Rose Tutorial
Sunday, 12 July 2020
Wishing You Well
Saturday, 11 July 2020
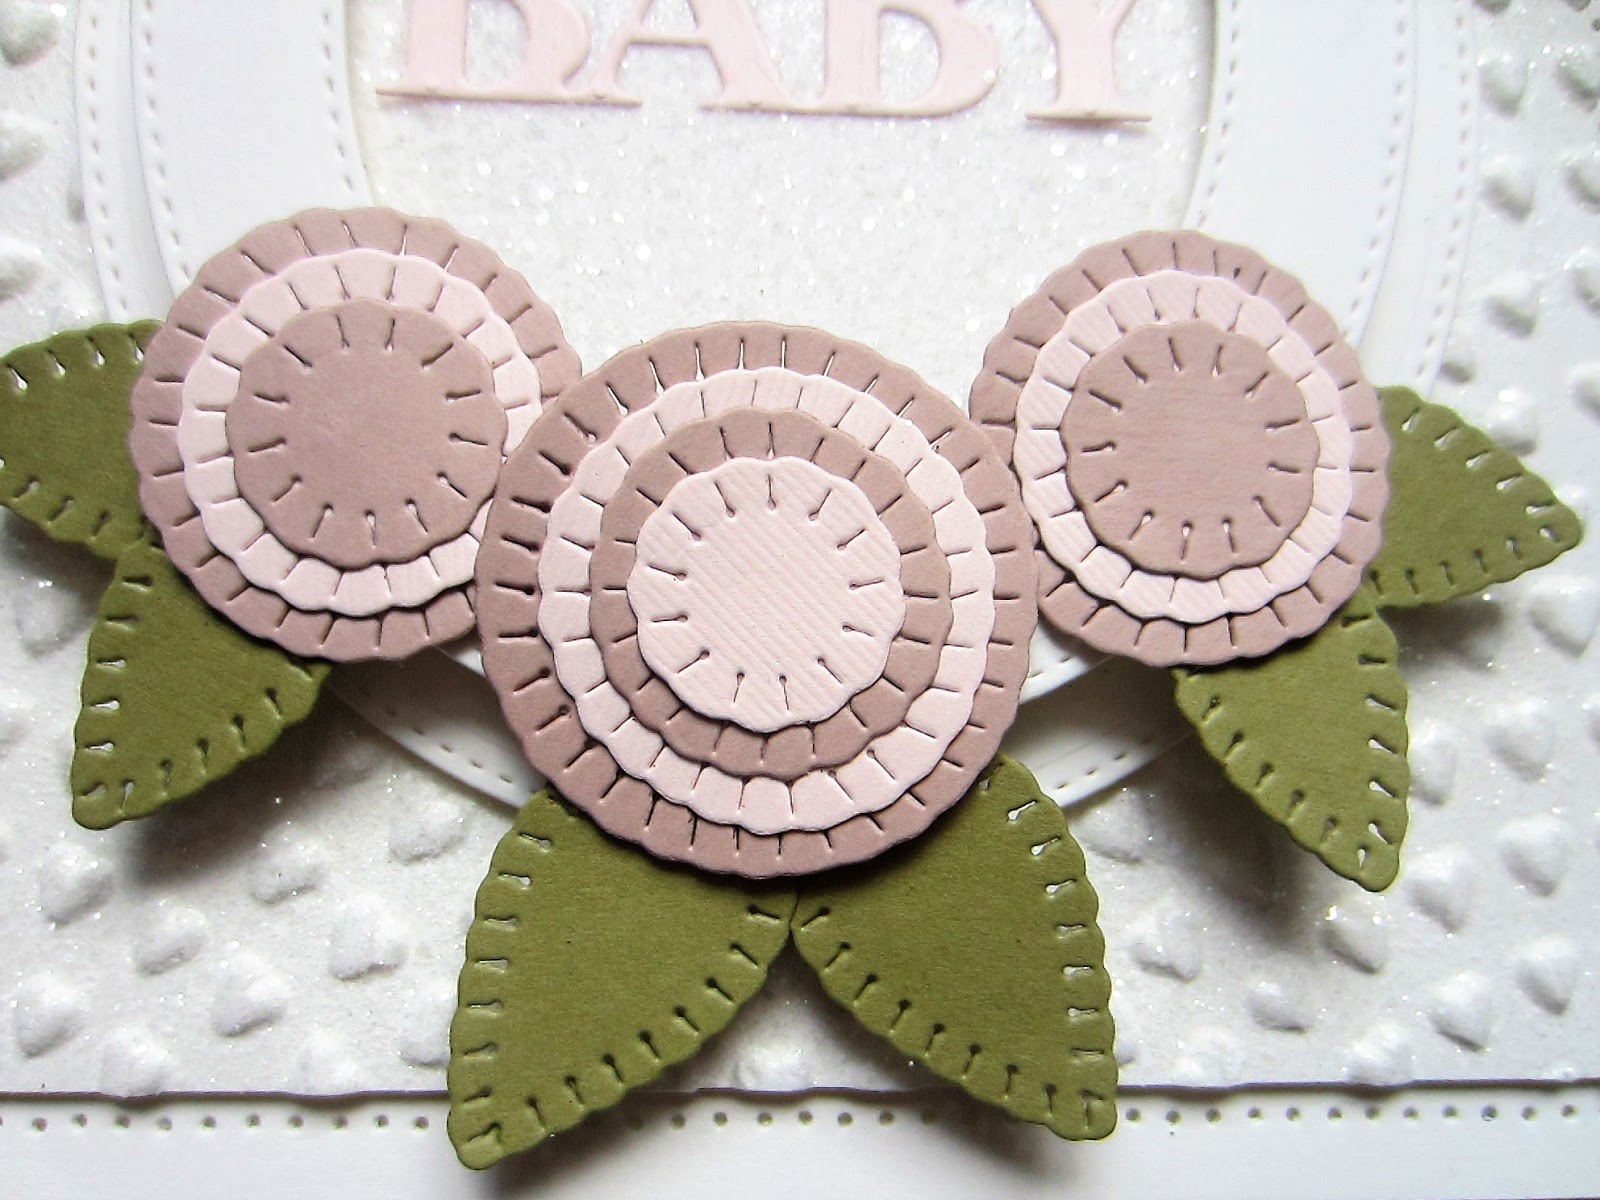
Hello Baby
Hi there my crafty friends! Here's another baby card but with just little bit more sophistication I think. I started with a piece of white card and embossed it with the Rainbow Heart embossing folder. Next I cut a wide oval using the Double Stitched Oval die set. I added mounting foam to the back of it and worked on the sentiment. I cut the Hello Baby from the Newborn Sentiment set out of powder pink card. I covered a piece of white card with a sticky adhesive sheet then peeled the backing paper of and laid the sentiment words down. I used Frosted Sparkle Glitterbitz on the remaining exposed adhesive, then attached the oval frame over the top. I added it with foam to the background. I used Old Rose card and Powder Pink card and cut out the Stitched Doodle Flowers. I made three flowers and and glued them to the bottom of the frame. I used leaves cut out of khaki card as accents. The card was completed with white mats and layers. The finished dimensions are 6 1/2" x 7 1/2" in size. All for now, Sue x
Friday, 10 July 2020
So Glad We're Friends
Hi bloggers! Here's an older card that I missed along the way. I started with a piece of white card and I embossed it with the Rose Bed embossing folder. I cut it diagonally and added it to another piece of white card. Next I cut the Vivian die in black as a backing piece. I went to my background craft stash and pulled out a piece of Pixie Powdered card using the Aubergine Dream, Plum Twist and Rich Gold Pixie Powders. I cut the backing from the Vivian die and then cut the decorative part of the die in white and glued it together and added it to the black base piece. Using a bit of extra card from the Pixie powdered card, I cover ed it in sticky adhesive sheet then cut the extra flower die from the Magnolia Corner. I peeled the backing off of the flowers and coated them in Frosted Sparkle Glitterbitz and assembled the flowers. I glued three to opposite sides of the die and embellished them with Lace Edged Leaves. I used the So Glad We're Friends sentiment cut in white and glued it to the centre. The card was completed with white and black mats and layers. The finished dimensions are 7" x
7 1/4" in size. All for now, Sue x

Follow my blog with Bloglovin
7 1/4" in size. All for now, Sue x
Follow my blog with Bloglovin
Thursday, 9 July 2020
Have A Magical Day
Wednesday, 8 July 2020
A Sweet Miracle Is On The Way
Hello crafters! This sweet little baby card is a simple one and doesn't need much explaining. I started with a piece of coconut white card as the background. Next I cut six circle frames using the Double Stitched Circle die set. Three were smaller and three were larger. I added mounting foam to all of the circle frames then added them to the background card alternating the sizes. Next I used animals from both the Zoo Animals die set and the Farm Animals die set and cut them in various shades of pastel card. I added all the animals to the circle frames either by themselves or with a mate. I added the bird to sit on top of the right hand side top frame and a small bird from the Noah's Ark set in the opposite corner. I used the A sweet Miracle Is On The Way sentiment at the top of the card cut out of Blue Dusk card. The card was completed with white mats and layers. The finished dimensions are 7 1/4" x 8 1/2" in size. All for now, Sue x


Follow my blog with Bloglovin
Tuesday, 7 July 2020
For You
Hi bloggers! I started today's card by using the Lustre Polishes across a piece of black card. I used Tantalising Teal, Apple Fizz and Blue Alure Lustre Polishes randomly on to the card and allowed them to dry well. Next I cut a large frame out of it and then cut the Paulette Background into the centre piece from the frame. I backed it with a piece of black card. I added a multi-layered frame made from a white base and a thin black gloss card frame on top and added it with foam. I cut a Pierced Flag and used the For You sentiment cut out of an extra piece of the lustre polish card. I cut one in black and used it as a shadow behind the sentiment. Using a bit more of the extra card, I cut a Jasmine Flower and added it to the end of the sentiment flag. The card was completed with white and black mats and layers. The finished dimensions are 7 1/4" x 8 1/2" in size. All for now. Sue x
Subscribe to:
Posts (Atom)