Hello crafters! Yes it is that time again, time to start sharing Christmas cards! I just had to start with an angel card too! For this card, I started by embossing a piece of coconut white card with the Falling Snow embossing folder. Next I cut the Mosaic Ray Background out of white card. I used a sticky adhesive sheet on to another piece of white card, peeled the backing off and attached the Mosaic Ray Backround to it. I pulled out the Holographic Glitters to fill in the background. I used Midnight Blue, Teal Have and Sea Spray and I started around the centre circle area in the die then roughly sprinkled them in a circle starting with the dark blue, then the teal and then the sea spray at the bottom. I cut a circular frame using the Double Stitched Circles die set and added it with foam over the background. I trimmed away the excess around the edge of the circle then added it to the embossed background with mounting foam. I cut the Christmas Angel 2020 once out of white card and twice out of silver mirror card. I used Distress ink to colour the hair, face and arms of the angel on the base white card. I cut the dress out of the two silver die cuts. I added one full dress, then cut the bottom off of the second on and added it one top to give a flowy look to it. I cut the wings out of vellum and attached them then added the angel to the circular frame with foam. I cut the Decorative Flag die to give it two forked ends by cutting half way then moving the die around to the other side and cutting it again. I added one more Decorative Flag in the centre but cut the forked ends off of it so it looked like it was tucked under. I used the Merrriest Christmas Wishes sentiment cut out of Cobalt Blue card and glued it in the centre. The card was completed with white mats and layers. The finished diemnsions are 7 3/4" x 8 3/4" in size. All for now. Sue x
A daily papercrafting blog which features my handmade cards showcasing Creative Expression's products including my own line of cutting dies and embossing folders, Cosmic Shimmer, Ranger and more which use various techniques and ideas to hopefully inspire the creativity in you.
Tutorials
- Home
- My Ribbon Flower Tutorial
- Fancy Nestie
- Blossoms Five Flower Bud
- Blossoms Five Full Flower
- Easel Tutorial
- Wax Paper Embossing Folder Tutorial
- Caught In Crystal
- Shaving Foam Tutorial
- Quilt Card Tutorial
- Paved Pearl Technique
- Faux Leather Technique
- Plaited Ribbon Wreath Tutorial
- Paper Rose Tutorial
Monday, 6 July 2020
Merriest Christmas Wishes
Hello crafters! Yes it is that time again, time to start sharing Christmas cards! I just had to start with an angel card too! For this card, I started by embossing a piece of coconut white card with the Falling Snow embossing folder. Next I cut the Mosaic Ray Background out of white card. I used a sticky adhesive sheet on to another piece of white card, peeled the backing off and attached the Mosaic Ray Backround to it. I pulled out the Holographic Glitters to fill in the background. I used Midnight Blue, Teal Have and Sea Spray and I started around the centre circle area in the die then roughly sprinkled them in a circle starting with the dark blue, then the teal and then the sea spray at the bottom. I cut a circular frame using the Double Stitched Circles die set and added it with foam over the background. I trimmed away the excess around the edge of the circle then added it to the embossed background with mounting foam. I cut the Christmas Angel 2020 once out of white card and twice out of silver mirror card. I used Distress ink to colour the hair, face and arms of the angel on the base white card. I cut the dress out of the two silver die cuts. I added one full dress, then cut the bottom off of the second on and added it one top to give a flowy look to it. I cut the wings out of vellum and attached them then added the angel to the circular frame with foam. I cut the Decorative Flag die to give it two forked ends by cutting half way then moving the die around to the other side and cutting it again. I added one more Decorative Flag in the centre but cut the forked ends off of it so it looked like it was tucked under. I used the Merrriest Christmas Wishes sentiment cut out of Cobalt Blue card and glued it in the centre. The card was completed with white mats and layers. The finished diemnsions are 7 3/4" x 8 3/4" in size. All for now. Sue x
Sunday, 5 July 2020
Sparkle Every Day
Saturday, 4 July 2020
So Glad We're Friends
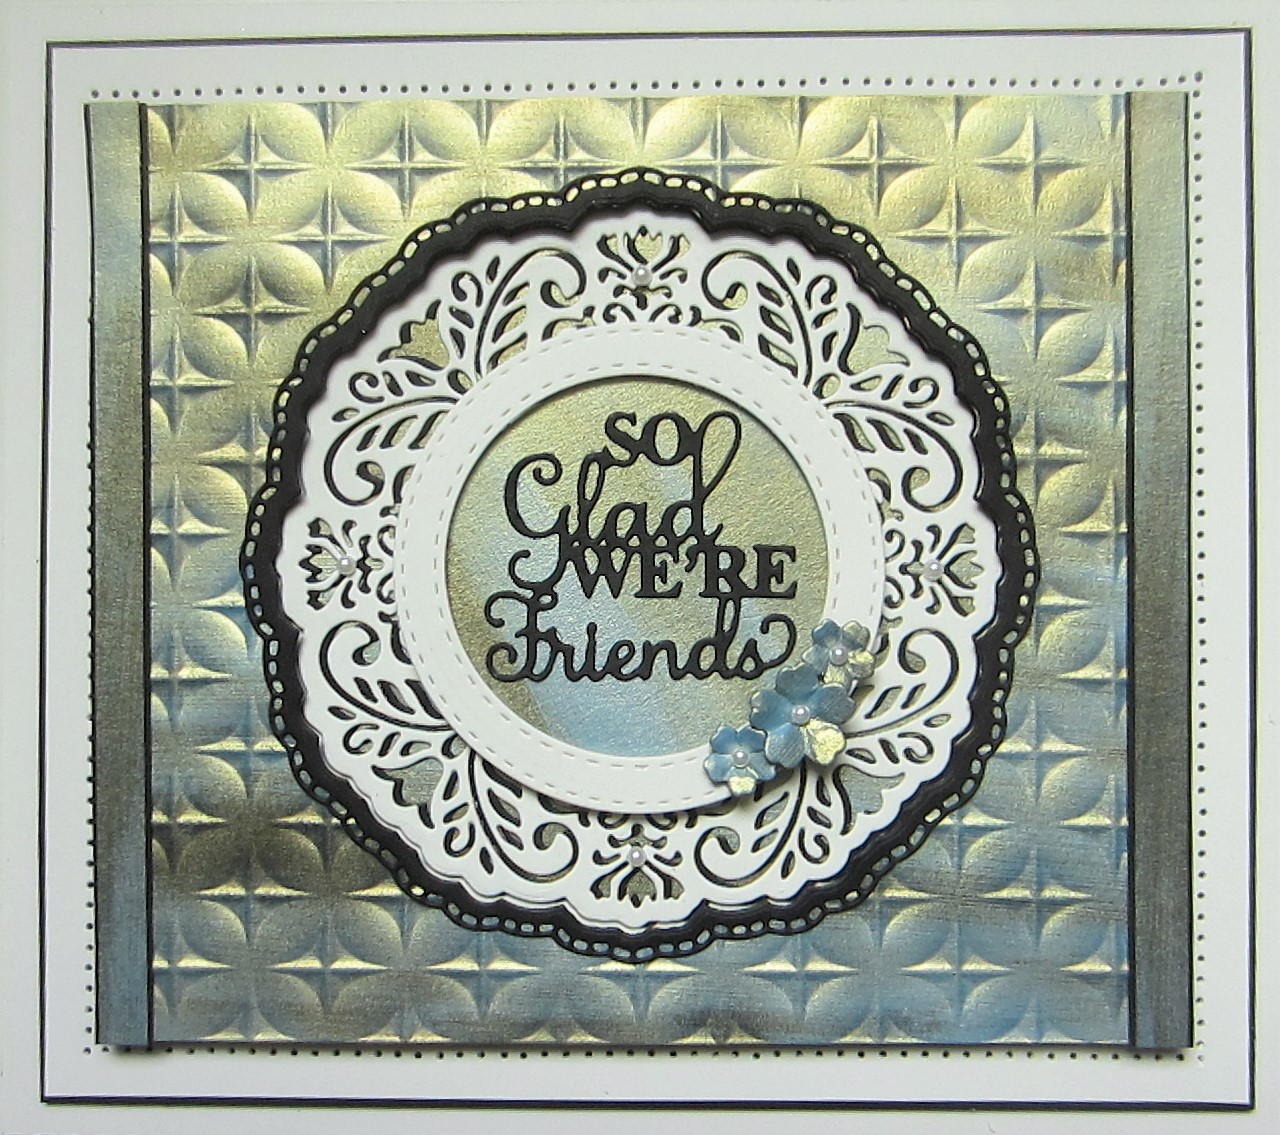
Hello crafters! I am going back to an earlier release with this one. I started with the Summer Sky Opal Polish across a piece of black card. Although it looks blue in the container, on dark card, you get the interference mica showing which is a gold colour. I swiped it across the card using lighter and heavier strokes so sometimes you see the gold and other times you get more of the blue colour showing through. I cut an aperture in the card using the Millie die ouline die. Next, I used the Quilted Pillow embossing folder on it for textureand added mounting foam to raise it. I added it onto a piece of white card (which did not show but gave me a base) I cut the Millie die again twice, once in white and once in black. I shadowed the white one with the black die cut then added the piece behind it that was cut from the aperture. I glued it into the recessed aperture.I used the outer decorative ring and cutting edge from the Millie set to add a black frame around the aperture opening. Using the Double Stitched Circle die set, I cut a small white frame and added it with foam in the middle of the Millie die. I cut the So Glad We're Friends sentiment in black and glued it inside the white frame. I added three small flowers cut from a left over section of the Summer Sky Opal Polish piece. I cut two thin strips of the leftover piece and added thin black mats to them and glued them on the edges of the card as borders. The card was completed with white and black mats and layers. The finished dimensions are 7" x 7 3/4" in size. All for now, Sue x
Follow my blog with Bloglovin
Friday, 3 July 2020
Best Wishes
Thursday, 2 July 2020
For You
Hello crafters! I started this card by coating a piece of card with Bordeaux Glitter Kiss and allowing it to dry well. Next I embossed it with the Quilted Hearts embossing folder. I cut the Deliah Background in white. I used the matching Delilah Edgers to cut away the sides of the background. I glued the edges to the top and bottom of the Glitter Kiss background. I used a small piece of extra Glitter kiss card and cut the For You sentiment out of it. I cut it again in black and used it as an offset shadow. I glued the sentiment to a Decorative Flag die cut in white and attached it to the card with mounting foam. Next I attached a sticky adhesive sheet to a piece of white card and cut out several of the Jasmine flowers. I peeled the backing off and coated them with Frosted Sparkle Glitterbitz and then assembled them into three flowers. I attached the flowers at the end of the sentiment flag and cut the Magnolia Corner in white to add as accents around the flowers. The card was completed with white mats and layers. The finished dimensions are 6 3/4" x 8" in size. All for now, Sue x
Wednesday, 1 July 2020
Rose Lady
Hello there my crafty friends! The Rose Lady was the second Perfect Portrait in the collection, but I just love the detail in her! I started this card by cutting the Rose Lady die into a piece of coconut white card. Rather than running the die through the emboss sandwich, I chose to hand emboss her using a ball stylus for maximum depth. It really brings all the detail in the roses out that way. Next I used Spun Sugar Distress Oxide ink on a smoothie and added colour to the roses. I went over the centres with Worn Lipstick to deepen them. I used Crushed Olive ink on the leaves. I backed it with Black Gloss card. Next I used the Background Rectangles die set to add a thin frame of Black Gloss card and added it atop a wider white frame. I added the frames with mounting foam to raise them. The card was completed with white and black gloss mats and layers. The finished dimensions are 6 3/4" x 8 1/2" in size. All for now, Sue x


Follow my blog with Bloglovin
Subscribe to:
Posts (Atom)