Friday, 20 March 2020

You Are Simply The Best Ever!

Hi bloggers!  Here is a great card to help use up some of your scrap card!  I started with strips of white , aqua and Ocean card and taped them to a piece of white card on the diagonal, butting them up tightly to each other.  Next I cut a multi layered frame using the Double Stitched Ovals, with a white base and a thinner aqua card frame on top.  I added the frame to a piece of white card that I lightly inked the centre with Spun Sugar Distress ink and attached it to the centre of the background.  I cut the rose from the Elegant Flower Trio out of powder pink and black.  I used the black as a shadow behind the pink and glued it into the centre of the oval frame.  I cut the You Are Simply The Best Ever out of pink and black card and shadowed it as well.  I glued the sentiment to the bottom of the card.  The card was completed with white mats and layers.  The finished dimensions are 6 3/4"  x  8 1/4"  in size.  All for now, Sue x


                                                       Follow my blog with Bloglovin

Thursday, 19 March 2020

Friends Are The Flowers

Hello crafters!  Today's card colours are Iris, white and black.  I started by cutting the decorative die from the Priscella die set into a piece of coconut white card twice, slightly overlapping in the centre.  I backed it with Iris card.  Next I cut two more of the Priscella die, once in white and once in black, and I used the outer cutting die to cut them out of the card.  I shadowed the white one with the black one slightly offset behind and mounted it vertically in the middle of the card, covering the overcut area in the background.  Next I made a rectangular frame using Iris card and the Double Stitched Rectangle die set.  I added mounting foam and seating it over my stamped sentiment and added it to the centre of the card.  I cut a strip of double pearls in half and ran them down each of the sides of the background, then created three flowers using the Cosmos Flower die set.  I cut Iris card for the base and added a black outline edge to them.  I attached them in opposite corners and added white leaves from the set as accents.  The card was completed with white, iris and black mats and layers.  The finished dimensions are 6 1/2"  x  9 1/4" in size.  All for now, Sue x


                                                      Follow my blog with Bloglovin

Wednesday, 18 March 2020

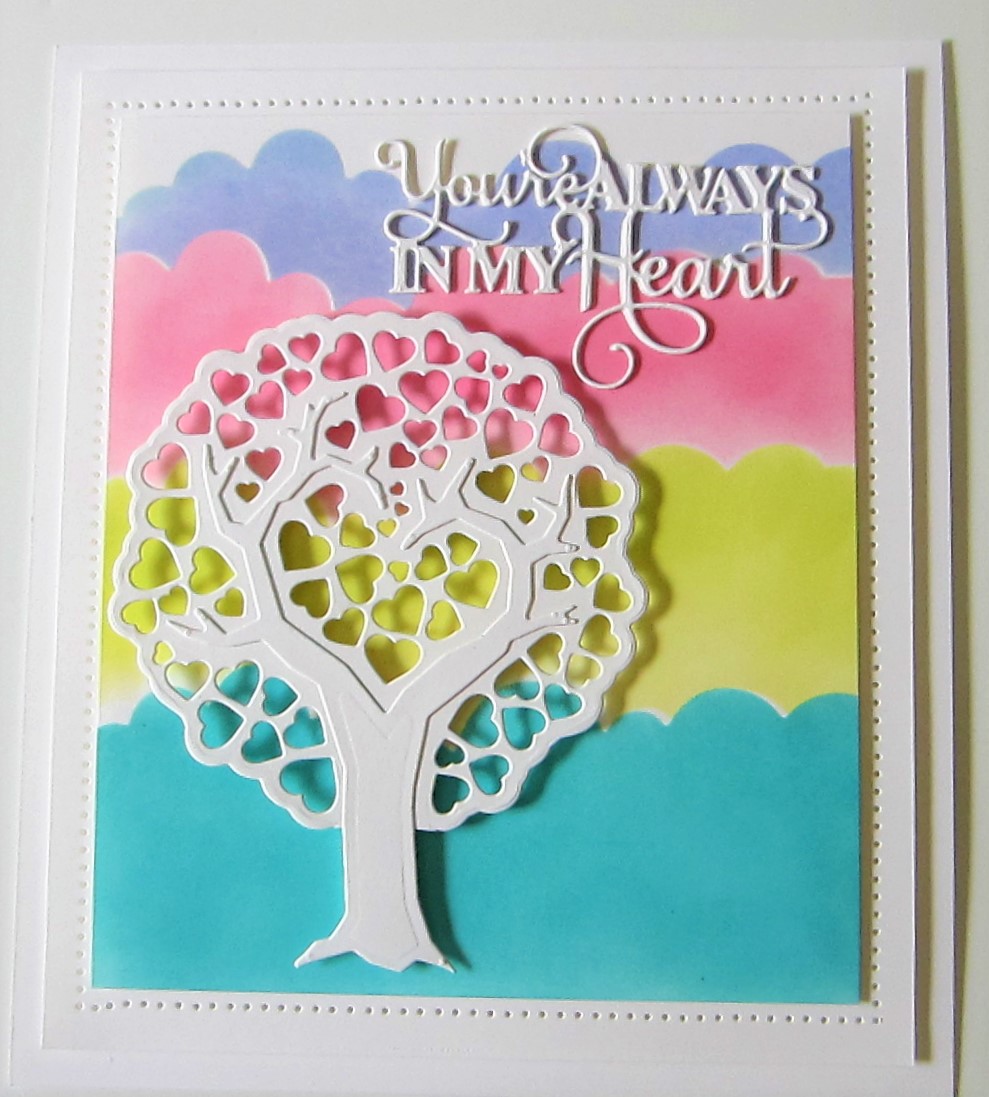
You're Always In My Heart

Hi there my crafty friends!  Today's offering is a bit whimsical, but I really liked it!  I started with a piece of coconut white card.  I cut a stencil using the Stitched Hills and Clouds.  I used the cloud die cut as a stencil and started at the top with Shaded Lilac Distress Oxide ink and a smoothie.  I moved the stencil down and used Worn Lipstick in the second area.  Next I used Fossilised Amber and finally Peacock Feathers until I filled in the lower portion of the card.  Next I cut the Eternal Heart Tree in white, both the base and the head of the tree.  I assembled them and added mounting foam to the back and attached it to the background.  I used the You're Always In MY Heart sentiment and cut it twice and stacked it then glued it into the upper portion of the card.  I completed the card with white mats and layers.  The finished dimensions are 7"  x  8" in size.  All for now. Sue x


                                                        Follow my blog with Bloglovin

Tuesday, 17 March 2020

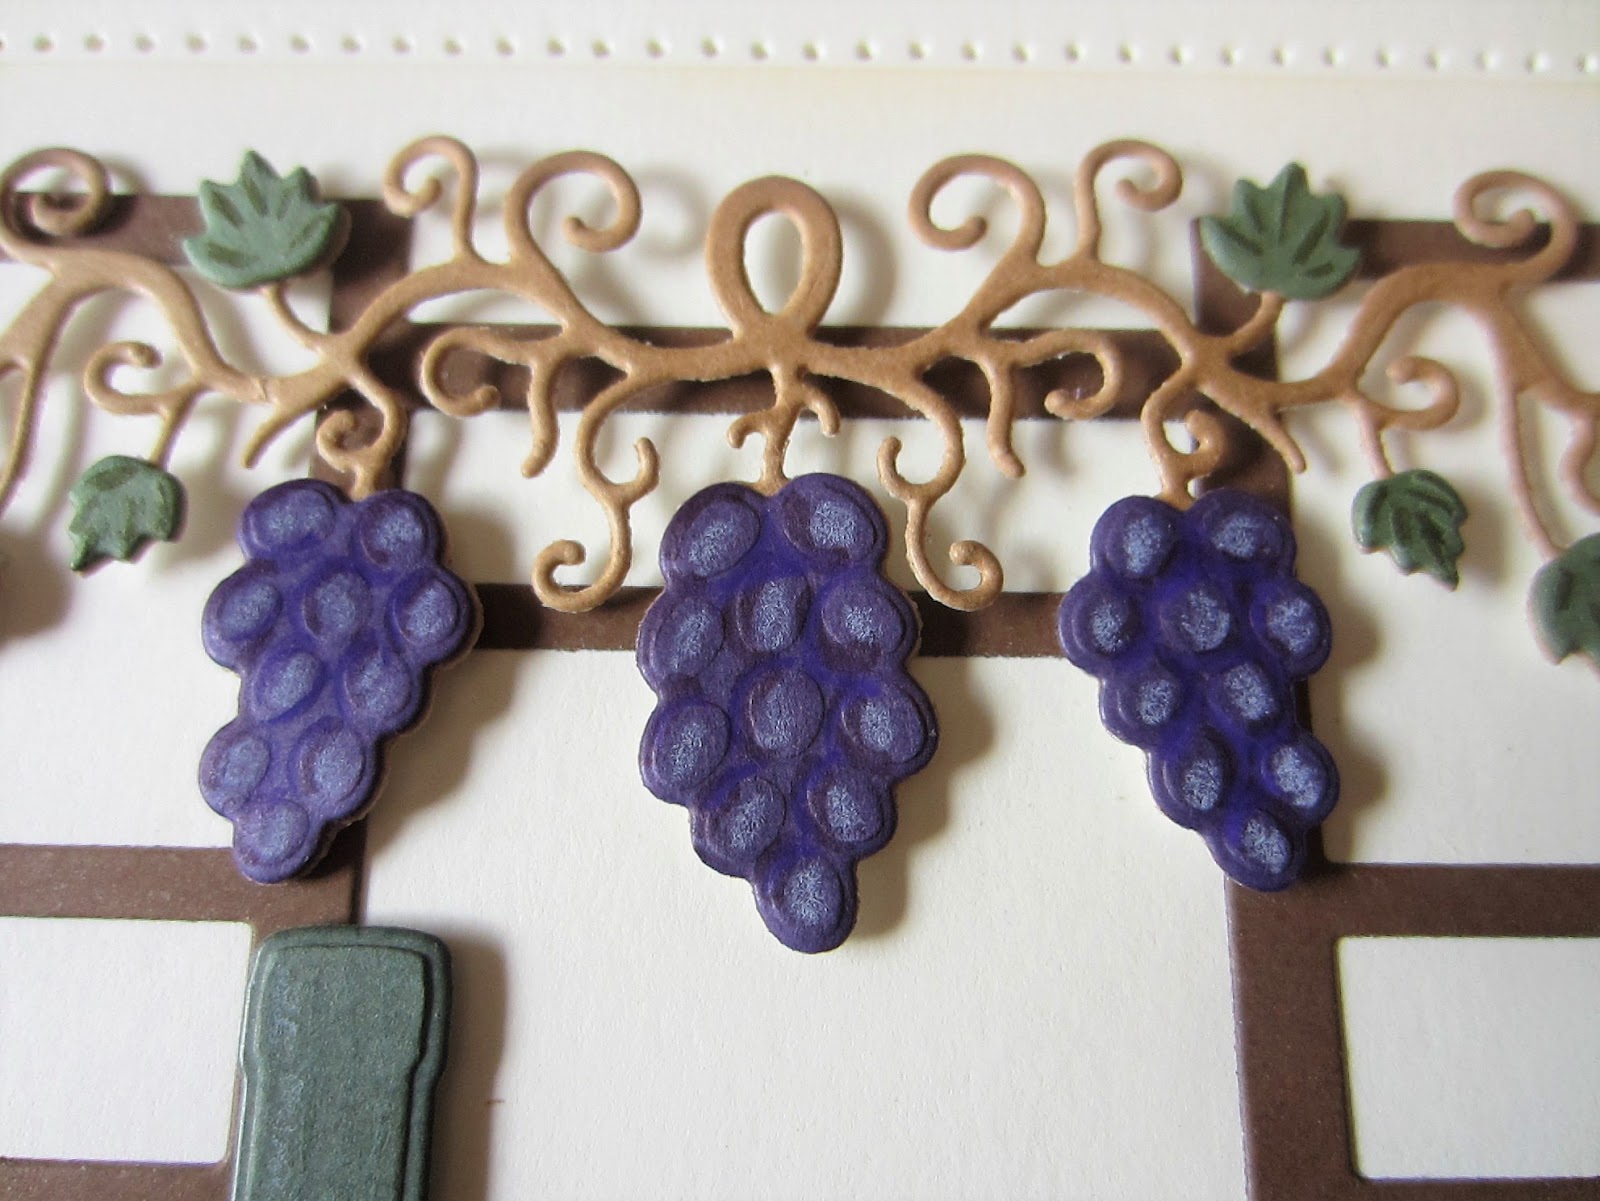
Celebrate

Hello bloggers!  I started with milk card for the background for today's card.  I used some Antique Linen distress oxide ink around the edges for a bit of a vintage look.  Next I cut the Tiled Background twice out of Chestnut card.  I cut the edges off of both of them, then reassembled them to make a larger background and glued them to the card.  Using the Grape Vine border die, I cut it in tan card then added the Grapes out of purple and the leaves out of khaki card over the top and glued it to the top of the card.  From both the Merlot set and the Chianti die sets, I cut the wine bottle and Chianti bottle out of Khaki card.  I cut the chianti bottle again out of tan card and nipped away the basket and glued it over the green bottle I used as a base.  I cut the grapes out of khaki for the base and then again out of purple card and nipped away the fruit portion and glued it over the green base.  I cut the Noble Celebrate out of purple card and added it to a milk card shadow base and added it with foam across the centre.  I used a white pencil to add highlights to the grapes and wine bottles.  The card was completed with milk mats and layers.  The finished dimensions are 7"  x  8 1.4" in size.  All for now. Sue x


                                                      Follow my blog with Bloglovin

Monday, 16 March 2020

Sweet Friends

Hello crafters!  I started with the Violet Vibe Lustre Polish for the background for today's card.  I coated a piece of card with it and allowed it to dry well.  Next I ran it through the Sublime Swirls 3D embossing folder to give it texture.  Next I cut all three of the Decorative Flag dies out of white card.  I glued them to the upper left corner and arranged the lengths to vary and nipped away the extra card so it was even with the edge.  I cut the Friend Circle out of white and glued it to the card.  I used a leftover piece of the Lustre Polish card and cut the flowers from the Magnolia Corner out of it.  I added a cluster of flowers on the top of the flags as accents.  I cut the base piece from the Magnolia Corner out of white and nipped it apart and used the leaves as accents for the flowers.  The card was completed with white mats and layers.  The finished dimensions are 7"  x  8 1/2" in size.  All for now, Sue x


                                                       Follow my blog with Bloglovin

Sunday, 15 March 2020

For You

Good Sunday morning all!  I started this card by embossing a piece of coconut white card with the Distressed Lines embossing folder.  Next I used the Frosted Sparkle Glitter Kiss and grouted the debossed areas of the card.  I allowed it to dry well.  Next I cut the Celtic Squares Background die in white.  I cut two strips of it to use as side borders.  I covered a couple of strips of white card with sticky adhesive sheets and peeled the backing off and coated them with Sunlight Speckle Gilding Flakes.  I glued the side borders to it then added them with foam to the sides of the background.  Next I cut the Elsa die in white and added it with foam to the centre of the card.  I cut a circle with a sticky adhesive sheet on it then used more of the Sunlight Speckle on it.  I added a decorative frame over the top of it from the centre of the Elsa die, then mounted it in the centre.  I used the For You sentiment in white and glued it in the middle.  I completed the card with white mats and a mat with a thin edge of the gilding flakes to match the card.  The finished dimensions are 6 1/4"  x  8 1/2"  in size.  All for now, Sue x


                                                       Follow my blog with Bloglovin

Saturday, 14 March 2020

Crinkle Background Card


Hi crafters!  Here's a cool technique that you can do with Lustre Polish to add an interesting effect to your backgrounds.  You just need a bit of cling film.


 The finished dimensions are 7"  x  8" in size.  All for now, Sue x
                                                     Follow my blog with Bloglovin