Monday, 25 May 2020

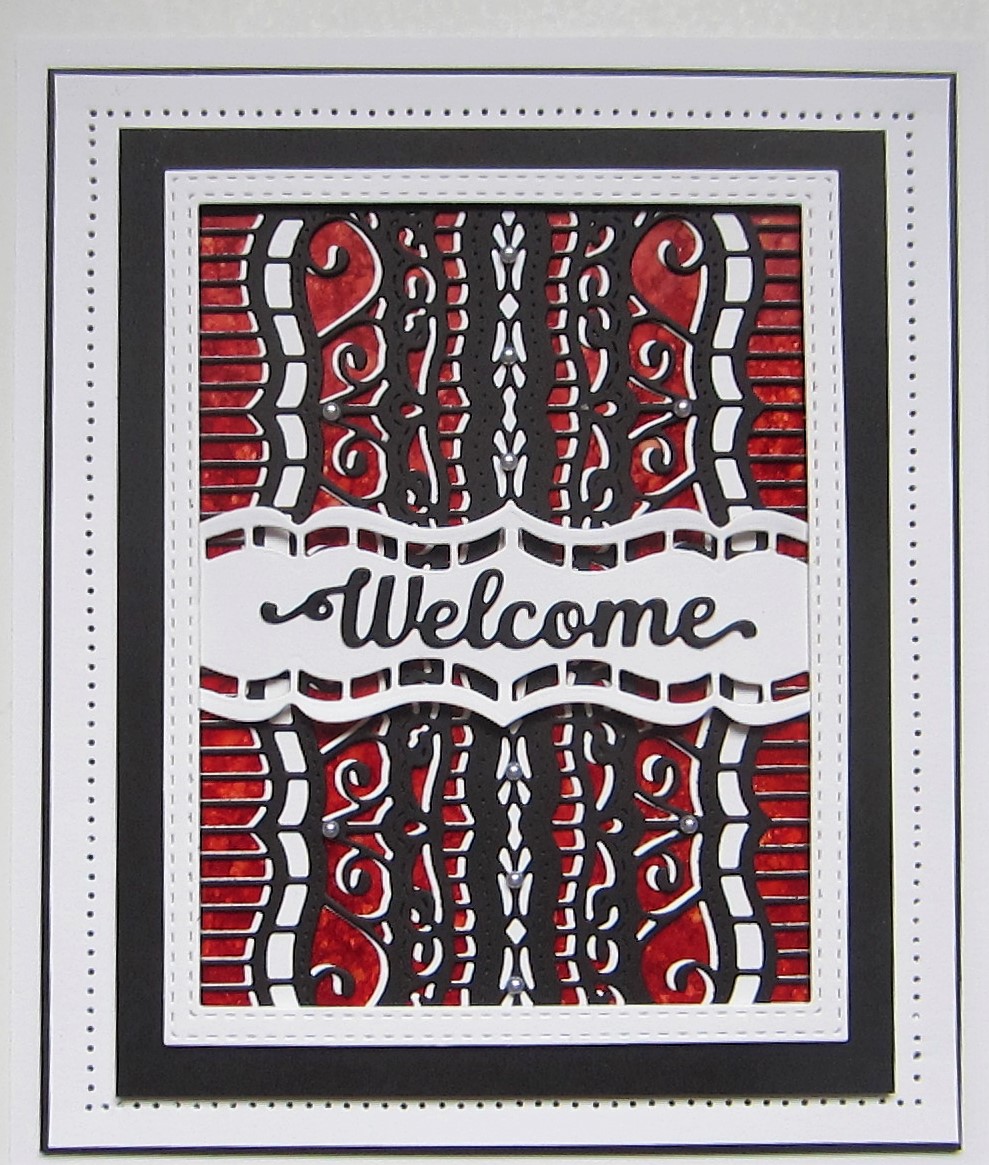
Welcome

Hello crafters!  I was playing with Yupo and alcohol inks for today's card.  I started with a piece of white Yupo paper and used Red Pepper and Sunshine Yellow alcohol inks on it.  I added Blending solution and mixed the colours around a bit (you can see the interesting patterns in the close up pics).  Next I cut the Paulette Background in black and white.  I used the Paulette Edgers and cut some more detail into the black version of the background.  This time, I used the white offset behind the black one and glued them together.  I glued them on to the Yupo Paper background.  I used the Double Stitched Rectangles and made a multi-layered frame using black as the base and a thinner white frame on top.  I added it with mounting foam over the backgound.  I used the Paulette Edgers to create a white base for the Welcome sentiment and attached it across the frame in the middle of the card.  I cut the Welcome die  from the Newborn Sentiments in black and glued it across the centre piece.  The card was completed with white and black mats and layers.  The finished dimensions are 6 1/4"  x  7 3/4" in size.  All for now Sue x


                                                       Follow my blog with Bloglovin

Sunday, 24 May 2020

Sweet Baby

Good Sunday morning all!  I thought this sweet card might be just the thing to bring a smile to your face!  I started with the Double Stitched Rectangles and matted up several of them in white.  I pulled out an older flower set called Stitched Doodle Flowers and cut the pieces in a variety of pastel tones.  I layered them all up differently to give them a whimsical look and added leaves cut from Khaki and dark green card.  I arranged the flowers in opposite corners around the smallest rectangle.  I cut the kangaroo and baby from the Zoo Animals set and glued it in the lower corner.  Using the Newborn Sentiments set, I cut the Sweet Baby out of lilac card and glued it above.  The card was completed with white mats and layers.  The finished dimensions are 6 1/4"  x  7 1/2" in size.  All for now. Sue x


                                                      Follow my blog with Bloglovin

Saturday, 23 May 2020

Scrunched Lustre Polish Background


Hello crafters!  Grab your Lustre Polish and some cling film for today's card technique.  It gives a really interesting look to your backgrounds!

This is also the last video that will be put up on the blog for awhile.  I was due to film more videos in April, but the trip had to be cancelled and I do not know when it can be rescheduled at the moment.  I hope you will enjoy some of the older videos that you may have missed along the way in the meantime!


 The finished dimensions are 6 1/4"  x  7 3/4" in size.  All for now. Sue x
                                                        Follow my blog with Bloglovin
Friday, 22 May 2020

For Someone Special

Hello bloggers!  Here is a quick one using Glitter Kiss!  I started by coating a piece of card with the Periwinkle Glitter Kiss and allowing it to dry well.  Next I used the Double Stitched Rectangles to cut the piece into frames.  Starting with the outside frame, I added mounting foam to raise every other frame and then added them to a piece of white card.  I cut the For Someone Special die in both white and black and shadowed it then glued it to the very centre.  I made three Jasmine Flowers using the matching stamps and dies.  I assembled them then used  some Shaded Lilac Distress Oxide on the tips to add colour.  They were attached in opposite corners, then pieces of the Magnolia Corner were cut up to add as accents around th flowers.  The card was completed with white and wisteria mats and layers.  The finished dimensions are 6 1/2"  x  8" in size.  All for now. Sue x


                                                    Follow my blog with Bloglovin

Thursday, 21 May 2020

Hello Sunshine

Hello bloggers!  How about some cheeky flamingos for todays' card!  I started with the Sunrise mask taped to a piece of white card.  I used Fossilized Amber Distress Oxide ink through the stencil, then went back over and blended in some Spiced Marmalade in the sun area and tips of the rays.  I used the Double Stitched Ovals and made a white frame and attached it with foam over the stenciled background.  I trimmed away the excess from the edges.  I used the Dotty Flourish embossing folder on a piece of white card and attached the frame in the centre.  Next I cut a bunch of the various flamingos from the Tickled Pink die set out of Soft Salmon card.  I used a black sharpie to colour their beaks and yes, I just noticed that I missed colouring the beak of the one in the very front!  Oops!  I cut the wings seperately and glued them on them added the flamingos into the frame, slightly overlapping them.  I cut the Hello Sunshine sentiment out of Soft Salmon and black card.  I used the black as a shadow behind, then glued it in the lower corner of the card.  The card was completed with white mats and layers.  The finished dimensions are 6"  x  7" in size.  All for now, Sue x


                                                       Follow my blog with Bloglovin

Wednesday, 20 May 2020

Just Because

Hi crafters! I know it looks like this card is black and white, but it is really a deep navy blue and white colour combo.  I started with a piece of coconut white card covered with a sticky adhesive sheet.  Next I cut the Martha Background out of  a piece of  Deep Navy card.  I used the Martha Edger set to cut away the sides, leaving me a wide border strip.  I peeled the backing paper off of the sticky adhesive sheet and positioned the strip in the middle of the card.  I used Frosted Sparkle Glitterbitz to cover the exposed adhesive.  Next I cut two white zigzag wavy borders out of the Martha set and added them to the sides with mounting foam to raise them.  I cut the Joanie die in white and backed it in white then added it to the centre of the card with foam.  I used the Just Because Shadowed sentiment in Deep Navy on a white shadow,  I mounted it with foam in the middle of the Joanie die.  The card was completed with white and Deep Navy mats and layers.  The finished dimensions are 6 3/4"  x  7"  in size.  All for now, Sue x


                                                        Follow my blog with Bloglovin