A daily papercrafting blog which features my handmade cards showcasing Creative Expression's products including my own line of cutting dies and embossing folders, Cosmic Shimmer, Ranger and more which use various techniques and ideas to hopefully inspire the creativity in you.
Tutorials
- Home
- My Ribbon Flower Tutorial
- Fancy Nestie
- Blossoms Five Flower Bud
- Blossoms Five Full Flower
- Easel Tutorial
- Wax Paper Embossing Folder Tutorial
- Caught In Crystal
- Shaving Foam Tutorial
- Quilt Card Tutorial
- Paved Pearl Technique
- Faux Leather Technique
- Plaited Ribbon Wreath Tutorial
- Paper Rose Tutorial
Tuesday, 25 July 2023
Trick Or Treaters
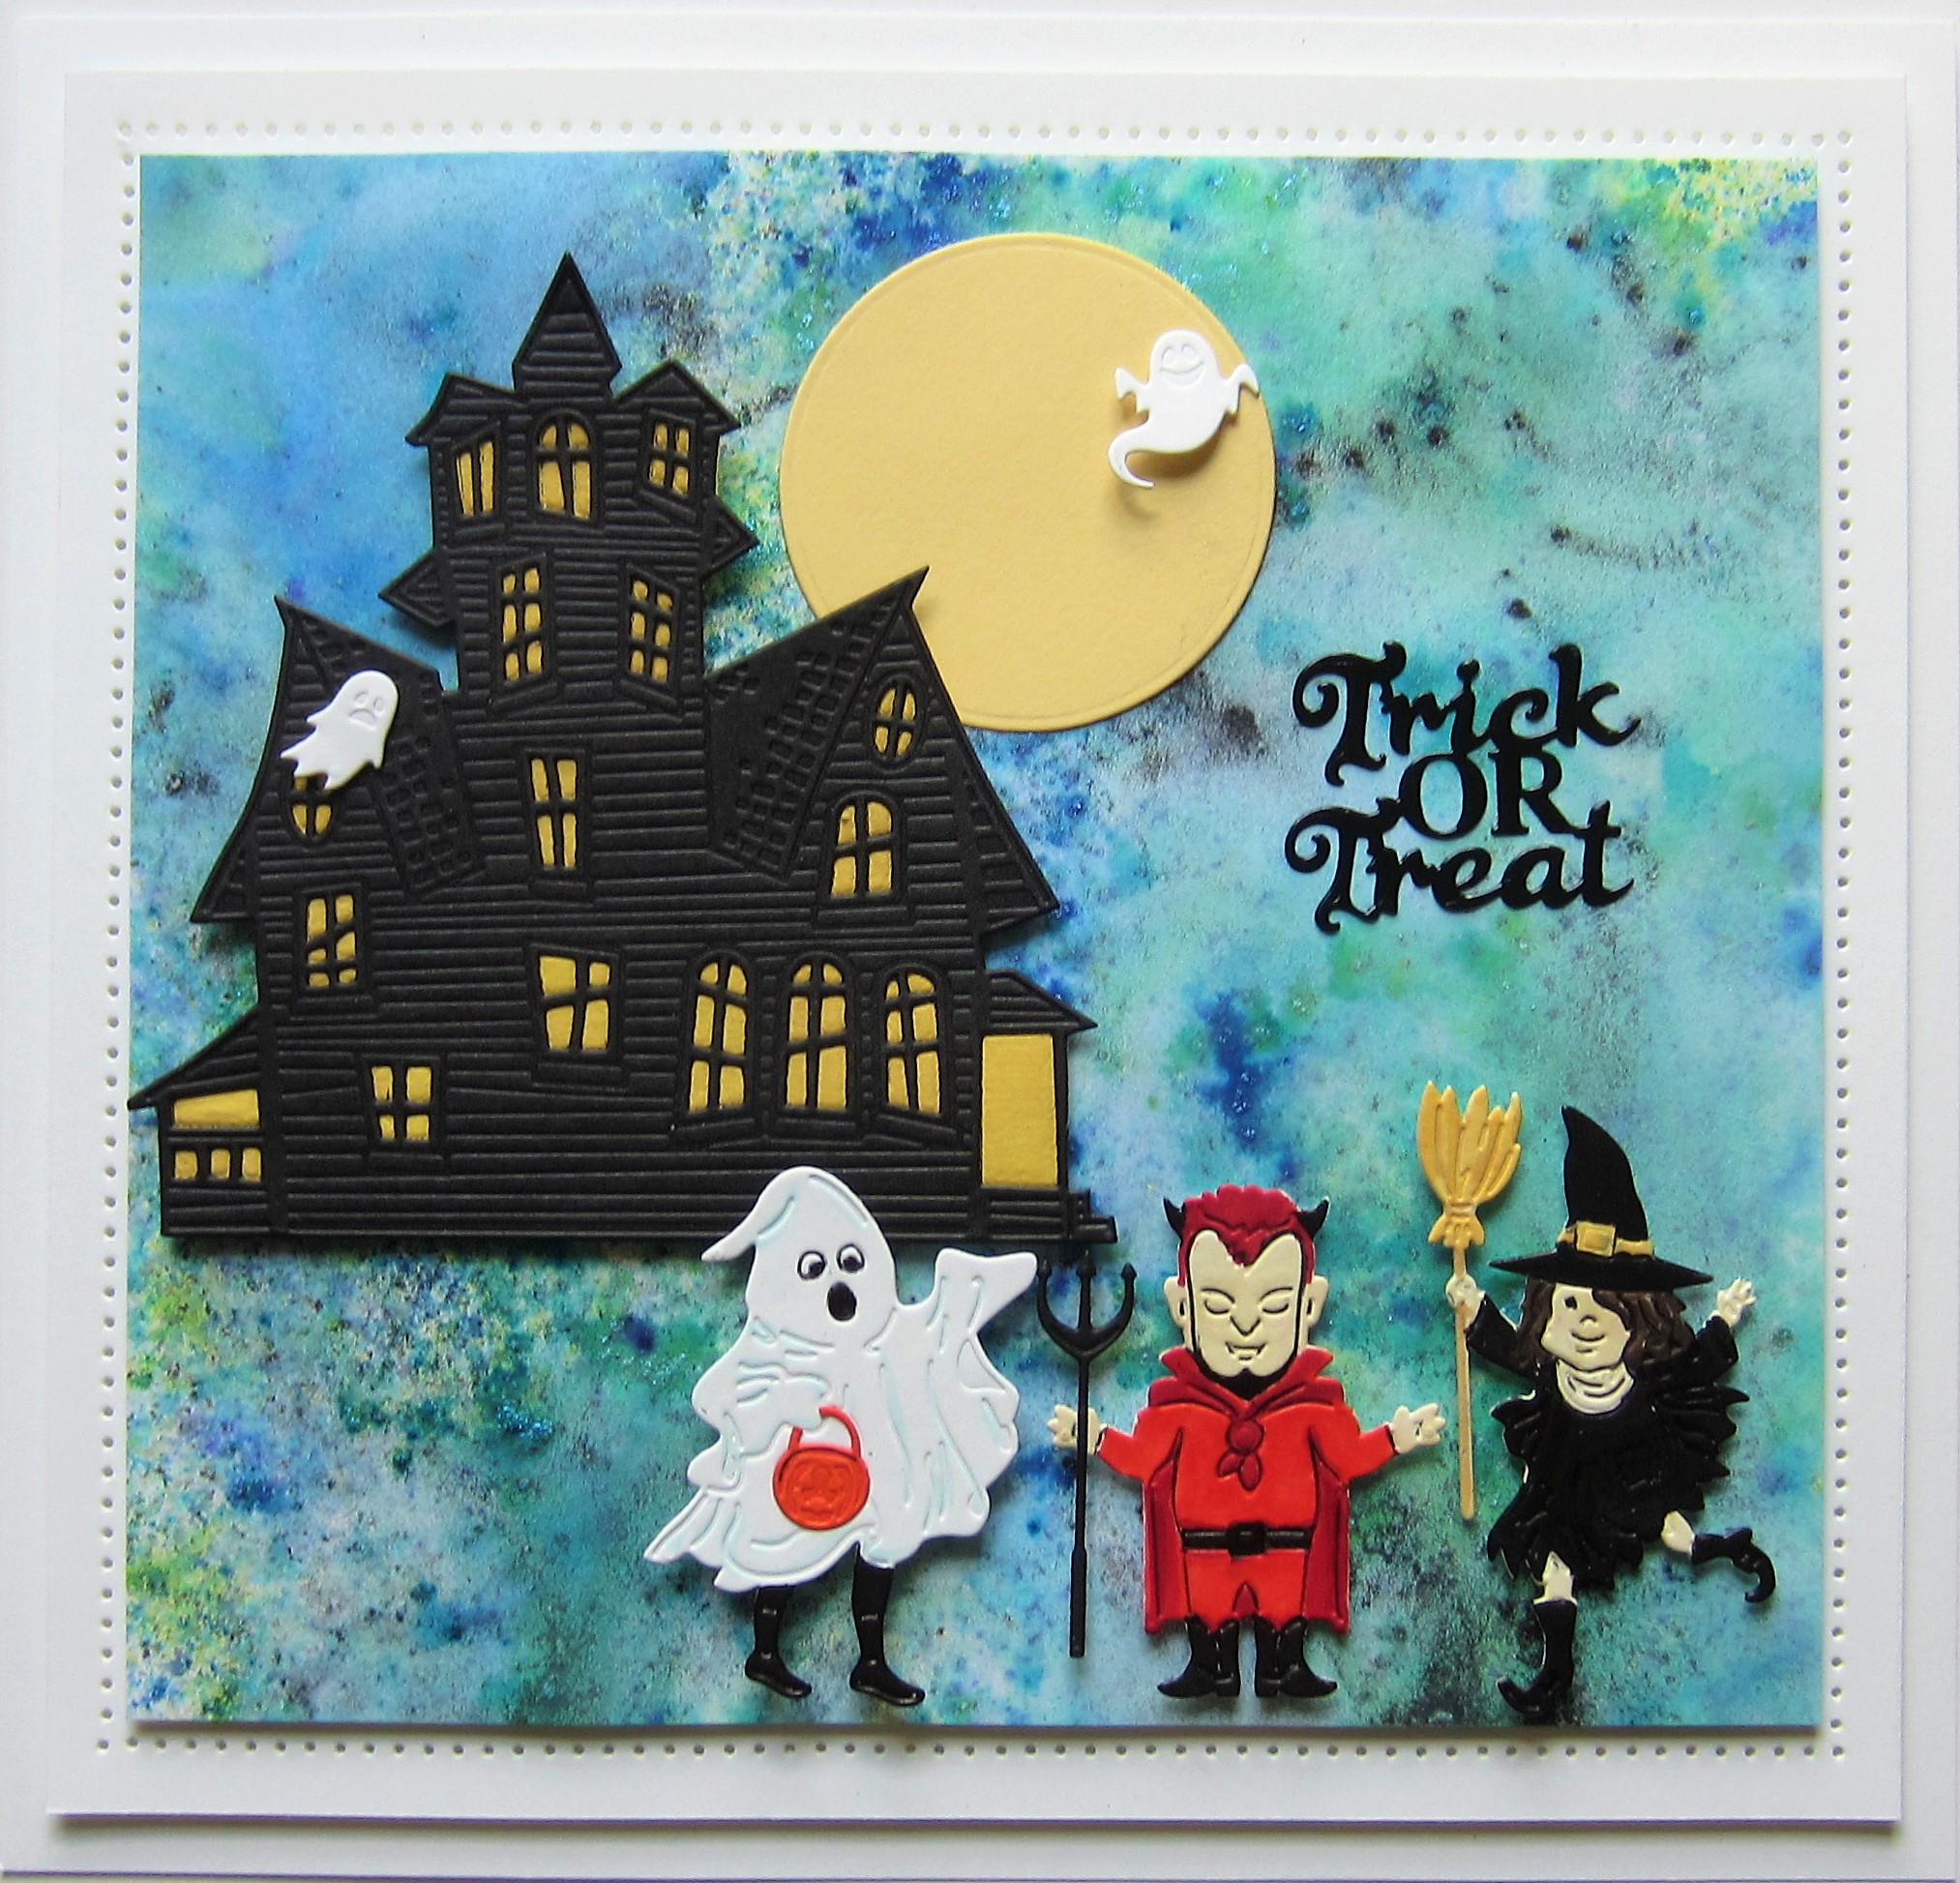
Hello bloggers! The next die that I would like to introduce is the Trick Or Treaters! This set contains nine dies including the devil, witch and ghost trick or treaters, plus several sentiments and accessories that can be used. These dies can easily be mixed with other dies in this release as well as those from last year's Halloween release to make fabulous cards. If this set is singing to you, then just leave a comment on this post and you will be included in the drawing to win the entire collection. The third post of the day will be here at 3pm. I hope you will be able to join us back here then! All for now, Sue x
Vampire
Hello crafters! Welcome to the July Die Release Blog Launch. We are releasing the new Halloween dies this month. It is a release of seven does, but they are all perfectly designed to be used together (and with last year's release as well!) I will be giving away one of the entire collection to one lucky winner based a drawing done of all the comments left on the posts. You may leave a comment on every one of the posts in the blog launch, but please only one comment per post. Please make sure to add your name to each post and make sure it s memorable in some way, add your surname, initial or funny alias. I will be doing the drawing and posting the winner's name on Tuesday the 1st of August, so don't forget to check back then. We are starting out with the new Vampire die from this Halloween collection. Shown here, you can see how well he works to add drama to your Halloween cards and projects. If you like this little guy, then just pop a comment on the end of this post. I will return with the next post at noon today. All for now, Sue x
Monday, 24 July 2023
With Love At Christmas
Hello crafters! I started today's card by embossing a piece of white card with the Padded Quilt Embossing Folder. I cut a wide oval frame using the Double Pierced Ovals. I added mounting foam to raise it and added it to the centre of the card. Using the Poinsettia Corners, I cut two of them in white. I cut the extra flowers in red and the leaves in green and added them to each of the corners. I attached the corners in the upper left and lower right of the frame. I cut the With Love At Christmas sentiment out of both antique gold and black. I used the black die cut as a shadow behind the gold one and glued it to the inside of the frame. I added small white pearls to the embossed background as accents. The card was completed with white and red mats and layers. The finished dimensions are 7 1/2" x 8 3/4" in size.
The July Halloween Die Release Blog Launch is starting here tomorrow morning at 6am. Hope to see you here then! All for now, Sue x
Sunday, 23 July 2023
Best Wishes
Good Sunday morning all! I covered a piece of white card with a sticky adhesive sheet. I peeled the backing paper off and added three strips of black paper in which I added the Heart Buckle Scroll. I arranged the buckles so they were in different places on the black strip before pressing them into place on the sticky sheet. I used Frosted Sparkle Glitterbitz all over the exposed sticky areas. I cut the buckles twice, once out of ruby red card and a second time out of red card covered in Lava Red polished silk glitter. I nipped away the hearts and added them onto the buckles. I cut the Best Wishes sentiment out of white card and added it to the top and bottom strips of paper. The card was completed with white, red and black mats and layers. The finished dimensions are 7 1/2" x 9" in size. All for now Sue x
Saturday, 22 July 2023
On Your Special Day
Hello my crafty friends! I had a smaller piece of leftover pixied card in my background stash, so I used it for this card. The card was created using Midnight Blue and Aqua Lagoon Pixie Powders. I cut a white frame using the Double Stitched Rectangles and added it with mounting foam to the pixied card. Next I cut a larger piece of white card and added a sticky adhesive sheet to it, I peeled the backing off and added the frame to the centre then used Frosted Sparkle Glitterbitz on the exposed sticky areas. I cut the Happy Couple in white and added them to the left side of the frame. I cut the On Your Special Day sentiment in white and glued it inside the frame. Using the Pinwheel Floral die set, I cut a flower then added it to the lower right corner of the frame and added white leaves as accents. The card was completed with white and black mats and layers. The finished dimensions are 7" x 8 1/2" in size. All for now, Sue x
Friday, 21 July 2023
Best Wishes
Hello crafters! I started today's card with a piece of white card and used the Lace Rose Heart die and cut it into the card twice. I covered a piece of white card with a sticky adhesive sheet, peeled the backing paper off and attached the die cut card on top of it. I used Frosted Sparkle Glitterbitz on the remaining sticky areas. I cut the die again, but this time, I cut it with a piece of black card on top of a piece of white card. What this does is completely cut out the top piece (the black die cut here) and leaves the bottom piece with an embossed image of the design and just the outside edge of the die cuts. I used markers to color the roses on the white die cut. Once I finished colouring it, I covered it with another piece of sticky adhesive sheet and trimmed it to the shape of the heart. I removed the backing paper then seated the black die cut on top. I used more Frosted Sparkle Glitterbitz on the sticky areas, the added it to the card with mounting foam. I cut the Best Wishes sentiment in black and glued it to the card. The card was completed with white and black mats and layers. The finished dimensions are 7 1/4" x 8" in size. All for now, Sue x
Thursday, 20 July 2023
Christmas Wishes
Hello there my crafty friends! I started with a piece of card and covered it with a sticky adhesive sheet. I peeled the backing paper off and used Copper Teal Gilding Flakes all over it. I used a piece of rubit scrubit pad to move the flakes around and refine and remove the excess flakes. Next, I embossed it with the Stripes embossing folder for background texture. I cut the outer frame from the Stained Glass Christmas Tree in both black and white. I used the black die cut as a shadow behind the white die cut. I cut the middle die out of black card and added it to the outer frame. I cut the Christmas Tree in black to use as a base then paper pieced the background by cutting it again out of card covered with the same gilding flakes. I cut the Christmas Tree die again out of white and backed it with a piece of white card. I used my scissors to cut the Christmas Tree out of the die. I paper pieced it with green and gold card, then added it back on top of the base die with mounting foam. I cut the Christmas Wishes sentiment out of a Christmas Wordie sheet and added it above the Christmas Tree. The card was completed with white and black mats and layers. The finished dimensions are 7 1/4" x 8 1/2" in size. All for now, Sue x
Wednesday, 19 July 2023
Sweet Baby Girl
Hello bloggers! I selected a piece of milk card and used the Rope Chain Embossing folder and embossed it for some background texture. I selected a piece of decorative paper from my paper stash to use at the bottom of the background. I taped it to the bottom of the embossed background and added a thin strip of Iris card across the connecting area of the two pieces. I cut the First Train die set out of powdered pink card. I cut the engine and the open car and added them with mounting foam to the card. I cut the extra wheels in pink but added a soft inking around them with Worn Lipstick distress ink. I also added an extra top on to the engine and the open card. I used the heart balloon from the Birthday Balloon die set and cut it in a variety of colours and added thin milk card strings to each one and connected them to the open car. I used some white Fluffy Stuff as smoke coming from the engine and heated it to make it puff up. I cut the Special Delivery die in powdered pink the added it to a milk card shadow backing piece and attached it above the train. I also cut the Sweet Baby Girl sentiment in powdered pink and seated it on a milk card shadow die and attached it below the train. The card was completed with milk and iris card mats and layers. The finished dimensions are 7 3/4" x 8 1/4" in size. All for now, Sue x
Tuesday, 18 July 2023
Just Because
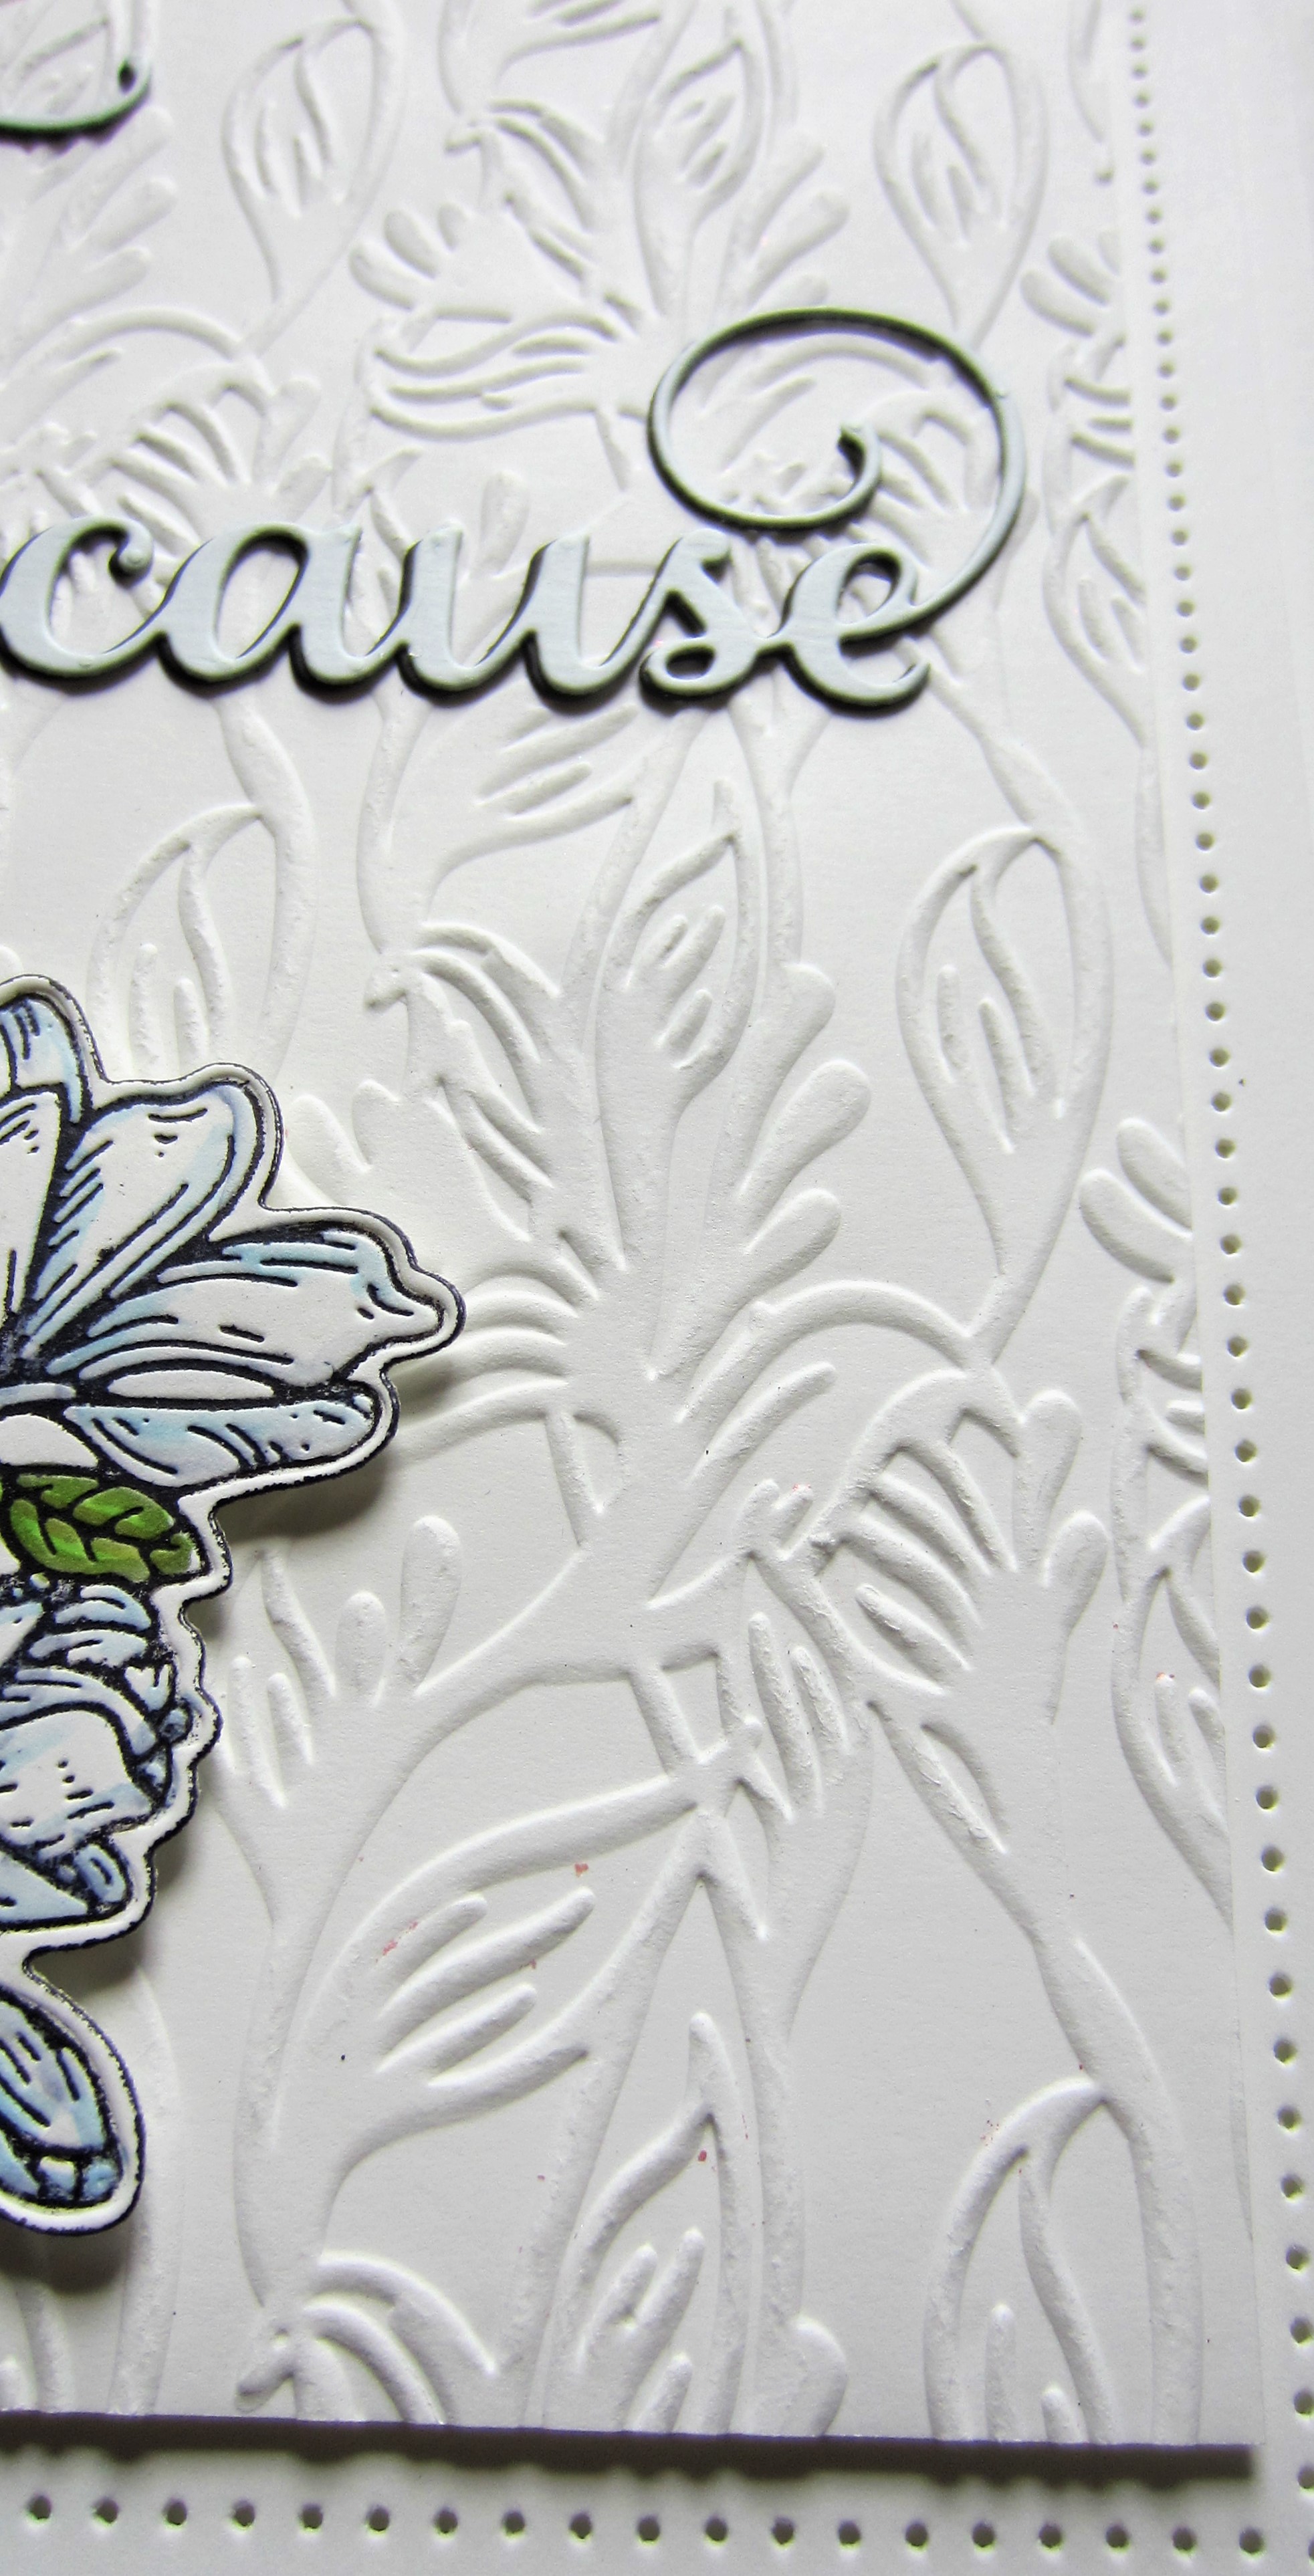
Hi crafters! I used the Sea Garden embossing folder and embossed a piece of white card to use as the background for today's card. Next I inked the Magnolia Stampcut die with black water based ink and ran it through the die cutting machine. I used alcohol based markers to colour the image, keeping the flowers mostly white but using a bit of blue to highlight them. I added them in the lower corner with mounting foam. I cut the Noble Just Because sentiment in white and added a black die cut behind as a shadow. I glued the sentiment to the top of the card. The card was completed with white mats and layers. The finished dimensions are 7 1/4" x 8" in size. All for now, Sue x
Subscribe to:
Posts (Atom)