Friday, 25 October 2019

Christmas Wishes

Hi crafters!  Today's offering is a sort of country Christmas style.  I started by embossing a piece of milk card with the Nordic Trees embossing folder for texture.  Next I cut the Poinsettia Flower Square die out of Antique Gold card.  I added it to another piece of gold card that had a sticky adhesive sheet added to it.  Next I cut the die three more times, each time out of decorative papers from my stash.  I used a red plaid for the petals, a green dotty patterned paper for the leaves and a black dot pattern for the background.  I paper pieced each of the patterned papers into the Poinsettia Flower square.  I added it onto a larger gold square cut from the Double Stitched Squares and attached it to the top of the card.  I used the Christmas Wishes sentiment cut from the same plaid paper and glued it to the lower corner.  The card was completed with milk mats and layers.  The finished dimensions are 6 1/4" x  8 1/4" in size.  All for now, Sue x


                                                     Follow my blog with Bloglovin

Thursday, 24 October 2019

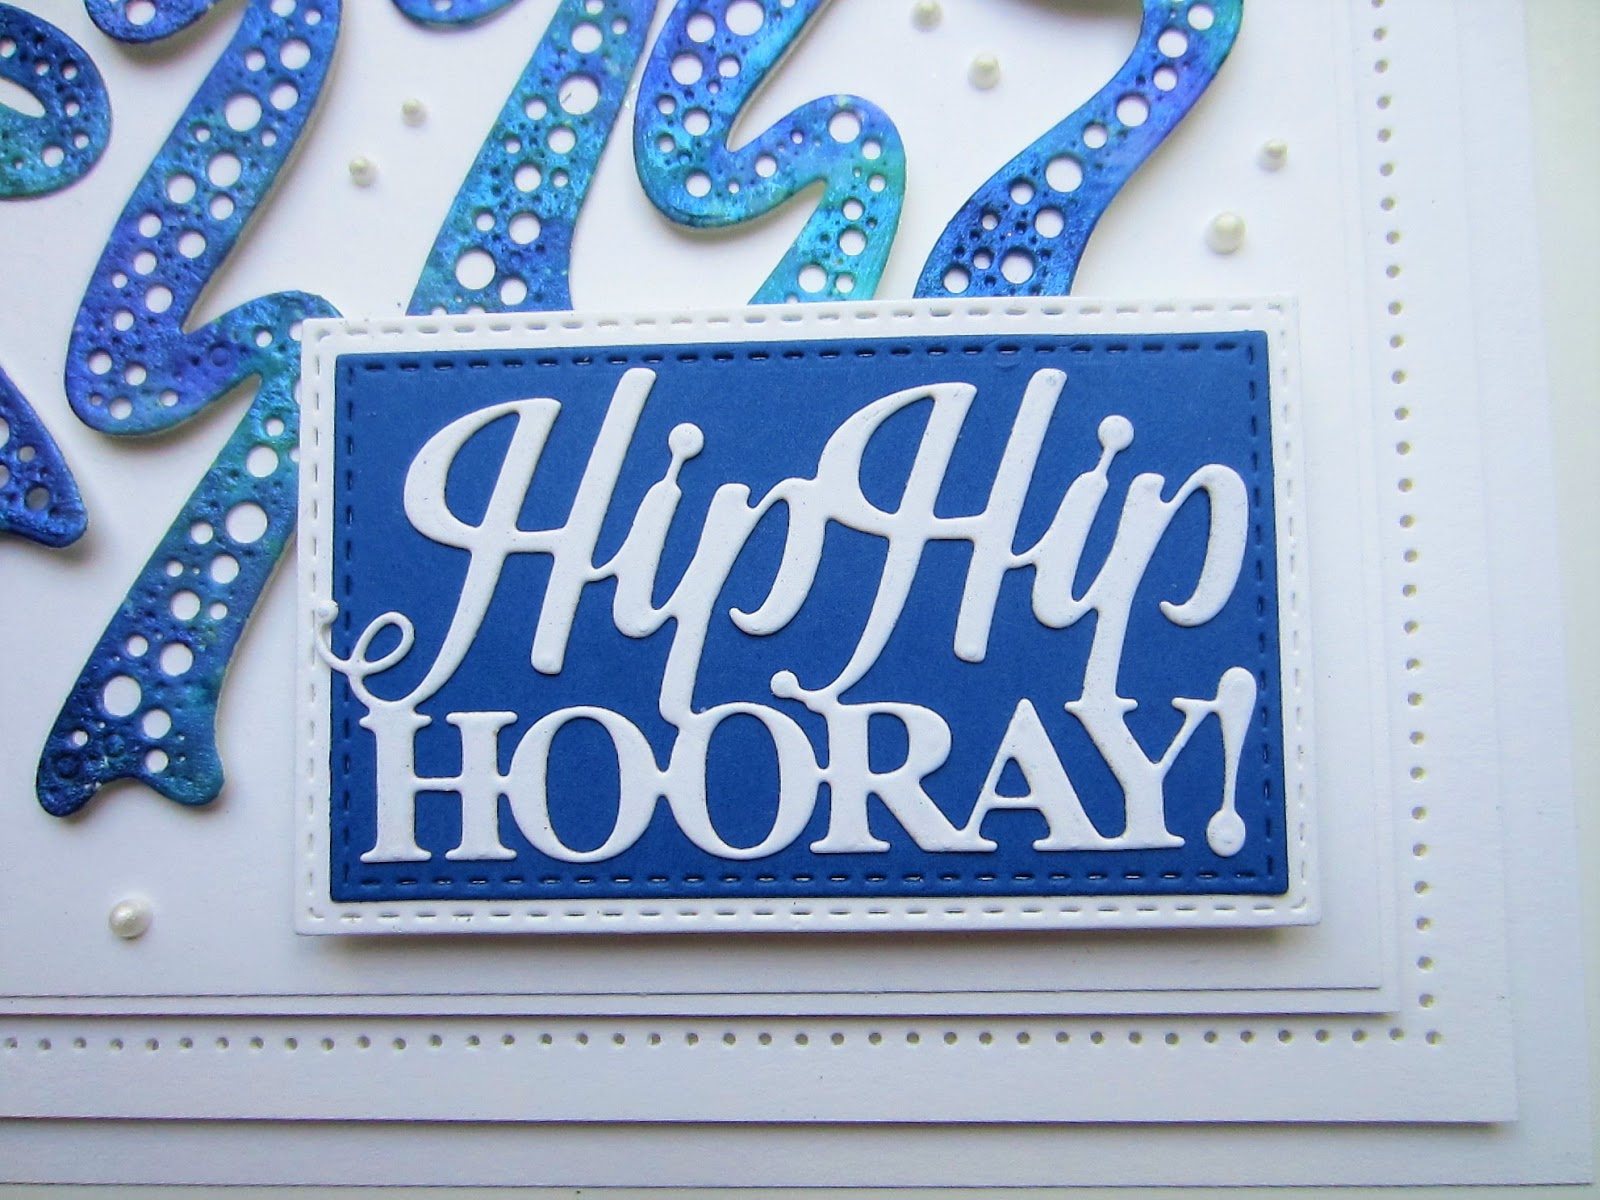
Hip Hip Hooray

 Hello there my crafty friends!  This one is definitely a quick and easy to make!  I started with a piece of white card and used Midnight Blue and Aqua Lagoon Pixie Powders all over it, then spritzed it with water.  Once dry, I used the Dotty Streamers die to cut out five streamers.  I baked each one with a white backing and arranged them on my background, using either foam or just glued them to the card.  I cut the Hip Hip Hooray sentiment three times then stacked them.  I cut a Stitched rectangle shape out of Cobalt blue card and added another mat in white and glued my sentiment to it.  I added it with foam to the lower corner of the card.  I scattered some small 3mm white pearls as accents.  White on white mats and layers were used to complete the card.  The finished dimensions are 7" x  8" in size.  All for now, Sue x


                                                          Follow my blog with Bloglovin

Wednesday, 23 October 2019

You Are The Best


Hi bloggers!   I thought I would share one of the Quilt cards from the September release.  I started by cutting the Cube Quilt out of coconut white card.  I attached it to a piece of sticky adhesive sheet that was attached to another piece of white card.  Next I cut the Cube Quilt three more times, out of aqua card, ocean card and teal card.  I kept all the fall away pieces and paper pieced them back into the design, which gives it a dimensional look.  I made a multi layered frame using the Double Stitched Squares and used a teal frame on the bottom and a wider white frame on top. I added it with foam over the Cube Quilt.  I cut the You Are The Best sentiment in teal and nipped it apart and placed it along a white Pierced Flag.  I inserted the end under the edge of the frame.  Using the Cosmos Flower set, I made three white flowers using just the outline shapes from the set.  I mounted them in opposite corners and used the leaves from the set to accent them.  The card was completed with white mats and layers.  The finished dimensions are 7 1/2" x  7 1/2" in size.  All for now, Sue x


                                                      Follow my blog with Bloglovin

Tuesday, 22 October 2019

Let It Snow

Hello crafters!  I began this card by embossing a piece of coconut white card with the Nordic Tiles embossing folder.  I extended the length of the Pearly Snowflake border by cutting two of them and attached them together.  I used spray glue to coat them, then glittered them with Frosted Sparkle Glitterbitz and glued them to the lower part of the card and nipped away the excess.  I cut the Felicity die in white and used it as a base on the top p-art of the card.  I cut a Hayley die in white and just used the three holly leaves from it glued to the side of the Felicity die.  Next I cut the Marie die out of antique gold card.  I added a thin border cut out of black card and attached it in the centre of the Felicity die.  I used the Let It Snow Shadowed die cut in black on a white shadow as my sentiment.  I mounted it in the centre of the Marie die.  The card was completed with white, Antique Gold and black mats and layers.  The finished dimensions are 7" x  8 1/2" in size.  All for now, Sue x


                                                     Follow my blog with Bloglovin

Monday, 21 October 2019

May Your Day Be Filled With Sunshine


Hi crafters!  I have a beautiful autumnal card to share today!  I started with a piece of white Yupo card and used Red Pepper, Sunshine Yellow and Citrus Alcohol inks all over it.  I added a couple of drops of Ranger blending solution to a blending tool with felt to add some unique blending of the colours.  Once dry, I used the Leafy Frame die to cut it.  This did take several passes through the die cutting machine o get through the thick coating on this type of card.  I added mounting foam to the back to raise it for dimension.  I used an old JustRite stamp that I had with Black Archival ink.  I stamped it in the centre of a piece of white card, then added the frame over it to centre it in the middle of the frame, then trimmed away the excess card.  I completed the card with a white on white mat and layer.  The finished dimensions are 6 1/4" x  7 1/4" in size.  All for now. Sue x


                                                       Follow my blog with Bloglovin

Sunday, 20 October 2019

Thinking Of You

Good Sunday morning all!  I'm back at it with the Glitter Kiss for today's card offering!  I started by embossing a piece of coconut white card using the 3D Ribbon Swirls embossing folder for texture.  Next I coated a piece of card with the Ocean Spray Glitter Kiss and allowed it to dry well.  I cut two of the Hexagonal Borders in white then added a thin strip of the Glitter Kiss behind them.  I added foam to the back and attached them to the sides of the card.  Next I cut the outer most die in the Vivian die set in white as a base.  I cut the decorative part of the Vivian die out of the Glitter Kiss card and added it to the base.  I went back to the centre dies in the set and cut them in white and added a white backing, then layered them in the centre.  I used the Thinking Of You die cut in white and black.  I used the black one as a shadow behind the white one and then glued it in place in the centre.  The card was completed with white on white mats and layers.  The finished dimensions are 6 1/2" x  8" in size.  All for now, Sue x


                                                     Follow my blog with Bloglovin

Saturday, 19 October 2019

Frosty Snowflake Card


Hello crafters!  Today's video is just a pretty Christmas card with a frosty snowflake feel to it.  Super simple and great for batch cards too!  Hope you like it!


 The finished dimensions are 7" x  8 1/2" in size.  All for now. Sue x
                                                        Follow my blog with Bloglovin