Thursday, 25 October 2018

Congrats


Hello all!  I started this one by using the Daisy Trail embossing folder to add texture to a piece of coconut white card for the background.  I matted it with Blue Dusk and black card.  Next I cut two rectangles using the Double Stitched Rectangles out of the same colours to use as a base for the focal element.  I cut the Caroline die in white and backed it with a white backing piece.  I added it to the centre of the rectangles with mounting foam.  I cut the Congrats in both Blue Dusk and black card and used it as a shadow then glued it to the centre of the die.  I made three Pocket Petal flowers out of white and added blue centres and pearls, then mounted them around the focal element.  White, blue dusk and black mats and layers were used to complete the card.  The finished dimensions are 7" x  8 3/4" in size.  All for now, Sue x


                                                      Follow my blog with Bloglovin

Wednesday, 24 October 2018

Just For You

Hello all!  Today's card shows off a couple of the Stamps To Die For  (STDF) from April.  I started by stamping the Fleur de Lys STDF using Flake and Glitter glue on to black card.  I cleaned the stamp well then gilded it with Gemstones Gilding Flakes and used a piece of rubit scrubit to remove the excess flakes, then die cut it with the matching Phoebe die.  I used the inner cutting die to cut the centre of it out.  I stamped my sentiment on white card and then mounted it behind the opening in the frame.  Next I used the Elegant Damask STDF and used the same gilding flakes and same method, but this time, I covered it with a sticky adhesive sheet then glittered it with Frosted Sparkle Glitterbitz, then cut the shape out with the matching Caroline die.  I mounted the sentiment frame on top of it with foam.  Next I cut an Ava die in white and another Phoebe die, this time out of white card.  I cut it in half and mounted it to the sides of the Ava die and seated the gilded dies in the centre.  Behind the dies, I thought I would give the card a torn and curled background to add some interest and just for something different.  I completed the card with a white on white mat.  The finished dimensions are 6 1/4" x  8" in size.  All for now, Sue x


                                                         Follow my blog with Bloglovin

Tuesday, 23 October 2018

Christmas Robin Card


Hi bloggers!  If you are looking for a little bit less traditional sort of design for your Christmas cards this year, how about this charming robin card?


The finished dimensions are 7 1/4" x  7 3/4" in size.  All for now, Sue x
                                                       Follow my blog with Bloglovin

Monday, 22 October 2018

Sending Birthday Wishes

Hi bloggers!  I have a "sweet" card for you today (and no calories!)! LOL  I started with a piece of  red and cream polka dotted decorative paper from my stash.  I used the Double Pierced Noble Ovals and cut an aperture out of a piece of milk card.  I made a slightly larger red frame to go around it and added mounting foam to the back and added it over the decorative paper.  I made two borders using the dot borders from the Treat Yourself Cupcakes out of milk card and glued them to the top and bottom edges of the aperture.  I made two cupcakes using glassine paper for the sleeves and milk card for the tops.  I cut sprinkles out of red and brown paper and added them to both cupcakes.  I cut a large and small Stitched Flag out of milk card.  I added the word "sending" that I die cut to the larger one and stamped the smaller one with sentiment from the Big Ideas clear stamp set (designed to go with the single word dies).  I arranged them around the cupcakes in the aperture using foam.  The card was completed with milk, red and chestnut brown mats and layers.  The finished dimensions are 7 1.2" x  9" in size.  All for now, Sue x


                                                       Follow my blog with Bloglovin

Sunday, 21 October 2018

Thank You


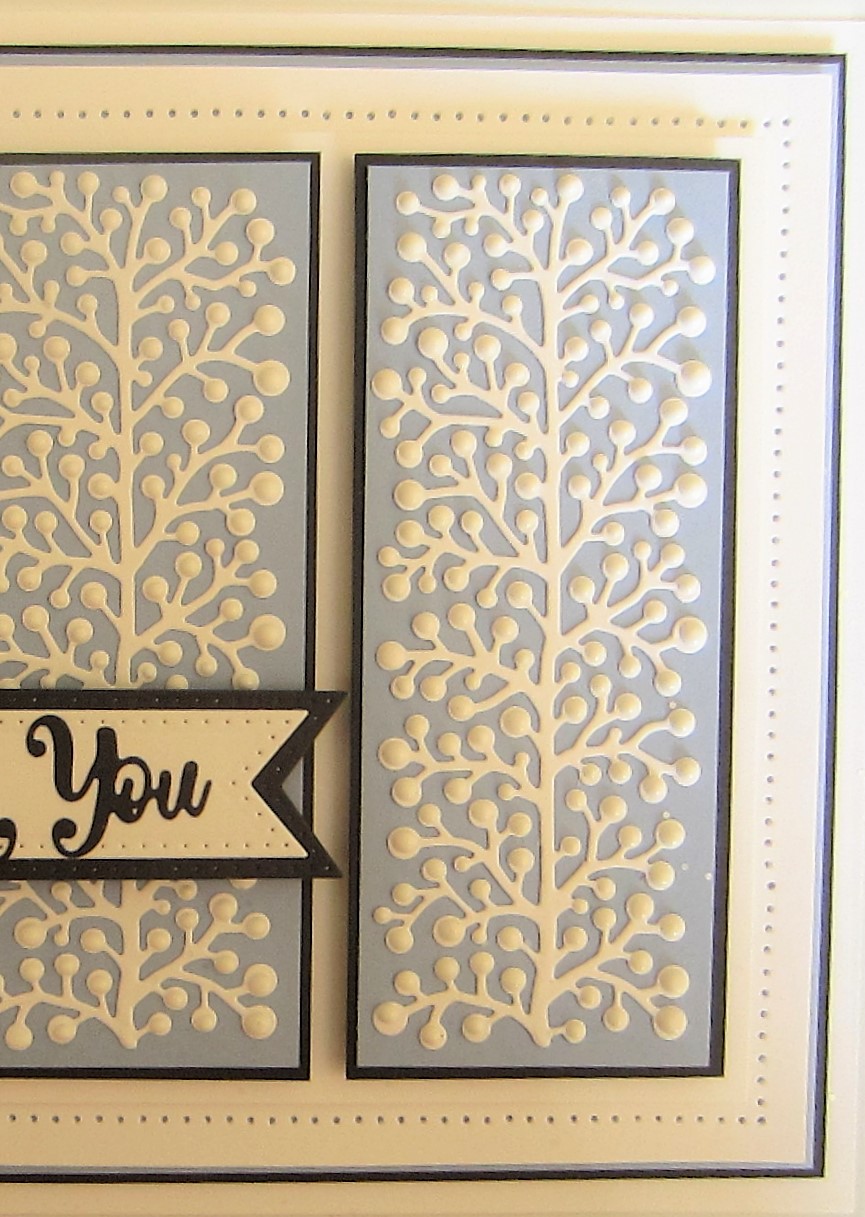
Hello my crafty friends!  I am trying to mix it up a bit with a few older release cards.  I started this one by cutting three Meandering Twig Borders out of coconut white card.  I cut three blue dusk panels and backed them with a thin black mat and added mounting foam to the backs of them.  I added all three to a piece of coconut white card.  I glued the borders to them and used Cosmic Shimmer white PVA glue to add small drops to the ends of all of the border pieces for some great texture!   I allowed it to dry overnight.  I cut a Pierced Flag out of white and added the next size up in black as a mat.  I used the Thank You Mini Expression cut in black and glued it to the flag, then mounted it across the card.  Using the outer dies from the Passion Flower, I made two scrunched flowers and added glitter to the edges.  I mounted the flowers at the edge of the flag with a ribbon bow and leaves as accents.  I made two stick pins and added them as embellishments.  White, Blue dusk and black mats and layers were used to complete the card.  The finished dimensions are 7" x  8 3/4" in size.  All for now, Sue x


                                                      Follow my blog with Bloglovin

Saturday, 20 October 2018

Crystal Tint Christmas Frame Card


Hi crafters!  I just love these Crystal Tints.  They are fabulous to use to make beautiful backgrounds for your cards, festive or otherwise.


The finished dimensions are 6 1/2" x  7 3/4" in size.  All for now, Sue x
                                                      Follow my blog with Bloglovin