 Morning all! I was just having a play with the Parisian dies here. It is really fun sometimes to just see how they will layer up on each other. These dies in particular are great for that with their "holding hand" feature. I cut the largest size of the Parisian Motif die and used a smaller die at the same time to turn it into a frame. I cut the largest of the Parisian Accents next and two of the corner pieces. I stamped my little sentiment on the smallest of the beaded circle dies and layered it onto the Parisian accent die I had cut. I set all the pieces aside and assembled my background. I chose a wild print for this as I loved the colours in it, but the name had been cut off the edge already so I am sorry to say I do not recall where it is from. I cut a smaller piece of it and layered it onto some burgundy card. I ran some basque red vintage ribbon through the top and bottom of the Parisian die centring it in the middle of my smaller background piece. I secured the ribbon behind the larger background piece then added some matting layers of burgundy and black. I added the two corner pieces so they were attached to the smaller background piece and lined up with the sides of my focal element. I liked the way they extended the motif horizontally giving it a completely different look. I added my sentiment to the centre to complete my focal element. Finally, I finished the card by adding a bow with a fancy button and some black rhinestone swirls for a bit of bling. If you have this Spellbinder die template, try it with any background papers for a completely easy and fun card. All for now, Sue x
Thursday, 5 January 2012
Parisian Motifs
Morning all! I was just having a play with the Parisian dies here. It is really fun sometimes to just see how they will layer up on each other. These dies in particular are great for that with their "holding hand" feature. I cut the largest size of the Parisian Motif die and used a smaller die at the same time to turn it into a frame. I cut the largest of the Parisian Accents next and two of the corner pieces. I stamped my little sentiment on the smallest of the beaded circle dies and layered it onto the Parisian accent die I had cut. I set all the pieces aside and assembled my background. I chose a wild print for this as I loved the colours in it, but the name had been cut off the edge already so I am sorry to say I do not recall where it is from. I cut a smaller piece of it and layered it onto some burgundy card. I ran some basque red vintage ribbon through the top and bottom of the Parisian die centring it in the middle of my smaller background piece. I secured the ribbon behind the larger background piece then added some matting layers of burgundy and black. I added the two corner pieces so they were attached to the smaller background piece and lined up with the sides of my focal element. I liked the way they extended the motif horizontally giving it a completely different look. I added my sentiment to the centre to complete my focal element. Finally, I finished the card by adding a bow with a fancy button and some black rhinestone swirls for a bit of bling. If you have this Spellbinder die template, try it with any background papers for a completely easy and fun card. All for now, Sue x

Wednesday, 4 January 2012
Winter Trees

Hi guys! And we have another winner to add to the list from yesterday. The post of January 2nd had over 100 comments so I randomly picked number 15 which was the comment left by L00py's craft creations!!! Congratulations! I love giving stuff away, this is fun! Email me to claim your prize at americansue1@gmail.com
While I am on the subject of prizes, we are halfway along to our next big blog candy drawing too! In case I haven't said it enough, if you leave a comment after each new post, you will get extra entry chances, thereby increasing your odds of winning! That's all I'm saying, the rest is up to you!

Tuesday, 3 January 2012
More Winners!

Morning all! I promised you winners today and winners you shall have! Four of them actually, three comment game winners and a winner of the orphan cards.
The winner of the comment game from the Dec. 30th post is comment number 108 which was left by Lorraine (classy lady)!!!
The winner of the comment game for the post made on Dec. 31st is comment number 72 which was left by The Wife!!!
The winner of the cards from the "Orphan Card" post is comment number 37 which was left by Anne RD!!!
The winner of the comment game for the post made on Jan. 1st is comment number thirteen which was left by Shelley!!!
Please email me at americansue1@gmail.com to confirm your shipping details so I can post out your prizes.
 Now, a quick rundown on today's card. Another card done with Kraft card as it is so lovely to work with. I decided to pick a bunch of decorative kraft card, some stripes, some fleur de lis and some script all on kraft type card. I used Labels eleven as my background die and the postage stamp dies for my sentiment. I did some light inking around my sentiment to bring it out a bit. I made three flowers out of the cottom hemp ribbon by cutting it down the centre. That gave me two pieces to play with, both with a cut edge. This time, I left the cut edge to form the top of the flower to give it a more distressed look. I love the natural fibres you get from this ribbon. You can see them in the close up photo. I put the selvage edge to the redline tape and rolled the ribbon to form a flower. I will be posting a tutorial of this very soon that Sam Poole photographed for me over the holidays so keep checking back! I added some of our green suede leaves to my floral spray (Sam Poole has these and the ribbon available on her online shop too). I added some black rhinestone to the card and three black glints to the top corner. I finished the card with our black PVA glue dots to frame the card. Kraft card is quite popular now and I have to say, I for one am loving it too! All for now, Sue x
Monday, 2 January 2012
Wishing You All The Best

This card could also have been added to yesterday's post if I had even posted it in 2011, but I was trying to save some nice cards to show in January knowing that I wouldn't be able to show you what I am working on for awhile. See, I was thinking about you, even if I am teasing you too! I think I like this card so much because I just love felt flowers, there is something about them that just sing to me.There is a close up of them below. I really like this October Afternoon decorative background paper too. I used the edgeabilities to make an "L" shaped border. My focal element was made by cutting an aperture in my background paper with Labels 18 and then I made a frame out of black card using the two largest sizes of those dies.
 I stamped my sentiment to show through my frame and I added some small rhinestone swirls to fill out the opening a bit. I made my felt flowers using the Spiral Blossoms 2 die out of two shades of yellow. I cut some black and cream leaves from the Foliage die set, inked the cream ones with Antique Linen Distress ink and then ran them all through a paper crimper for texture. I added some more black rhinestone swirls to the background and finished the card with black PVA glue dots around the edge to frame the entire piece. I hope you like it, let me know. All for now, Sue x
Sunday, 1 January 2012
My Favs of 2011


Saturday, 31 December 2011
Orphan Cards

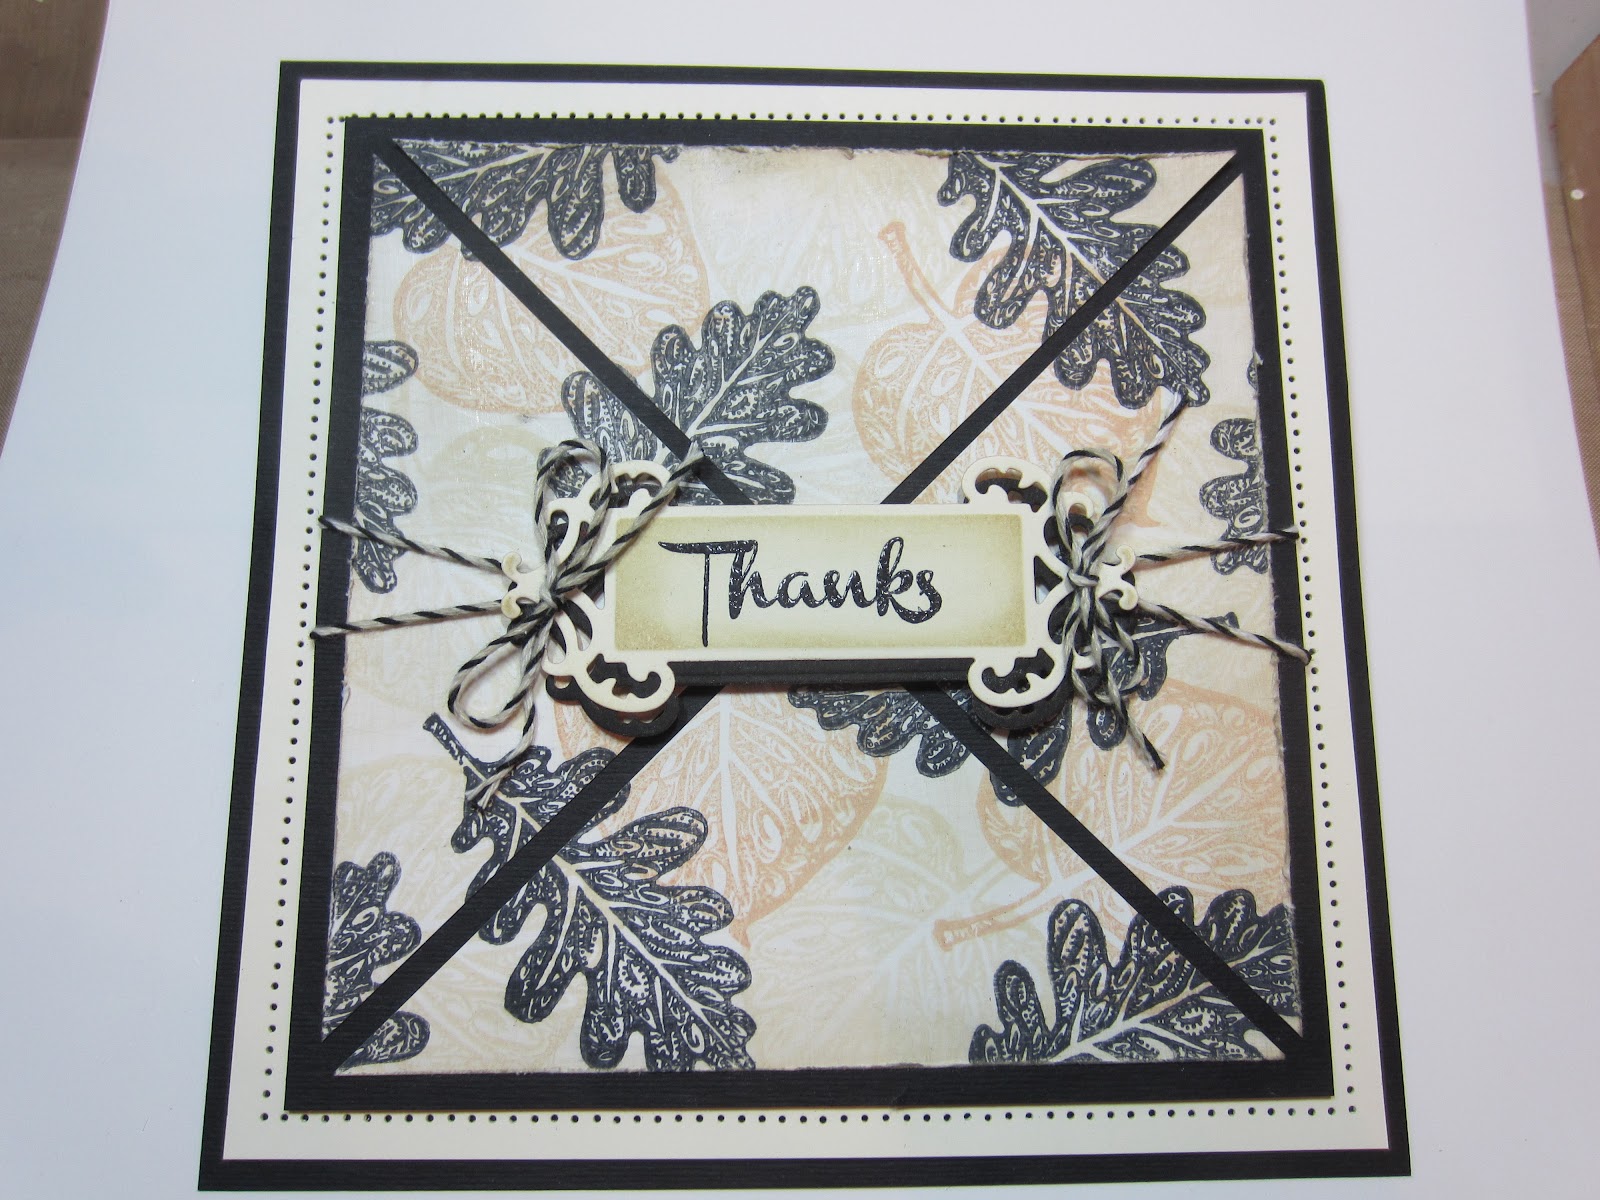
Since these cards are orphans and need a good home, I will randomly pick a number from the comments left after this post to find them a new home. I will post the winner on the 3rd (as well as the winner to the comment game from yesterday) All for now, Sue x


Friday, 30 December 2011
More Candy and A Card For You
 Hi there blog friends! I have a card today and new candy today for you. I hope either one or the other will appeal to you! The card for today's post was fun for me because it was a little bit different. I was trying to get the gold and copper crocheted ribbon to work together on this card so I used a metallic gold cardstock that I embossed with the Grand Impressibilities. I lightly sanded it and then inked the embossed areas with Vintage Photo Distress ink. I was pleased that the vintage photo ink picked up the copper quite nicely. I cut a large lacy circle for the background and cut it in half, mounting it behind my embossed panel. I cut two more of the smaller sized lacy circles for my focal element. I stamped my sentiment and cut it out with a fancy tag die then inked it lightly with vintage photo. I added a bow of black vintage ribbon and topped it with a flower made from the copper crochet ribbon. I added a few more flowers, one from the gold and one from the copper ribbon with a few foliage sprigs. Black rhinestone swirls finished the piece off.
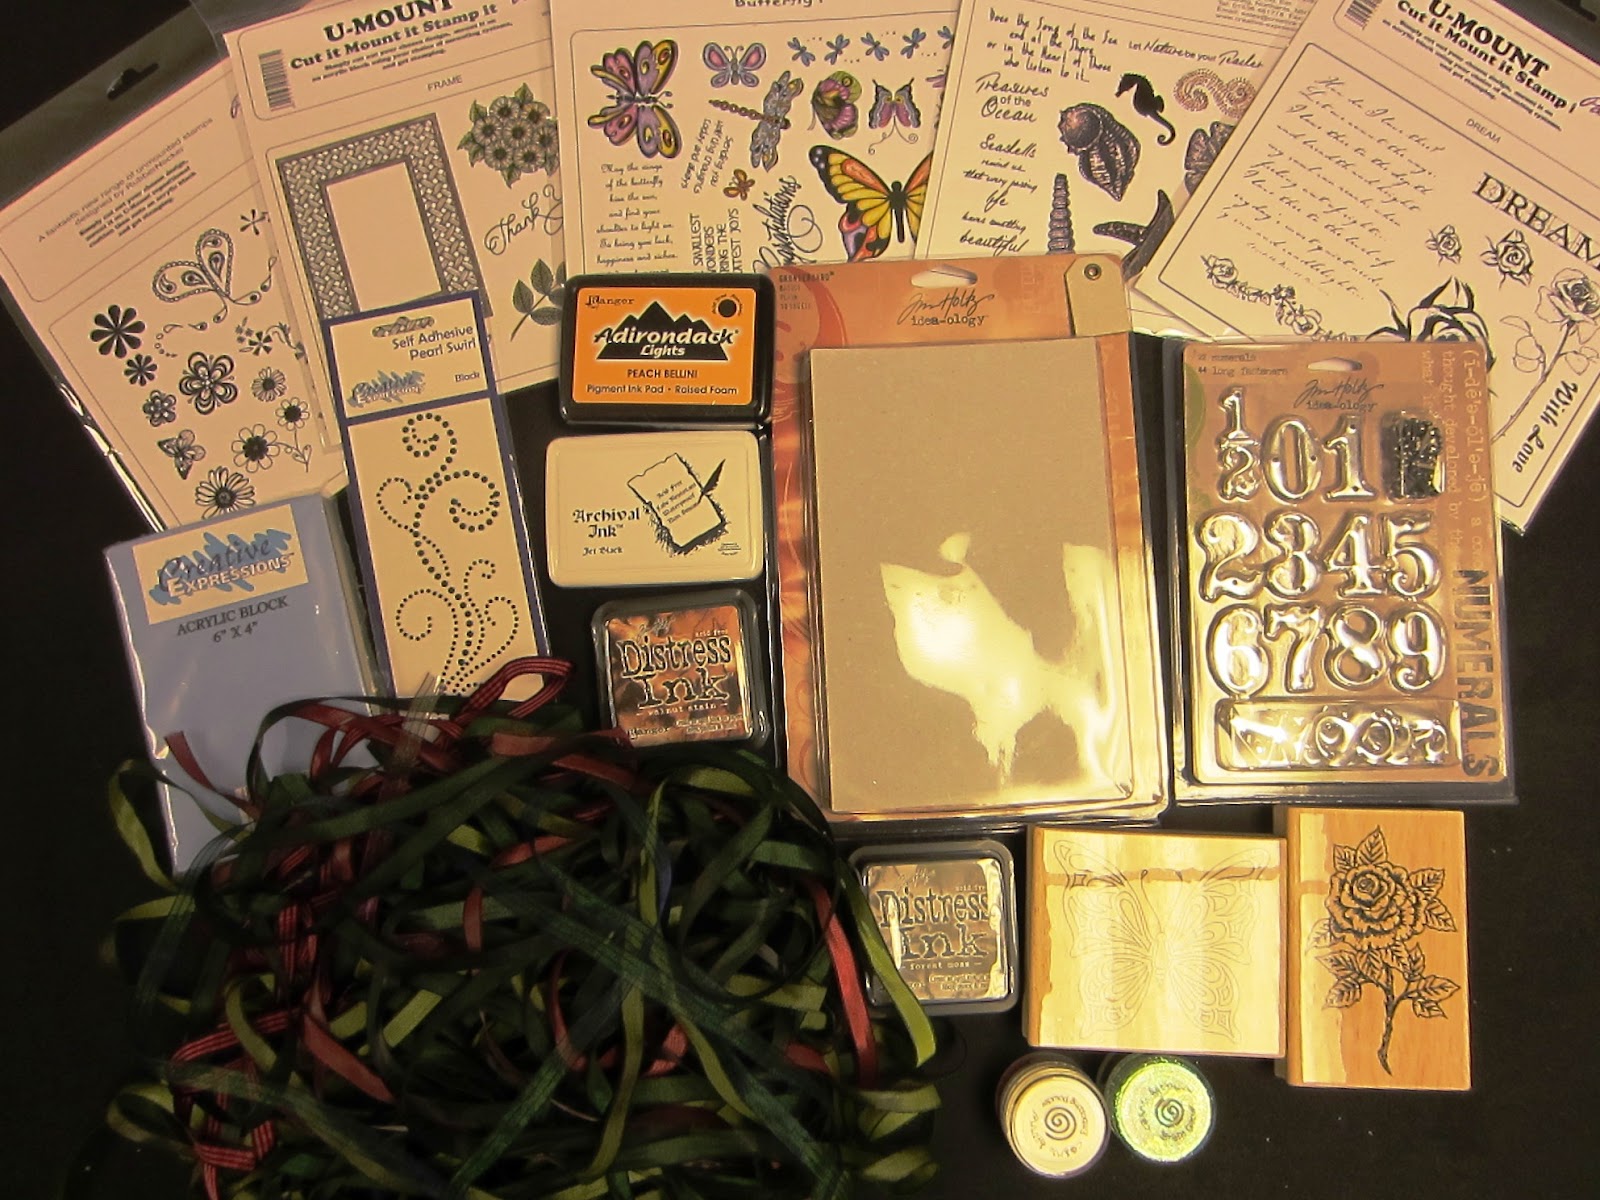 If the card isn't your cup of tea, how about this lot of blog candy? Five stamp sets, Tim Holtz numerals, TH grunge board, Adirondack ink pad, archival ink pad, acrylic block, rhinestone swirls, two distress inks, two mounted rubber stamps, two Cosmic Shimmer embossing powders and a huge pile of ribbons! What would you do with this lot of candy? Got any plans? When we reach 2200 followers, I will draw a name. To be part of the draw, you need to become a follower and email me your details. And if you leave a comment after each new post (not mandatory) but you will receive extra entries to increase your odds! I like to reward you if I can see you have taken the time to stop by the blog. Also, don't forget that we are still playing the comment game so there are more prizes for the posts that have 100 comments or more. What do you say, do you want to play?! If you have any questions, just email me at americansue1@gmail.com All for now, Sue x
Thursday, 29 December 2011
A Kraft Card
 Hi there blog friends! This card was made using the bits and pieces of left over pieces of kraft card and other earthtoned decorative papers that I had. Every once in a while you want to put something together and don't seem to have enough decorative paper to do exactly what you want so you end up with a card like this instead. I cut a frame from black card for my focal element from Labels eleven and labels fifteen on the inside I used my houndstooth embossing folder to give it texture. I stamped my sentiment on a piece of natural kraft card and then cut a faux labels eleven nestie from it. Using my edgeability dies, I cut a small heart border in black and added it to a larger heart border that I cut from kraft card. I mounted small black card behind the hearts then mounted a piece of kraft card from the Tim Holtz decorative kraft pad. I added another small piece of this to the top of the card for balance. The three small black hearts are the ones that I removed from the border cut outs earlier. I added some black vintage ribbon , a button and some Bakers Twine. The entire card was mounted on to a piece of black card and gold PVA glue dots were added to the edge to complete the card. If you have some scraps you need to use up, give this one a try! All for now, Sue x
Wednesday, 28 December 2011
It's A Mystery

Hi blog friends, I found another Steampunk styled card done in gray and wine for today. This one used a really fun technique which involves using Artist's Spackle and spreading it through a mask. Carefully remove the mask and let the spackle dry thoroughly. Be sure to clean your mask right away as you do not want the spackle to dry on to it. There is silver embossing in the recess of the grid lines if you look carefully. I haven't posted this card until now for a good reason. I cannot for the life of me recall how I did that part. I thought that I probably inked the mask with clear Perfect Medium before I spakled through it, but I am sure the embossing powder woukld have stuck to the spakle and it clearly didn't so I am baffled. Now, here is a question for you, how do you think that I got the silver embossing into the recess of the grid lines? I am hoping that some one's explanation will trigger a memory for me. I can't often look at a card I made and not remember the technique I used, occasionally the exact colours may elude me, but never an entire technique! Must be old age! LOL!
I painted some chipboard pieces silver and added some of Tim Holtz gears and cogs as embellishments, as well as a steampunk charm from my craft stash. I stamped the train track stamp from corner to corner and I edged the two locomotive pieces with Aged mahogany Distress ink. But I am still at a complete loss as to the silver in the grid lines! Well, aside from that part, I hope you have enjoyed the card. All for now, Sue x
Tuesday, 27 December 2011
Winter's Magic Wand
 Hi guys! There is no snow on the ground in my part of town so I'm bringing it to look at through my card. So much less cold and easier to manage, I think! For this card, I started with a piece of blue card and embossed my sentiment in the corner using a clear Perfect Medium pad and white embossing powder. From there, I added my trees in the same fashion and drew in some hill lines with my white Inksential pen. Next, I tore some white card to create my hills. On the torn edge, I used my perfect medium pad and inked randomly along the edge (I didn't want a distinct line here so I pushed it into the pad). I embossed the edges with Cosmic Shimmer Aurora Sparkle embossing powder to give it that snowy (but a bit blingy) feel. Rather than adding more hills, I decided to leave a large open area to add an ornament to my card. For this, I cut eight thin strips of white card. I formed a loop by gluing the ends together on each one, taking care not to crease them. I used an acrylic block to secure the ends while the glue dried. Next I punched a small circle out of white card, then added a bit of Cosmic Shimmer dries clear glue to it. I put the ends of each of my loops on their sides into the glue to form a rosette and set them aside to dry for a bit. I cut one of the Holly accent pieces out of blue card and attached it to my main card in the corner. Once my rosette was dry, I carefully applied glue to the top edges (this will run a bit but no problem) and I sprinkled it with the Cosmic Shimmer Glitter Jewels. These are fab for this as they are chunky and blingy. I added a white button with blue Bakers Twine to the top to cover all the centre pieces and finally glued it atop the blue Holly accent piece. To complete the card, I cut the largest size of the Grand Scallop rectangles in white card, matted my card with this and added some pearl PVA glue dots to each of the scallops.
Monday, 26 December 2011
Winter Easel Card

 You can see the card here when it is opened and made into an easel. With only the bottom attached, it allows the front piece to be folded downward and propped on to the sentiment on the inside of the card. I added some rhinestone swirls to the side of the sentiment for a bit of bling. A bow of vintage ribbon was added to the front of the card with a fancy button from my craft stash. This card was a very quick and easy card if you are a bit time challenged. I hope you have some time now that Christmas is behind us to give it a go! All for now, Sue x
Sunday, 25 December 2011
Oh Christmas Tree (s)
Merry Christmas to all!! This is a rather long post today but I thought that I would share a few trees with you today instead of a card seeing that it is Christmas day. I was hoping to show you all the different trees that I have decorated through the years, but unfortunately I was only able to locate a few pictures. I guess I will just have to bore you with those! The first picture is of a tree that I did for my daughter when she was about five years old. She loved Sesame Street, in fact, she wanted her room decorated with Burt and Ernie so I thought I would show you how serious she was about her two boys (and the cookie monster) first, then the tree! This was my daughter's room when she was a little girl. I love this picture as I truly believe it is the only time I ever captured her room on film while it was tidy! LOL

 Here is her Christmas tree, her very own Sesame Street themed tree (I bet you have never seen one of those before!) LOL This photo and the other two pictures above and below this one, by the way is a picture of the pictures because I couldn't get my scanner to work so it is a bit grainy. This tree was probably the fattest real tree I have ever seen as it was only about 4 ft. tall! It had multi coloured lights on it so it was very fun when lit up too! All the kids in the neighbourhood really liked this tree.
 The pic to the left is of my Christmas tree today (at least one of them). It is all done in copper and gold. I know it is an unusual choice for a Christmas tree, but I really do like it. When I moved here, my other half had only a few ornaments and one of them was this copper and gold velvety ornament with a sort of harlequin pattern on it. You can see it in the close up below to the left side of the tree. I really liked this ornament so I decided to go from there and this is where it ended up! I added a few things every year to it, but I think it is full up now. I do like my trees busy and full of stuff (kind of like my cards!)

I love decorating trees so this is one of the Christmas traditions that really gets me in the festive spirit. Even though this has been a difficult time for me, I am really glad that I put the trees up. I am also very thankful for the wonderful emails, comments, cards, flowers and general support and love that I have felt from all of you through this time. Keeping my blog up has actually been a godsend for me, so thank you for taking the time each day to come by and visit. You are all very remarkable and I am so blessed to be part of this crafting family we have here in the UK. Thank you for taking time out during your Christmas day to spend a few minutes with me here. Merry Christmas, Sue x
.

Subscribe to:
Posts (Atom)