Tutorials

Sunday, 31 January 2016

Fabulous Day

 Good Sunday morning all!  Today's card is a bit of an ombre sort, as I am quite taken with that trend.  I have seen it absolutely everywhere of late and I think it is especially pretty in cards.  I started the card by cutting the Intertwining Circle Striplet without the outside cutting edge three times in a piece of coconut white card to create the background.  I selected three varying shades of aqua coloured card (from my leftover stash box).  This is a great card to use up some of those smaller bits you have.  I cut three strips and covered each one with a sticky adhesive sheet.  I peeled the backing paper off and placed them behind each of the striplets in order from lightest to darkest.  Next I coated them with Diamond Snow from the front of the background piece so all of the exposed adhesive caught the glitter.  I used the Double Pierced Noble Squares (both sets) to create a layered frame with white and aqua card and placed it over the background.  I used the Grace die to cut a decorative frame and backed it in white and seated it over a stamped sentiment, then attached it in the centre of the card.  I used the same three shades of aqua card to cut some small flowers from the Orange Blossom complete petal set.  I glued them around my sentiment as a small accent.  I completed the card in my usual pierced matting and layering.  The finished dimensions are 7 3/4" x  7 3/4" in size.
   Just a quick reminder that I will be doing the drawings for the winning dies tomorrow morning, then posting the winners in a separate post in the afternoon.  There is still time to add any comments to posts you may have missed if you do it before Monday morning!  Don't forget to check back in the afternoon too, to see if your name has been drawn!  All for now, Sue x


                                                   Follow my blog with Bloglovin

Saturday, 30 January 2016

Gilded Faux Leather

Hello crafters!  It is about time that I revisited an age old technique, faux leather.  However, this time there is a bit of a twist that I have put to it.  I hope you can check out the video to see it!


 The finished dimensions are 7 1/4" x  8 1/2" in size.  All for now, Sue x


                                                       Follow my blog with Bloglovin


Friday, 29 January 2016

Finishing Touches

Hello all!  The final post of the five days of the new die blog launch!  It is always sort of sad to see it come as I really enjoy reading all of your comments!  I do want to say that I have been listening to what you say and this set is for those of you that have asked for the open petal and the complete petal to be put in the same set.  Here you go!  The new Sweetheart Flowers have both dies in the same set and there are three sizes to use.  Shown here in their simplest form, you can see that they make a pretty flower, but did you happen to notice the flower on the last post?  That too was made with this set of dies!  There are other ways in which to use these as well so they are very versatile as well as affordable!  For a final time this launch, I ask you to leave a comment to be entered into the drawing.  I will post the winners of the die drawings on Monday afternoon.  I hope you have enjoyed this launch, I know I have!  All for now, Sue x
                                                     Follow my blog with Bloglovin

Finishing Touches

Hi bloggers!  The penultimate post which showcases two new Finishing Touches.  We are featuring the new Lace Edged Leaves and the Beaded Swirl Flourish during this post.  The leaves are shown here in both black and white and you can see what a lovely accent they add to your floral elements.  The Beaded Swirl Flourish was seen earlier in the week on the post for the Frames and Tags.  You can see how both of these sets will quickly become "go to" sets in your crafty arsenal.  Leave me a comment and don't forget to join me for the last post of the blog launch which goes live at 6pm today.  All for now, Sue x

                                                        Follow my blog with Bloglovin

Backgrounds

Hello again my crafty friends!  Another addition to the full sized background category, the Scattered Leaves Background is a great die for use with any unisex cards.  Imagine it for those Autumn birthdays too, as it just looks so gorgeous in those autumnal colours!  This die has been created in three sections so it can easily be used for larger sized cards or even smaller cards, the choice is yours, so plenty of versatility!  Leave me a comment to be entered into this drawing.  The next die is to be revealed at 3pm!  All for now, Sue x


                                                        Follow my blog with Bloglovin

Mini Background


Hello bloggers!  Welcome to the final day of the blog die launch.   I have wanted to add a few designs to my Mini Background category for awhile and have finally done so!  Shown here, the Pierced Roses Mini Background creates a beautiful card which is suitably for some many occasions.  I just love the way it has turned out and look forward to showing you more samples made with this die as well.  If you like what you see, let me know and you will be entered into the drawing to win this one as well.  I will be back at 12 noon with the next blog post so until then!  All for now, Sue x
                                                       Follow my blog with Bloglovin

Thursday, 28 January 2016

Clean & Simple


Hi bloggers!  I have added a new category to my die line called "Clean And Simple".  The first entry is my new zigzag border.  I have decide to show it here in just that way, a simply styled card.  You did, however, see it earlier in the week on the Frames and Tags post shown with the Maggie die.  Don't let this one fol you, it can be used in so many ways that it will constantly look like a different die every time you see it, but it also has so many amazing ways in which it can be used so it is very versatile.  I hope to add many more dies to this category as they make very quick, but beautiful cards!  You know the drill, leave a comment, let me know what you think of the newest addition to my die category.  Is there anything you would like to see added?  I would love to hear!  That's it for today, but we have one final day which kicks off at 6am tomorrow morning.  All for now, Sue x

                                                      Follow my blog with Bloglovin

Mini Gemini Dies

Hello crafters!  The two new Mini Gemini dies are being showcased during this blog post.  They are the Dorado and the Aquila die sets.  The Aquila is shown here used as a frame around the Sydney die, which you saw on an earlier blog post this week.  It is nice how they fit it so well!  The Dorado Gemini has a floral design to it in a curved motif, perfect for using around the edges of frames and other dies.  I'm sure you will agree that both would make lovely additions to your Gemini family!  I would love to hear what you think of these and the other dies so far too.  Leave me a comment and you will be entered to win a chance of winning one of these two die sets.  The last post of the day is scheduled for 6pm.  Don't be late! LOL  All for now, Sue x


                                                           Follow my blog with Bloglovin

Gemini Dies

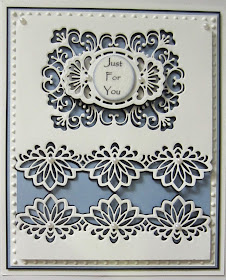
Hello again!  The first of the new Gemini dies is on offer during this post.  The Auriga die set shown here has a lovely shape with a sort of  lotus floral appeal to it.  As you can see, it makes a beautiful channel card when used inward towards each other.  A slight bit of shadowing really makes it pop and bring any card to life.  I think you will find a lot of fabulous uses for this die and if you would like a chance to win it, you know what to do! LOL  Don't forget to leave your name if posting under the "anonymous" dropdown and even add a bit extra so there is no mistaking it was your name drawn. The next post is scheduled for 3pm if you can work it into your schedule to join us again!  We would love to see you here!  All for now, Sue x


                                                       Follow my blog with Bloglovin

Striplets

Good morning all!  First up today are the new striplets!  I just love these as there are so many fun ways in which to use them.  Shown here is the Ravello Striplet done with a paper pieced background showing through more layered striplets.  The other striplet on offer this post is the Rococo Striplet.  Both are shaped striplets with beautiful detail that lend themselves to equally stunning backgrounds, borders or frames.   Please feel free to "pin" any of the dies or cards, the button has been placed at the bottom of each post for ease.   If you would like the chance to win either of these die sets, just leave a comment.  The next blog post will be online at 12 noon.  I hope you will join us back here for it!  All for now, Sue x

                                                        Follow my blog with Bloglovin

Wednesday, 27 January 2016

Configurations

Welcome back!!  This post is dedicated to the new Magnolia Adornment.  Shown here used as a background for the Hamilton die, you can see the lovely detail it has.  Configurations can be used in so many different ways and this one is no exception.  It makes a great edger, border, or focal element.  I'm sure you will find even more uses for it too!  Don't forget to leave your comment and please sign your name if you are posting under
"anonymous" rather than using a google account.  If you would like to join in but have never left a comment, it is very easy and there are full details on the right hand side of the blog!  Well that's it for today, but we start back up at 6am in the morning.

Just a quick note to let you know that Julia Watts has the One Day Special on Hochanda starting this evening at 8pm.  Don't forget to tune in!   All for now, Sue x


                                                       Follow my blog with Bloglovin

Configurations

Hello there my crafty friends!  On to the Configurations for the first of their two posts!  We have two up for grabs during this blog post, the Milford Adornment and the Hobart Adornment.  Shown here is the Milford Adornment, which is beautifully detailed and intricate and adds a lovely lacy look to any of your projects.  The Hobart Adornment is also very detailed, but smaller in size so it easily usable with so many of your smaller card sizes as well.  If you would like to be entered into this drawing, you know the drill!  Just leave a comment on this post.  The last post for today is scheduled for 6pm, so I hope you will be able to join me back here then!All for now, Sue x


                                                       Follow my blog with Bloglovin