Friday, 7 December 2018

Christmas Double Day

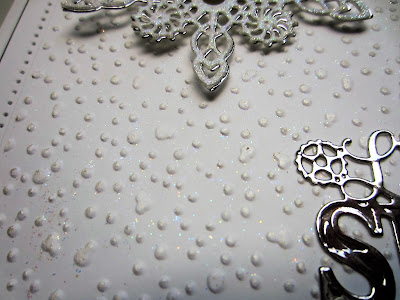
 Hello crafters!  Another double day is upon us, but only a few left to go!  I thought I would start with this bright Pixie Powdered card.  I used Rich Gold, Lava Red and Scarlet Mist to create this pixied background card.  I cut two of the Frosty Snowflake Borders in white and glued them to the side edges of the card.  For the focal element, I cut two of the Frosty Snowflake corners in white and glued the to the upper and lower edges between the borders.  I cut the Natalie die for my focal element in white and added it with foam to the centre of the card.  I used the other shaped cut dies to create a thin lip for the edge of the die.  I cut the Let It Snow die in white and added a black shadow then seated it in the centre.  White on white mats and layers completed the card, it's a real quick one to make!  The finished dimensions are 7 1/4" x  8" in size.  Scroll down for card number two.


Card number two is also a very quick card, but completely different looking!  I started with a piece of white card and embossed it with the 3D Opulent Frame folder for texture.  Next I cut the centre die from the Star Wreath in antique Gold card twice and stacked them together, then glued them into the centre of the embossed design.  From the Christmas Robin die set, I cut several of the pine sprigs out of tan card and used Forest Moss ink on the tips.  I glued them around the base of the wreath and added a few pine cones.  I cut both of the Robins in tan card and added some Festive Berries ink to their chest and glued them onto the branches.  I added the From me to you sentiment in gold with a tan shadow mat and glued it above the wreath.  White and Antique Gold mats and layers were used to complete the card.  The finished dimensions are 7" x  8 1/2" in size.  All for now, Sue x


                                                      Follow my blog with Bloglovin

Thursday, 6 December 2018

For You

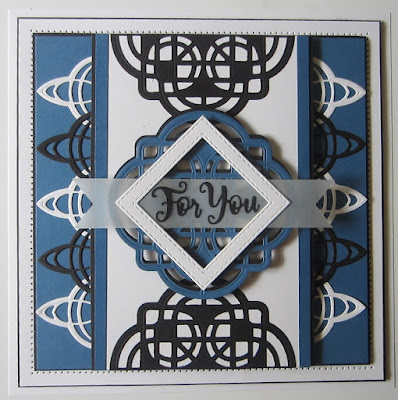
Hi bloggers!  I thought I would share one of the Celtic sample cards that I made.  I started with a piece of Petrol Blue card as my background.  I cut three of the Keira die in white and two in black.  I nipped each of the in half and glued the pointy ends towards the edge of the card, alternating the colours.  Next I cut a wide strip of Petrol Blue card and gave it a thin black mat on the sides and added a white strip down the centre. then added mounting foam to the back.  I seated it in the centre of the card, covering the cut sides of the Keira dies.  I used the Erin die and cut it twice in black and once out of Petrol Blue card.  I cut one of the black die cuts in half and glued the cut sides to the top and bottom of the strip.  I used the blue one in the centre with the remaining black die cut as a offset shadow for it.  I used the Double Stitched Squares and cut a small white frame and added mounting foam to the back.  I seated it in a diamond orientation with a strip of vellum between it and the Erin die.  I cut forked ends into the vellum and cut the For You sentiment in black and glued it across the vellum strip.  White, petrol blue and black mats and layers completed the card.  The finished dimensions are 8 1/4" x  8 1/4" in size.  All for now. Sue x


                                                      Follow my blog with Bloglovin

Wednesday, 5 December 2018

Warmest Wishes

Hi Bloggers!  Say hello to Yupo Paper, as that's what I have used here!  I started with a piece of white Yupo paper and used Red Pepper alcohol ink with a smidge of Cool Peri for depth.  I used the inks on a Ranger Felt Applicator and applied it to the paper until the entire background was covered.  The Yupo paper works with the alcohol inks to create lovely patterns.  Next I cut the Lattice poinsettia Background die out of the centre of it.  I backed it with a piece of coconut white card covered with a sticky adhesive sheet.  I attached it to the die cut then added Frosted Sparkle Glitterbitz to the remaining exposed adhesive areas for a bit of bling.  I used the Double Stitched Rectangles to create a thin white frame around the centre cut out area.  I cut the Tis The Season sentiment out of Antique Gold and Gold Mirror card.  I used the mirror card behind as a shadow and glued it into place in the centre of the poinsettias on the background.  I completed the card with white and gold mats and layers.  The finished dimensions are 5 3/4" x  7 1/4" in size.  All for now, Sue x


                                                       Follow my blog with Bloglovin

Tuesday, 4 December 2018

Happy Birthday

Hi bloggers!  I have been playing with some gilding polish for today's card.  I started by cutting four of the Hexagonal border out of coconut white card.  Next, I used the Blossom Gilding Polish and covered a large area of a piece of coconut white card with it.  I allowed it to dry (it doesn't take long) and cut it into strips to go behind the borders.  I glued it in place then added all four borders in a row to a piece of white card to use as my background.  Next I cut the outer  die from the Avery die set in black to use as a backdrop.  I cut two more of the Avery die in white, but left off the outer die area on those.  I crisscrossed them and added them to the black die cut.  I cut the very centre of the set as a base for my sentiment and then cut the Happy Birthday mini expression out of a leftover bit of the gilded pink card.  I cut a black shadow for it and glued it on to the base and attached it in the middle of the card.  I made one small flower using the Layered Carnation set and added a touch of Blossom Gilding Polish to the edges of the petals.  I seated it with leaves on the side of the focal element.  I added a thin back mat to the background, then completed the card with a mat edges in Blossom gilding polish, a black mat and a final white mat layer. The finished dimensions are 7 1/2" x  7 1/2" in size.


                                                       Follow my blog with Bloglovin

Monday, 3 December 2018

Silent Night

Hello crafters!  I have a white on white Christmas card (with just a touch of silver added) to share today.  I started by cutting the Poinsettia Lattice Background into a piece of coconut white card.  I moved the die along to create a larger background area and cut it again.  I left a wide border around it.  Next I cut away a large portion of the poinsettia pattern with scissors to open up an area for my sentiment and allow the glitter from behind to show through.  I followed the floral pattern along the side and bottom of the frame working around it.  I glued a piece of acetate to the back of the background.  Next I covered a piece of white card with a sticky adhesive sheet and coated it with Iced Flake.  I attached the poinsettia background over it.  I cut the Swirled Silent Night twice, once out of silver mirror card and once out of black.  I used the black die cut as a shadow behind the silver one, then glued it in place in the open area of the background.  I made three vellum poinsettias and seated them in opposite corners as accents.  The card was completed with white, silver and black mats and layers.  The finished dimensions are 7 1/4" x  8 3/4" in size.  All for now. Sue x


                                                     Follow my blog with Bloglovin

Sunday, 2 December 2018

Miss You

Good Sunday morning all!  I selected Cobalt Blue, white and black for the card colours for this one.  I started with a piece of Cobalt Blue card as my background.   I used the border from the Treat Yourself Cupcakes to add white borders to the top and bottom edge of the card.  I ran a strip of  white pearls on each outer edge as accents.  Next I cut the Sophia die in white and backed it with Cobalt Blue.  I cut three of the inside die from the set in white.  I used one on each side of the Sophia die in the background and used the last one for the centre of the card.  I backed that one in black and added A multi layered Double Stitched Octagon frame to it in white.  I cut the Miss You die twice, once in blue and once in black and shadowed it then glued it in the centre of the card.  The card was completed using white, cobalt blue and black mats and layers.  The finished dimensions are 7" x  8 1/4" in size.  All for now, Sue x


                                                        Follow my blog with Bloglovin
Saturday, 1 December 2018

Let It Snow Snowflake Card


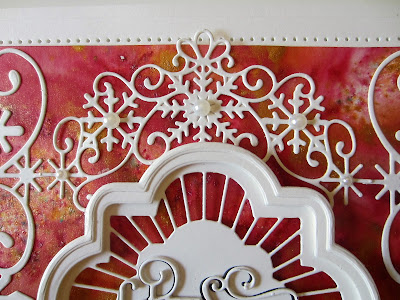
Hi bloggers!  How about a white on white steampunk Christmas card?  I wouldn't believe it either if someone told me this, but here it is and so simple to recreate!


The finished dimensions are 6 1/2" x  7" in size.  All for now, Sue x
                                                         Follow my blog with Bloglovin