Tutorials

Sunday, 28 February 2021

Have A Magical Day

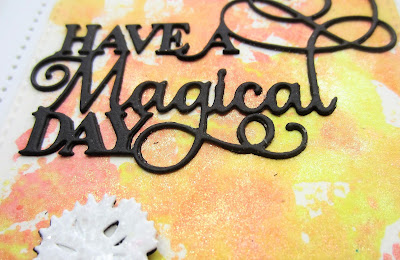
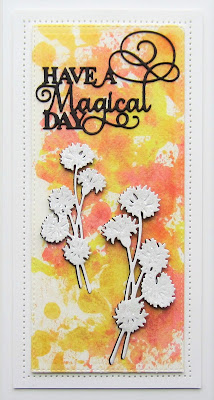
 Good Sunday morning all!  I pulled out the new Pearlescent Watercolours for today's background.  If you haven't seen these before, they are liquid watercolours that come with a dropper in them.  I just used the dropper to apply the colours, Golden Sunset and Red Sunset,  around the card, then spritzed them with some water.  I used a piece of kitchen roll to blot up an excess moisture so it dried quicker. Using the Slimline Stitched Rectangles, I cut it using the largest die in the set.   I cut the Dandelion Posies out of both white and black card.  I used the black die cut as a shadow behind.  I added dries clear glue to the flower heads then sprinkled them with Frosted Sparkle Glitterbitz and let them dry.  I glued them to the lower part of the card, the added the sentiment above.  I cut the Have A Magical Day sentiment in black twice, then stacked them and glued them to the card.  The card was completed with white mats and layers.  The finished dimensions are 4 3/4"  x  9"  in size.  All for now. Sue x


Saturday, 27 February 2021

Grateful Circle

 Hello crafters!  I started this card by taping the Blast Mask to a piece of white card.  I used Mink Luna Paste through the mask then allowed it to dry thoroughly.  Using the Double Stitched Circles, I cut an outer circular frame out of the pattern.  I added mounting foam to raise the frame section, then glued the entire background on to another piece of white card, lining up the pieces.  I used the Mink Luna Paste on another piece of card and let it dry, then cut out the Grateful Circle from it as well as three butterflies from the Petite Butterfly die set.  I added a black shadow to the Grateful Circle die and glued it to a white backing piece.  I added mounting foam and seated it in the centre of the background.  I glued the three butterflies around it.  The card was completed with white mats and layers.  The finished dimensions are 7"  x  7"  in size.  All for now, Sue x


                                                       Follow my blog with Bloglovin

Friday, 26 February 2021

All The Best

Hi crafters!  I just can't seem to put down these new Pixie Sparkles!   I decided to mix the Groovy Grape and the Fuchsia Rose Pixie Sparkles colours on a piece of white card.  Once dry, I embossed it with the Stripes embossing folder.  Next I used the Tahiti die and cut it twice in white and twice in black card.  I shadow the white dies with the black die cuts then mounted them horizontally across the centre of the card, over lapping in the middle.  Next I cut the Maldives die in white.  I mounted it vertically across the centre of the card and on top of the other two dies so they were showing on the sides.  I cut the centre of the die in white and added a black mat, then layered it up in the centre.  I have a bit of left over pixied card from the background and used a small piece to cut the All The Best sentiment.  I added a black shadow, then glued it in the centre of the Maldives die.  I decided not to add any flowers so that the background would be more visible (but I think it probably could have used some!)LOL    The card was completed with white and black mats and layers.  The finished dimensions are 7"  x  8 3/4"  in size.  All for now. Sue x


                                                         Follow my blog with Bloglovin

Thursday, 25 February 2021

So So Cute

 Hello crafters!  I made a couple of baby cards using the new Slimline dies as I just thought they were so (so) cute!  I started by cutting the Slimline Stitched Rectangles Frames out of powder pink card.  I added mounting foam to the back of the frame to raise it.  Next I cut the Slimline Oval Decorative Aperture Trio in white.  I added the frame over the top of it, then added one more layer of mounting foam to the back of the aperture.  I added a white backing piece behind the aperture.  Next I cut the dog, cat and sheep dies in pastel card (custard, aqua and wisteria).  They are from the Sweet Dreams Little One die set.  I added them together in the centre aperture oval, slightly overlapping them.  I cut the words "so so cute" from the Baby's First Pram die set out of the matching pastel card and mounted them in the outer two apertures.  I added a small set of baby feet too from the New Arrival die set.  The card was completed with white and powder pink mats and layers.  The finished dimensions are 4 3/4" x  9"  in size.  

I forgot to remind you yesterday, but we still have two unclaimed die prizes from the drawings at the blog launch.  I posted the winners a few days ago, so just scroll down to see if your name is on the list.  You will need to contact me to claim the die too!  All for now. Sue x


                                                        Follow my blog with Bloglovin

Wednesday, 24 February 2021

So Sweet Of You

 Hi bloggers!  I started today's card by embossing a piece of white card with the Rose Bed embossing folder.  Next I used a piece that was leftover from another card I made previously and that was the decorative border on the left side of the card (you can't waste a perfectly good border, now can you??).  I cut the Whitney Background out of a piece of pixied card from my stash.  I used the Whitney Edger set and cut it into three pieces.  I used the two side borders on the other card and was left with the centre piece.   I backed it with a white strip in the centre of the border then added a black card covering the rest of the back.   I attached it to the left side of the card here.  I cut the So Sweet Of You sentiment out of a leftover piece of the Pixied card and added a black shadow, then glued it to the upper right side of the card.  For the floral element, I cut the Whirligig Flowers out of a piece of white card that was covered with a sticky adhesive sheet.  I glittered all the pieces then assembled three flowers.  I attached them in a cluster in the bottom right corner.  Lace Edged Leaves were used as accents around them.  The card was completed with white and black mats and layers.  The finished dimensions are 6 1/2"  x  8 1/2"  in size.  All for now, Sue 


                                                           Follow my blog with Bloglovin

Tuesday, 23 February 2021

February Die Launch Winners

 Hello everyone!  As promised, the results from the drawings for the winning dies are now complete.  I just want to say a quick thank you to everyone that took part.  I know it was a small release, but hopefully, you all found something that tickled your creativity in it!  Without further ado, here are the winners:


Giraffe:   Pawprintx4!!!

Elephant:  Viki Banaszak!!!

Sloth: Tooth Fairy Jo!!!

Zebra:  Bejay in Truro!!!

Rhino: Scottydog!!!

Lion: Handmade by Donna x!!!

Safari Tags:  Owlish!!!


Congratulations all!  Please email me at americansue1@gmail.com to confirm your postal address and claim your winning die.  Please put the name of the die you won in the subject line when you email me.  All for now. Sue x
Thanks

Hi bloggers!  I found this pretty Endless Option die card that still hadn't had a day on the blog!  I started by cutting the Paulette Background out of white card.  I used some of the Paulette Edgers to add more detail cut into the background.  I used the Paulette Edgers again to cut a few backing pieces out of Slate Grey card and glued them behind the middle and two side sections of the background.  I backed the entire card with Powder Pink card.  I stamped the Jasmine Stamps on to Powder Pink card with  a grey Archival ink.  I cut them out with the matching Jasmine dies and assembled the flowers.  Using vellum, I cut a strip and attached it across the middle of the card.  I cut the Thanks sentiment out of Slate Grey card and glued it to the vellum.  The three flowers were attached to the side of the card with the largest flower seated on the end of the sentiment strip.  I used Magnolia Corner foliage cut up as accents around the flowers.  The card was completed with white, powder pink and silver mats and layers.  The finished dimensions are 6 1/2"  x  7 1/2  in size.  

Don't forget to check back later this afternoon to see if your name is on the list of winners from the February Die Launch!  All for now. Sue x


Monday, 22 February 2021

Your'e Amazing

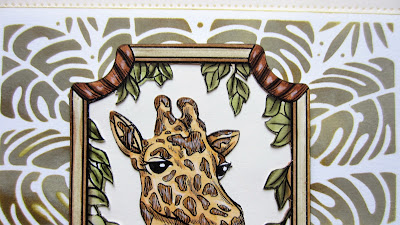
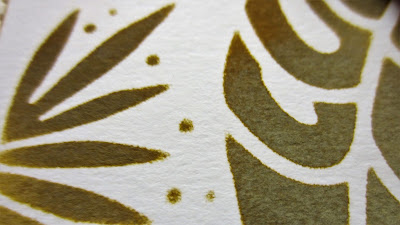
 Hello there my crafty friends!  I thought I would share another sample from the Safari Collection that uses one of the new stencils from the range too!  I started by taping the new Tropical Leaves stencil to a piece of milk card.  I inked through the stencil with Forest Moss Distress Oxide ink and Crushed Olive ink.  I removed the mask and heat set it to dry.  Next I stamped the Giraffe twice and cut them out with the matching die.  I coloured one of the dies entirely with Distress Markers.  I coloured just the frame on the other one.   I added a background to the die cut by hand cutting the shape.  I nipped the frame away from the second die cut and used mounting foam to raise it and attach it over the other die cut.  I added it to the middle of the stencilled background.  I stamped the Safari Tag design from the clear stamp set called Wild About You and added the sentiment to the centre.  I cut it out with the matching die.  It was coloured with a bit of Rusty Hinge around the outside, then mounted in the corner.  The card was completed with milk mats and layers.  The finished dimensions are 8"  x  8" in size.  All for now, Sue x


                                                         Follow my blog with Bloglovin