Monday 30 April 2012

Paved Pearl Border Technique

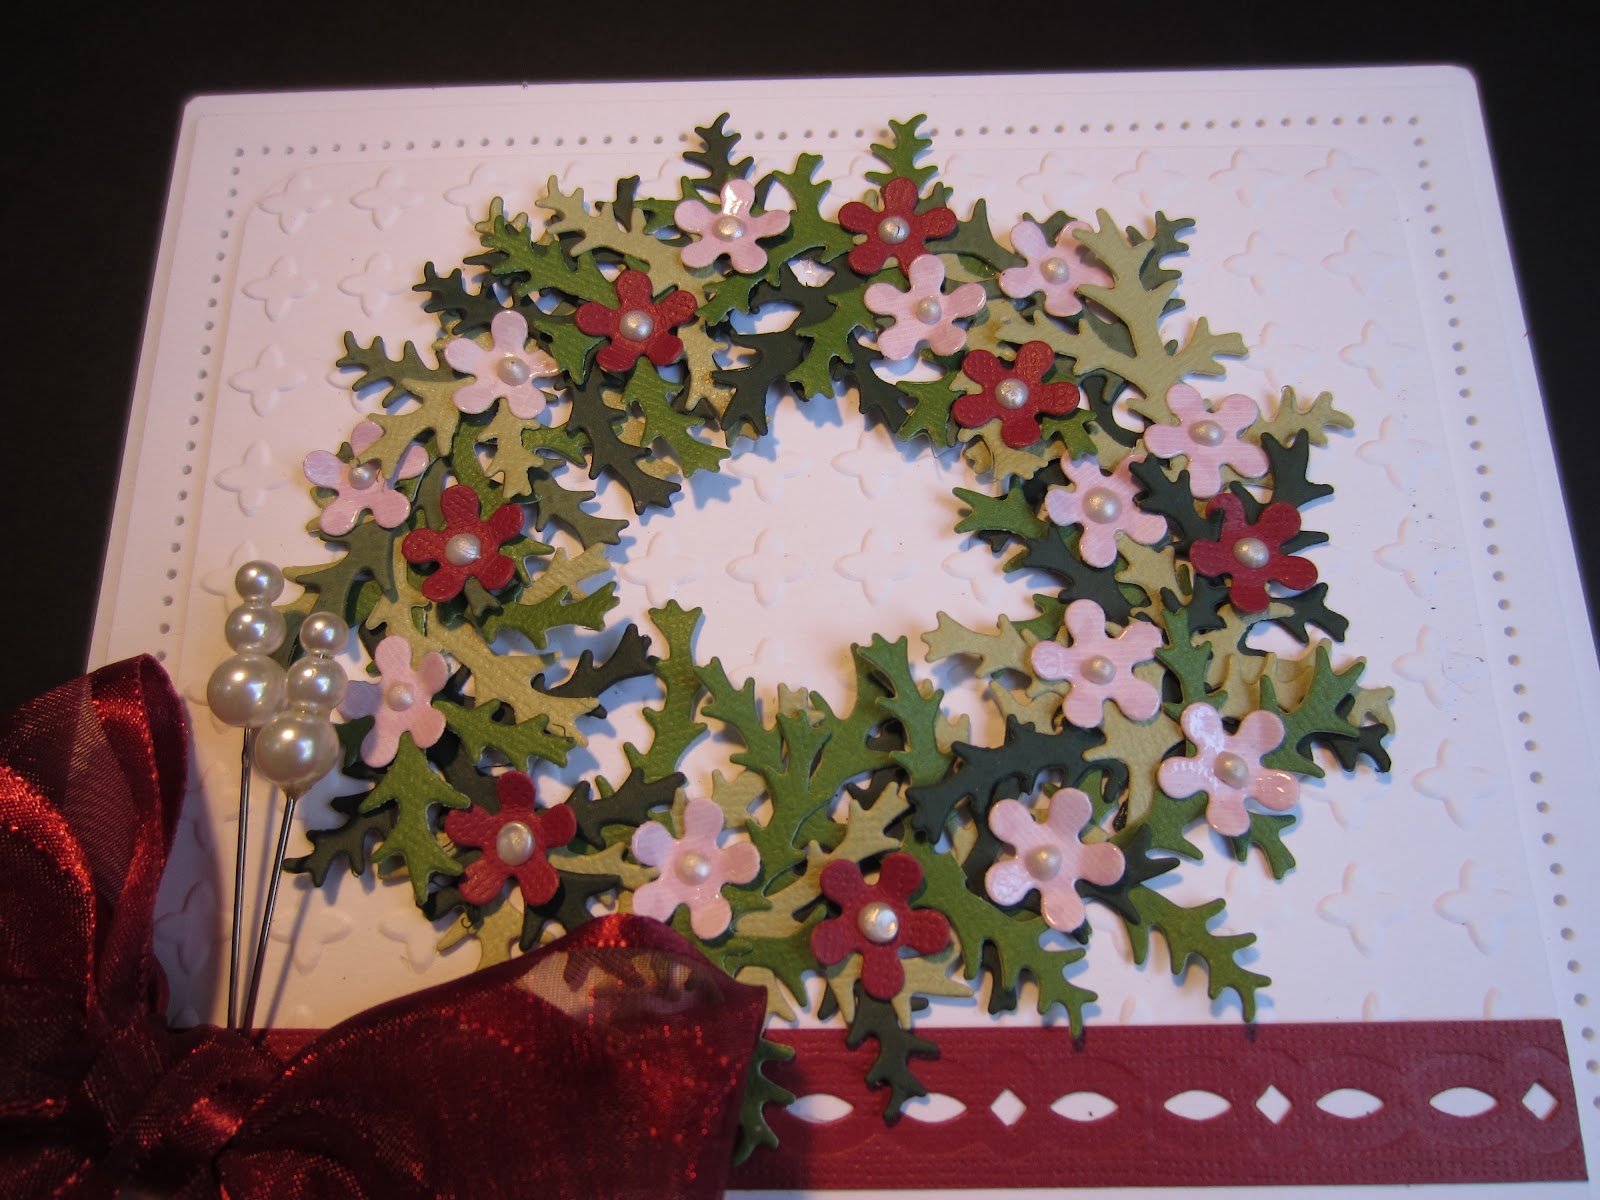
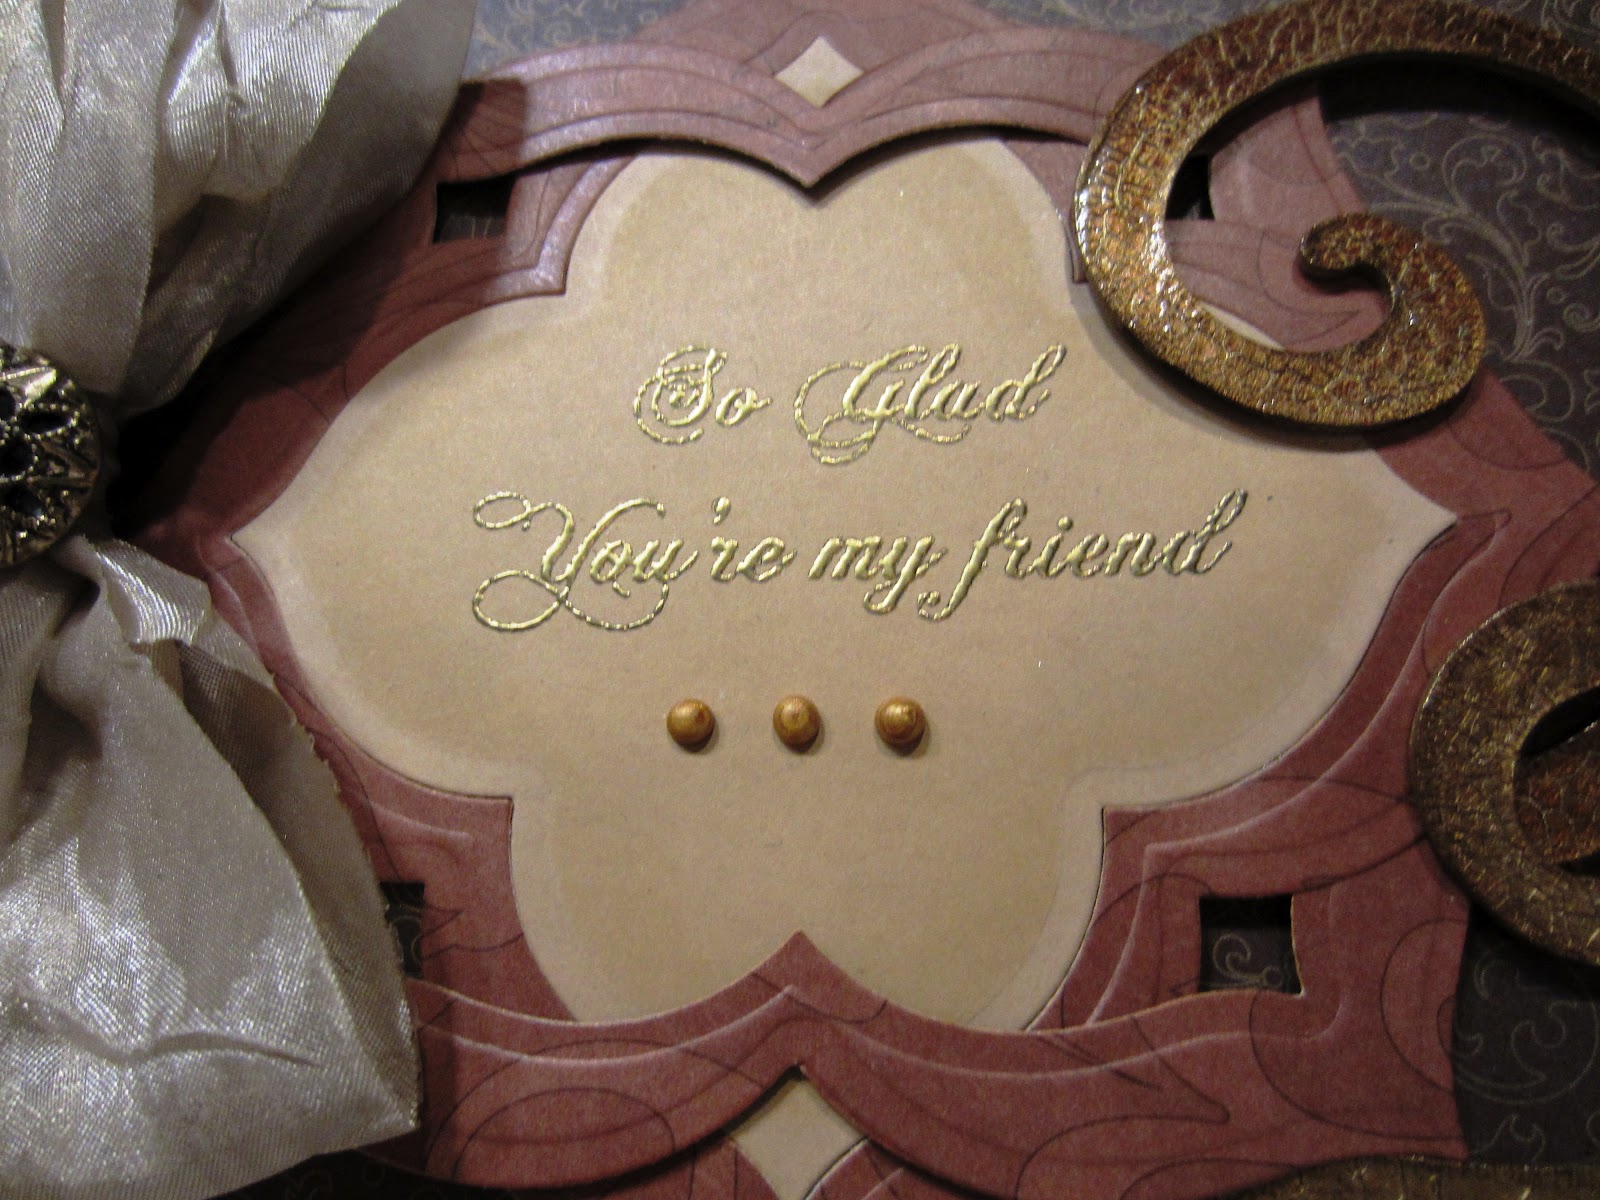
Good morning all!   Today's card is a bit of an experiment.  I recently got an email from a blog follower named Sam Smithard and she included some pictures of the beautiful cards that she had made.  One of them had these lovely pearl borders that she told me were actually done using a roll of predone pearls of different sizes (and it was a bit pricey too, I was told!)  It gave me an idea to try to achieve a similar look using our Cosmic Shimmer pearl PVA glues which I am calling the Paved Pearl technique.    I used a pencil to lightly mark out a half inch border on my card and proceeded to make different sized drops using the PVA glue.   I have to say that I rather enjoyed doing it as it was very relaxing and didn't take up too much time either.  I made the drops randomly so that there was a mixture of larger drops with tiny bits in between too.  I left it aside to dry overnight before I assembled the rest of my card.  While it was drying, I went to work on the rest of the card.  I inked the Heart embossibility folder on the negative side using Tattered Rose distress ink.  Using milk coloured card, I embossed it so that the ink transferred to the background of my card, giving it a hint of rose colour accenting the hearts.  I used a piece of our brand new Layered Scalloped cream coloured lace as an accent on the side. If you like this lace, please ask your local stockists to carry it in their shops(there are three styles of lace, all available in both cream and black).   I cut three sizes of the Moroccan Motifs in milk and rose card.  Using the largest die, I traced around it to create a faux nestie for the largest motif.  I stamped my sentiment and cut it out with the small Moroccan accent piece.  I used a light inking of tattered rose to highlight the sentiment.  I completed the card with a swirly pearly accent piece.  What do you think of this new look for my edges?  all for now, Sue x

Sunday 29 April 2012

Beaded Asters

 Good Sunday morning!  I'm up again very early for today's shows, but I've got enough time that I can also do the comment game drawing so don't forget to read to the bottom of the post!  For today's card, I have used the Flora Embossibility folder on a crisp white card background to give some texture to my card.  I gave it a thin mat of rose coloured card to match my vintage ribbon, then matted it with another piece of white card that I pierced.  I cut five of the smallest Aster Flower die in white card that had a piece of the self adhesive sheet added to it (before cutting).  I peeled off the backing paper and beaded them all with the clear micro beads for a lovely texture.  You should be able to see it better in the close up below.  I stamped my sentiment and cut it out with one of the Floral Oval dies and inked it while still in the die using Victorian Velvet with a bit of Spun Sugar Distress ink.  I mounted the sentiment in the upper corner and ran the Asters up the card diagonally.  I added a piece of vintage ribbon and a messy bow for a pop of colour and finished the card with a couple of stick pins.  Another kind of girlie card, but not too specific for any occasion which is nice! 


Now for the fun part, the comment game winners for the week.
They are:
Shazza!!!
Marlou McAlees!!!
JennyWren1947!!!

On the post of April 27th, we had over 200 comments so we have more winners.  They are:
Snapdragon25!!!
Celina Dee!!!
siennawoo!!!

Congratulations to all the winners!  You need to email me at americansue1@gmail.com to confirm your address and claim your prize!  All for now, Sue x

Saturday 28 April 2012

Angle Approach

 Good morning blog friends!  Day two of the POTW shows for me.  It's an early start this morning so this post should be popping up just as I am leaving the house heading for the studio.  I have decided to show one of the cut, fold, tuck samples that I made today.  I love these colours and, although I grabbed a sentiment from one of the sets on the show, you could easily go in any direction with this one.  It's masculine, but feminine too I think.  You decide.  First off I covered my background with the sticky adhesive sheet.  I used the Angle Approach die to cut an aperture in it.  I peeled off my backing paper and poured clear micro beads over it.  I just love the look of these and it is difficult to get the real feel for these in the photos, you just have to try them!  With the positive piece, I beaded it too, but I folded it backwards so that just a sliver of the decorative paper with the beading showed.  I mounted it below my background piece and offset it so the shape did not fit back in the hole the way it came out.  I cut another smaller one of the cut, fold tuck dies to go on top and still a smaller one to go on top of that.  So I layered up three of them in different sizes and shapes to create my focal element.   I used another decorative backing paper for the bottom of the card.  I stamped a few of the stamps from the Design Element set using a clear perfect medium and clear embossed them.  Again, it doesn't show up too well in the picture, but it adds just a nice texture to the piece.  I used some teal vintage ribbon and made a messy bow and added a fancy button and crystal pins.  I used a few pieces of the black rhinestone swirls above and below my focal element.  I finished the card with Cosmic Shimmer black PVA glue dots around the edge to frame it and add accents.  All for now, Sue x

Friday 27 April 2012

POTW Sneak Peek

Hello my crafty blog friends!  Here is a sneak peek at one of the cards for the POTW shows that begin today at noon.  This card features the lovely Floral Oval dies, Floral Tag dies and an Embossibility folder that are part of the line up.  It is a very simple card and I am not using it as a demo this week so I thought I would show it today and give a quick rundown for you.  I started with a piece of lavender card (5 1/2" x 7" in size) and embossed it with the Garden Delight folder.  Due to the size of this piece, I had to run it through twice.  I wrapped a piece of white crocheted ribbon around the bottom and taped it to the back.  I cut the largest size of the Floral Oval in white and attached it with mounting foam.  I stamped my sentiment and cut it out with the next size of the Floral Oval set and inked it with Dusty Concord Distress ink while in the die.
  I attached that piece with mounting foam to complete my focal element.  I cut and ink two of the rose die from the Floral Tag set and attached them to the upper corner of my focal element.  Small pearls were added to the centres for accents.    I tied a double bow using the white satin edged organza ribbon, one of my new favourites!  I completed the bow with a two mixed stick pins and a pearl embellishment from my craft stash.  I added the bow using a glue dot to the lower corner. I completed my project by adding a pearly swirlie piece to the upper corner and piercing around the edge for a nice framed effect.  The finished size is 6 1/2" x 8 1/2" in size (I actually have the card in my hand for once as I write this!)  This is definitely one for the girlie card lovers out there!  All for now, Sue x

Thursday 26 April 2012

Layered Scalloped Posy

Good morning all!  This is one of my favourite cards from the past shows!  I adore these dies and I love this paper so it all worked for me.  I found a few more pieces of this paper in my stash (did the happy dance!) so you will see it a couple more times in the future I am sure. (In case you want to know, it is by S.E.I. and it is called Jolie Chocolat).  It has the prettiest shimmer to it, but it just doesn't show up in the photos unfortunately.  I used the Layered Scallop Posy die from Heartfelt Creations to cut the top and bottom sections of the card.  This die cuts the half circle part but the bottom edge stays attached to your card.  I left about an inch between the two cuts where I placed my sentiment on a (yes another) forked flag then matted it in gold and grey card.  At the edge of the flag, I added a flower made from the background paper using the Spiral Flower 3.  I cut several of the gorgeous swirl that is sold in the Decorative Dutch Iris set, so that they were radiating outward from my flower.  I added a few bits from the Bella Rose set and a piece of gold tulle from my craft stash to create a floral element on my card.  I added a couple of partial mats in gold card then pierced the edges to complete my card.  I will have a sneak peek for you tomorrow so please check back in the morning.  All for now, Sue x


Wednesday 25 April 2012

Fun With Forked Flags


Hello my crafty friends!  I have been using these forked flags (pennants, bunting, whatever they are called, I'm not sure) a lot lately.  I had a bit of fun here with a whole bunch of them for a different sort of look!  I started this card by embossing the background taupe piece of card with the Valor embossibility.  I cut a bunch of different coloured and sized flags to attach to my embossed piece and extend out on the right hand side of my card.  I added faux stitching lines on the lighter coloured flags.  I used a bit of Bakers Twine around the card and tied it through a button.  Next I cut four of the Decorative Window die and cut the smaller side of it off.  I cut a Labels 24 frame out of red card.  I attached the four side pieces I cut from the window so that they clipped on to the edge of the labels frame.  I stamped my sentiment and cut it out with one of the smaller Labels 24 dies.  I stamped my sentiment and cut it out with one of the smaller Labels 24 dies and inked it with antique linen distress ink.  I mounted it on foam pieces in the centre of my Labels 24 frame with the window edge pieces.  I added four black rhinestones in the corners and faux stitched around the edges to complete my card.  I try to mix it up to show some different ideas when I can.  I rather liked the way this came out as it was quite different.  I hope you like it too!  All for now, Sue x

Tuesday 24 April 2012

Measured With Kindness

Hi guys,  This should be the last sewing card for awhile!  I have to admit that every time I picked up these dies, they reminded my of days gone by, about my Mom's sewing machine when I was a kid and I just thought "vintage."  The papers I picked here are no exception, if you don't like that vintage look, this may not be a card for you.  I also have to admit that this is the card that I bent Mom's sewing machine needle on too.  Can you see the zigzag seams between the different papers?  It bent where I put the black zipper rose, that was lucky, huh!  The lovely lady at Scrap and Stamp in Inverness, Florida, Vicky Turner, gave me a needle to replace my Mom's. 
Wasn't that just so nice of her! 
This is a great card layout to help use up some of the old scraps of decorative papers you have lying around (yes, I know we all do!).  I taped them to a piece of copy paper and then sewed the zigzag lines between them.  I distressed all the edges to help make it look more vintage using the edge of my scissors.  I added a piece of black guipur lace and attached it to the back of the card.  I tied a bow out of three pieces of black vintage ribbon, spritzed it with water and crumpled it to get a shabby chic look and attached it to my lace in the corner.  I added a piece of natural twine and a black zipper
rose.  Next I stamped my sentiment then cut it out of "milk" coloured card. I cut a second swatch the same size and  I inked them both with antique linen while still in the die.  I used one of Sam Poole's sewing stamps to stamp the swatches too, giving them both a bit of texture.  I added some old buttons from my stash to the sentiment swatch.  I cut the sewing machine out of black card.  While still in the die, I inked it with clear perfect medium.  I popped it out and embossed it with clear powder to bring out the detail on the machine.  I mounted it on the second swatch.  I mounted both swatches on my card at offset angles for interest.  I added a few more buttons in the upper corner to complete my card.  I hope you like my take on a vintage themed sewing card.

Just a quick note before I go, I am doing the POTW shows on Create and Craft this Friday the 27th beginning with the launch art noon.  I hope you can tune in to watch.  I have had many comments from followers of the blog outside of the UK about the shows.  I just wanted to let them know that
if you aren't in the UK, you can still watch online at www.createandcraft.tv .  The shows are live so you just have to work out what time it is where you live when it is noon in England!  If you have any questions, just email me at americansue1@gmail.com   Watch this space for some sneak peeks later  this week too!  All for now, Sue x

Monday 23 April 2012

Heartfelt Creations Oval Window Card

 Good Monday morning to all!  Yes this is the oval window die, but not a window die, if you know what I mean!  I like this die as it is truly versatile to use.  The negative shape is interesting also.  I cut the oval window twice, once out of taupe card and kept the positive shape and once out of royal blue and used both the positive and the negative from it.  I stamped my sentiment on cream card and mounted my taupe window over it after I removed the cross bars from the inside of the window.  They are easily nipped out.  Next I cut the aperture in the centre of the blue piece, removed the die cut and then keeping the die still attached to the background piece, I situated them on top of the A4 Impressibility (Garden Delight, I think it is called), to emboss the background.  By leaving it in the die, you get a pretty border from the edge of the die that doesn't emboss.  I had to use one of the metal impressibility for this because of the size of my background piece.  If I had used an embossibility, I could only have done a background that was no larger than 5" x 7" in size because you cannot close the folder when using this technique.  Once the background was embossed, I wrapped a piece of the striped grosgrain ribbon around the bottom and taped it the the back of the card.  I used mounting foam to  raise it for dimension and attached it to my back mat where I pierced the edges.  Using the blue window that I cut earlier, I cut it at the second swirl on each side. I hooked the swirls on to the inside of my aperture to hold it in place.   I used a few small pieces of mounting foam to raise up the back edge and secure it in place on my card.  It provided a pretty little tone on tone frame around my focal element.  I tied a double bow with the striped ribbon and attached it with glue dots to the left side of my card.  A button with twine and a couple of crystal stick pins finished off the bow.  I matted a final layer with the same taupe colour as the centre window die cut for balance.  If you were lucky enough to get this die, I hope you can find more fun uses for it too!  All for now, Sue x

Sunday 22 April 2012

Sunday's Winners and A Cross Card

 Happy Sunday!  You know what that means, don't you?  More winners in the comment game.  First to the card though.  A simple cross card in teal, cream and black.  I embossed the background using double sided coordinations card and the Valor Embossibility folder.  I sanded it once embossed to show the teal colour and distress it a bit.  Next I cut two of the Labels 24 and interlocked them.  I did this a lot as I thought it worked so well with many of the dies from the last shows (and that was the only label shape besides the square swatches that I had to work with!)  I cut the largest cross twice from milk cardstock from the neutral cardpack.  The first cross served as my base.  The second one I cut, I removed the arms and used the very centre but did not punch out the fall away pieces.  Instead, I taped the back of the piece to keep them intact for a more solid look.  I like the way you can see the cut lines though.  I mounted this piece on foam and attached it the the cross for dimension.  I added a large half pearl to cover the centre hole.  I cut a piece of the cream crocheted ribbon and wrapped it around the bottom of the card and secured it to the back.  I tied a double bow and added a pearl brad to the centre and attached it to the bottom centre of my card.  No sentiment again, but a tag could be easily stamped and added to the bow depending on the occasion.
Here is a close up of the centre of the cross.
And now for the weekly winners in the ongoing comment game.
They are:
Jayne Denver!!!
Grimsby Chris!!!
Mary at Doghouse!!!

We had 2 posts with over 200 comments so we have additional winners. 
They are:
Magpie!!!
Barney Bear!!!
Amelia K!!!

From the post of April 20th:
They are:
AHend09!!!
Talk to the Tail!!!
Vie Carter!!!

Please email me at americansue1@gmail.com to confirm your address and claim your prize!!  All for now, Sue x

Saturday 21 April 2012

Cute As A Button

IHi guys!  I hope you don't mind seeing a few more sewing cards!  This card is all done in navy blue and cream using a mixture of patterned papers in those colours.  Yes, you have spotted my much beloved hounds tooth pattern in the background, along with some dots, checks and stripes too.  I used Mom's sewing machine to put a zigzag stitch around the edge of the background card as an accent.  I layered up a few more papers, then stamped my sentiment and cut the largest square swatch die and mounted in with a navy blue mat.  I offset it on the card.  I cut a smaller swatch out of striped card and used it for a background for my pin cushion.  I had a bit of fun with this piece as I die cut it out of felt and sewed lines into it.  I added some real pins to it too.  You can see these in the close up picture.  I stamped my tape measure and cut out a thimble from the Sewing Elements set and mounted them both with my pin cushion. I cut one more of the square swatches, this time a rather small one, out of blue coordination's card.  I sanded it a bit so it looks like a piece of denim.   I added a piece of cream crocheted ribbon across the bottom of the card.  I ruched my blue vintage ribbon down the centre of it and added a messy bow.  I topped my bow with a button and some Bakers Twine.  I finished the card by randomly adding some buttons to a few places on the background.  I hope you have enjoyed the different looks that this sewing set can give.  All for now, Sue x

Friday 20 April 2012

Lavender And White Simplicity

Hello my crafty friends!  This card is one of the samples that I made to show off the lovely new edgeability dies.  I chose a lavender and white combination for this card and started by embossing my background with the Valor Embossibility folder.  This gave me a crisp clean patterned background for my focal element.  I cut the Heartfelt Creations oval window to use, not as a window, but as a decorative backdrop for my sentiment.  I stamped my sentiment and cut it out with Labels 24.  While in the die, I inked it with dusty concord distress ink to accent the sentiment.  I used the die shape to cut a faux nestie out of white to back my sentiment on the window.  I really liked the way it looked together.  I picked two decorative edgeability inserts and added the scalloped cutting edge to cut my side border.  I used the leftover piece to mount up on the very edge for dimension.  I added a lavender piece of card as a background to the border strips for a nice contrast and to add balance.  I cut two identical borders this way and mounted them on the sides of the card.  I added strips of pearls to either side as an accent.  I pierced the card on the top and bottom only this time.  You can see a few of the close ups below too.  I was very happy with the way this came out.  It could easily be done in any colour and the sentiment could be changed to suit whatever occasion you need.  Hope you like it too.  All for now, Sue x


Thursday 19 April 2012

So Glad You're My Friend

Good morning everyone!  This style card is one that I really enjoy making, it is about 5 inches tall, but about 11 inches long!  I like that it is a bit different than just your average square card.  I started with some background paper that |I liked from my craft stash (I think it is SEI brand).  It has a subtle gold vein going through it.  I cut out two frames from the back side of the background paper making them the same sizes using Labels 24. You can see a close up below.   I interlocked the top and bottom point into the area between the points on the second one to create a pretty shape.  I stamped my sentiment (available from Creative Expressions stockists) and embossed it with gold and mounted it behind my two Labels 24 frames. I added three gold PVA glue dots underneath the sentiment.   I had some chipboard in my stash so I painted it with some gold Eco Paint, used a bit of aged mahogany distress ink and coated it with Tim Holtz Rock Candy which gave it a bit of a crackle look to it.  I glued those into place so they were coming from underneath my focal element.  I tied a double bow out of the  champagne coloured silky crush ribbon.  I added a button from my stash.  Paper piercing around the edge finished off the card nicely I think!  Hope you like this style card too!  All for now, Sue x


Wednesday 18 April 2012

Black and Gold Simplicity

Good morning everyone!  This is a real quick card using a bit more of the lovely card that I picked up in the States.  I simply cut four strips of different patterned paper from the same set of cardstock and matted them with a piece of black card.  I made a border using two different inserts with the scalloped cutting border from the edgeabilities.  I matted some taupe card behind so it shows off the insert cut patterns.  I cut several of the Heartfelt creations swirl (which is part of their Bella Rose die set) in gold card.  I actually cut it into sections using two of them glued together to run up the card with one section for the bottom of the card.  I added a grouping of three black flowers.  One of these was a black organza flower that we carry already made, but the other two flowers I made.  One was made from ribbon using the technique with the redline tape and the other was made from felt using Spiral Flower three.  I cut a Heartfelt Creations butterfly from black glitter card for the corner of the card (a little bit of bling too!).  I pierced around the edge to finish it off.  No sentiment on it, but you could easily add a tag if you wanted to.  Hope you like it!  All for now, Sue x

Tuesday 17 April 2012

Blog Candy Winners and A Fav Card

Hello my crafty friends! I am almost recovered from the hectic weekend at Ally Pally.  I just wanted to say a great big thank you to everyone from the blog that came by to introduce themselves and say hi.   I was so lucky to receive several beautiful handmade cards from well wishers and even  a gorgeous wall hanging and certificate (complete with its own decorated box) from one of the blog followers named Lorraine.  She told me that it was a gift from all of the followers on my blog so thank you all so very much!  I am hoping to get some of the pictures from Ally Pally on the blog later in the week for you.
Now, before we get to the card of the day, I have just realised that we hit our blog candy goal so I will announce the winners. 
 The third place prize goes to......................................
................................................................
...............................................
.....................................
..................................
..............................
.........................
.........................
...........................
........................Rizwana!!!!
The winner of the second place prize is...........................
..............................
..............................
.................................
.....................................
.....................................................................Sue Pass!!!!
.
The winner of the First Grand prize is..................
..........................................................................
.....................................................
...............................................
...................................
........
.........
Mell!!!!
Congratulations to the winners!!  Please email me at americansue1@gmail.com and confirm your address to claim your prize.

Now for the card at hand!  This is one of my favourite cards from the last shows.  I'm sure you will recognise the buckle styling to this card. The first thing I did was to cut the Heartfelt Creations Layered Scalloped Posy twice so it cut a fancy circle to put behind my "buckle frames".   I used Labels 24 in the largest size and the next size down to cut a frame.  Then I cut two more frames using the next two smaller sizes.  I assembled my frames with the largest in the centre and the two smaller frames on the sides.  I cut a strip of card and stamped my sentiment on it so that it sits in the centre of the frame.  I used an edgeability insert to cut a pattern in the top and bottom of my strip.  I added a piece of teal card to show through the insert behind the sentiment strip.  I used the strip to weave between the edges of the Labels 24 frames.  I added an aqua coloured double bow tied from the silky crush ribbon, two stick pins and a sparkly button from my craft stash.  For a few finishing touches, I added some swirly pearls to the sentiment strip and a few half pearls to the corners and the frame overlap areas.  Paper piercing around the edge was the final finishing touch for my card.  I enjoy making these type of cards so I hope they will inspire you to give one a go!  All for now, Sue x


Monday 16 April 2012

Comment Game Winners

Hi guys!  Thanks for your patience on this! Now for the winners from this weeks comment game.  The weekly winners are:
Vicky37diddy!!!
Graciouslady!!!
SueB!!!

We had three posts this past week with over 200 comments so there are more winners.  They are:
Craftylisa!!!
Jordiegirl!!!
TAM

Also:
Julie Andrews!!!
GlassDaisy!!!
Rosietoes!!!

Also:
Bridget CG!!!
Kim Dixon!!!
NannaTina!!!

Congratulations to all the winners!  You must send me an email at americansue1@gmail.com to confirm your postal addresses and claim your prize!  All for now, Sue x

Embossed Cross Card

 Happy Monday morning!  I had a crazy weekend at Ally Pally and really enjoyed meeting so many of you that check in on my blog each day.  Thank you so much for all your support, it has really been a lifeline for me!  For today's card, I have chosen one that isn't always the easiest card to make, a sympathy card.  I started with a salmon coloured card that I embossed with an embossibility folder.  I inked the edges with Tattered rose distress ink to bring out the pattern a bit.  I used a piece of cream lace from my stash as an accent.  I stamped my sentiment in black then lined up my Labels 24 die so the phrase was off centre.  I cut it out, then added the large cross die to it so it slightly overlapped the sentiment and embossed the design into the background.  I used a bit more tattered rose to bring out the detail in it. You can see the close up below. I cut a faux nestie mat out of milk coloured card.  I made a ribbon rose using my reline tape technique and added it atop one of the beautiful Heartfelt Creations swirls and a shabby chic bow tied from vintage ribbon I scrunched.  I added a couple of crystal stick pins as an accent and pierced around the edge to finish the card off nicely.  Sympathy cards are probably among the most difficult to make because of the emotional aspect to them, but I was happy with the way this one turned out.  All for now, Sue x

Sunday 15 April 2012

Hem Your Blessings

Good morning everyone!  It is Sunday morning and I know that I usually announce the winners of the comment game, but since I am away at Ally Pally at the moment, I need to postpone it until Monday afternoon.  Sorry about the delay, but the good news is that we will have extra winners this week since we had some posts with over 200 comments this week!  In the meantime, how about a sewing card done in Kraft card.  I just love kraft card and find myself reaching for it all the time.  It distresses great, takes the ink beautifully, coloured pencils look fab on it, and it is reasonably priced, what's not to love about it! I used another patterned kraft for the bottom of the card and a kraft card ribbon for a border.   I cut three dressform dies out of patterned kraft card allowing the pattern to end up randomly on the dressforms.  To bring them out a bit more against the background, I cut three dressforms out of "milk" coloured card to use as shadows behind them, just peeking out a bit.  On the background, I used some of Sam Poole's brilliant sewing stamps and randomly stamped them using a coffee archival ink pad.  I stamped a sentiment in black and I inked the edges with walnut stain distress ink.  I used my Mom's sewing machine to sew a zigzag around the top edge of the background.  This was my first attempt at using her machine so I ended up with a wide zigzag (I had wanted it to be a bit tighter, but after I played with it a bit, I figured it out!)  I had some lovely black velvet ribbon that had a bit of a lace woven into it that I brought from my craft stash.  I used it to ruch down the side of the card.  I added a few old buttons that I found in my button stash to the top and bottom of the card.  I tied a bow with some black American seam binding and added a fancy button to it.  I added the bow to my ruched strip right where it met the paper ruler border and a couple of crystal stick pins for an accent.  I finished the card with black PVA glue dots all the way around the edge to frame it.  I just love the sewing themed cards,  just wish I could actually sew!  All for now, Sue x

Saturday 14 April 2012

Good Friends

Hi my crafty friends!  My much loved teal is sneaking its way back into my cards, this time with the "milk" coloured card.  I made the background by cutting four square swatches and then embossing them while still in the die.  I did this by setting them on top of the So Trendy embossibility folder but NOT CLOSING IT!  This is very important if you try to recreate this look.  If you close the folder, the die will cut into it and ruin it!  Set the die on the open folder, cover it with the tan mat and because you will need to make up for the lack of thickness since it is open, you will need to add a couple of pieces of card so the embossing comes out nicely.  By leaving it in the die, the edge will stay unembossed and give your piece a nice frame.  I mounted these so that the patterns went in opposite directions.  Next I used Labels 24 to cut three frames and I interlocked them together to form one frame with the points alternating all the way around.  I stamped my sentiment then framed it with a smaller label 24 die frame cut out of the milk card that I also embossed.  I added the lovely pearl labels 24 nestabling to the edge.  I made two flowers using the spiral flower 3 and added them to the corner of my sentiment with a bow made from the chalk white American seam binding.  I matted it all with another piece of teal card and then milk card that I pierced the edges. 
Before I go, I just wanted to add a quick note to say that since I will be in London at the show all weekend, I probably won't be able to get my emails so please be patient, I will get them caught up early next week.  All for now, Sue x

Friday 13 April 2012

Decorative Lace Border Creation

Good morning my crafty friends!  I wanted to show some of the ways that the Heartfelt Creations Decorative lace border could be used.  It is a very wide border so it could be limiting because of it's size.  I found this border to be extremely versatile because of its size though.  I used it here by cutting it into two sections and removing the centre area.  I cut the border after the lattice section and matted it with teal card then added some foam mounting to the back.  I added it atop the bottom section of the border for dimension.  The background of the card was stamped with the sentiment then embossed with Labels 24 twice so it overlapped the first one, creating a ring around my sentiment. I lightly inked the area with chipped sapphire to highlight the embossing.   I made several flowers using the spiral flower three die.  The bottom one was made using black glitter card and the top three flowers were made using decorative paper.  I cut the die twice and made three flowers from it by cutting the die rather than spiralling the entire length of the die cut.  I used the leftover piece from the cut to make a small third flower.  I added some black glitter card leaves for balance.  I finished the card with some black rhinestone swirls and paper piercing around the edges.  I hope you like my take on the decorative lace border and flowers.  All for now, Sue x

Thursday 12 April 2012

Sew Thankful

Hi guys,  how's this for a really sweet and quick sewing card?  The background was embossed with the So Trendy embossibility folder.  I cut a border using the new edgeability insert with the scalloped cutting edge.  I dyed some white American seam binding using tumbled glass and crushed olive distress inks.  I did this twice to get the colour a bit darker.  You need to dry it completely then use more ink swiped on to your craft mat and spritzed with water.  I wanted a shabby chic look to the ribbon and bow so I scrunched it as I dried it to achieve this.  I cut a dressform and a pin cushion and a sewing machine using the  Nina Brackett sewing element dies.  I inked through the die to bring out the details on the dressform and the pin cushion.  The sewing machine was the leftover piece from another card I made where I used the negative piece.  I stamped my sentiment on a tag and inked the edges.  I attached a button with some Bakers Twine to it and added it to my bow.  I added some pearly swirlies and paper pierced the edge to complete the card.  Are these dies growing on you too?  All for now, Sue x

Wednesday 11 April 2012

You Are Loved

 Good morning all!  I have spent all weekend and the last few days getting everything ready for our upcoming Big Stamp and Scrapbooking show at the Alexandra Palace in London.  I am so looking forward to meeting some of my blog followers there so please stop by and say hi so I may put a face with the names that I see please.  I will be on my own stand called Rubbernecker which is right inside the door just to your right as you enter.  I will be demoing all weekend with my clear micro beads as I was able to get a small shipment in time for the show.  Now for todays post, I just loved the way this card came out but it was a total experiment!  I wanted the flowers to look like porcelain and I usually will dip them in ultra thick embossing powder to achieve that sort of look, but I didn't have any with me while I was staying at my Moms.  I decided to experiment with clear crystal lacquer to see if I could get them to look similar.  I made my flowers with the bitty blossoms die and dripped crystal lacquer on them.  It got a bit thick by the time I had coated the first flower so I turned it upside down to drip the excess off onto the second flower (no waste).  I let them dry overnight and I was pleasantly surprised with the results in the morning!  My close up pic doesn' t do any real justice but I think it was a suitable alternative to the ultra thick technique.
I cut the layered elegant swirl die twice so I had a cut out decorative circle for my focal element.  I used the extra scalloped die piece to cut a matching black mat to mount behind it and help accent it.  I stamped my sentiment and then cut it out with the square swatch die and mounted it in a diamond orientation using a slightly larger one cut in black as a mat.  I did a slight inking with antique linen to highlight the phrase.  I added some guipur lace in black next to my striped grosgrain ribbon and bow on the side of the card.  I also used a few of the stunning swirl die underneath my flowers and leaves.  I finished the card with some piercing all the way around the edge and a mat of black for balance.  What do you think of this monochromatic floral card, song or no song for you?  All for now, Sue x

Tuesday 10 April 2012

Almost White On White

Hi everyone!  I probably should have just gone ahead and done the all white card with this one, but I just wanted a pop of colour on it and this navy blue silky crush ribbon is just delicious in real life.  I could not resist it!  I cut an aperture in the background with labels 24 and raised the back piece up on mounting foam.  Behind the opening, I embossed a piece of white card that I had stamped my sentiment on to first.  I placed this behind my aperture and cut a Heartfelt Creations Oval Window die and and nipped out the centre window crossbars and  mounted it over my opening.  Although, it mostly covers it, you can still see a bit of the labels 24 shape behind it and I liked that.  I cut two borders using the new edgeability dies and layered them on the bottom of my card.  I added rows of pearls around the to edge of the card as an accent.  Using my silky crush ribbon, I tied a double bow and added a pearl embellishment from my stash to the centre.  I finished off the bow with a couple of the pearl stick pins (available through any Creative Expressions stockists to answer a question from a comment left a few days ago).  I finished the card with piercing around the edge to give it an elegant look.  I really liked the simplicity of this card (yes, it sang to me!)  All for now, Sue x

Monday 9 April 2012

Red And White Swirls

Morning all!  I am just loving these Heartfelt Creation dies!  There are just so many things you can do with them.  I love the swirly  filligree look to this one.  I cut it positioned in the upper half of my card.  As it doesn't cut completely away, just the top half comes away from the card.  From the back of the card, I taped the very edges of the die so it became part of the background again.  I stamped my sentiment below it with a black archival ink pad.  I embossed it with clear embossing powder.  (I had a question about what I use recently and this ia the way that I always do my sentiments).  I cut my background on the diagonal underneath the sentiment.  The bottom piece I embossed with the valor embossibility folder.  I layered the pieces of the background on another piece of card where I pierced around the edge.  Along the two joined pieces, I added some swirls.  Atop the swirls, I made flowers from the spiral flower 3 and the Bitty Blossoms set.  On one of the spiral flowers, I nipped off the tip of the petals and cut fringe into each petal before rolling it.  This will give you a flower that looks a little like a carnation and is completely different from the original flower the die makes.  I added some of the Bitty Blossoms to the spray of flowers.  Although it did not photograph very well, I put a bit of Diamond Stickles on the edges of the flowers for a bit of bling.  I hope you like this one!  All for now, Sue x

Sunday 8 April 2012

Sewn With Love

.Happy Easter! I didn't have any Easter cards so I hope you don't mind if we stay with our sewing theme for today too!  This card was a lot of fun using the new Bakers twine and some kraft card from my craft stash.  I had some kraft ticking background paper which I thought suited the sewing theme so nicely.  I did do a bit of stamping on the background first using some of Sam Poole's Vintage Sewing stamps, but it doesn't show up very well but it does add a bit to the vintage feel of the card.  I decided that it needed some texture so I used an embossibility folder on the top half of it.  Using Mom's sewing machine, I added a zigzag stitch around the top half also.  I did a bit of edge distressing with my scissors to bring out the vintage feel too.  I happened to have some paper ruler borders in my stash so I added one of those across the middle of the card.  On the lower half of the card, I stamped my sentiment.  I stamped my scissors on a small piece of kraft paper and cut them out.  I glued them on to my card but left the end of the scissors unattached to my base card.  Next I cut four of the thread spools, inked them antique linen and wrapped them with Bakers Twine.  I chose four of the colours from the new vintage selection .  I wrapped the twine around the spools until it covered them sufficiently.  The last one, I left about seven or eight inches hanging from the end.  I mounted all the spools across the top of my card and used the leftover piece of the twine to swirl down to where my scissors were mounted on the card.  I tucked the end through the open scissor end and glued it into place.  I tacked the twine in several spots with a drop of Cosmic Shimmer clear glue.  The card was matted and layered with black card and finished with black Cosmic Shimmer PVA glue dots around the edge.
It's Sunday and time for the comment game winners for the week.  The three  winners are:
Ladock Girl!!!
Gay Richardson!!!
Eemeli!!!!

Congrats to all the winners this week.  Please email me with your postal address to claim your prize.  All for now, Sue x

Saturday 7 April 2012

Sew Special

Happy Saturday!  How about a vintage look sewing card for today's post!  This is from designer Nina Brackett's new dies called Sewing Elements.  Don't you just love that old fashioned sewing machine?  It reminds me of the one my Mom had when I was growing up (a long time ago!LOL)  I created a distressed background using some Kaiser Craft papers that I had and by roughing the edges with my scissors.  I sewed around the edge (since it was a sewing card, I thought, why not!)  I added some crocheted ribbon and piece of fine tulle that I ripped to distress even more! On top of that, I added a large swatch square that I cut.  I inked it with pumice stone distress ink and stamped a couple of vintage buttons on it with a clear perfect medium pad.  I added my sentiment and an old button with a piece of twine tied into a bow.  I cut the sewing machine out of Co-ordinations card (black with a turquoise backing) and sanded the embossing to reveal the turquoise colour.  I mounted this on my Swatch square for my focal element.  I added a bow made from the aqua silky crush ribbon with a bit of the black tulle behind it.  In my craft stash, I had some ruler ribbon, so I made a flower out it and added it to the centre of my bow.  To complete the card, I added some black rhinestone swirls as an accent piece.  A little different, not my usual, but I hope you aren't disappointed!  All for now, Sue x

Friday 6 April 2012

Purple Iris

Hi everyone!  I also want to say big  hello to the newest members of the blog as we have had an extra surge in the followers of late.  Today's card is another from the Heartfelt Creations line of stamps and dies.  More colouring with this one and I have to confess to being a bit rusty at it.  The iris was done with coloured pencils as they were what I had handy to use when I made this card.  I used the matching die to cut out the iris, but then I stamped it one more time and cut it out only the top petals, this time by hand,  to mount upwards.  I added a few leaves around it and mounted it on an oval with a slightly larger purple oval mat.  I cut two chateau gate dies in black.  I taped the gate closed from behind and cut the die just below the centre under one of the swirls.  These were both done this way and then mounted end to end underneath the iris to give it a pretty scrolly outer frame.   Setting the focal element aside for a moment, I created the background by using the Valor embossibility folder to give it an embossed texture.  I added a border from two of the edgeability inserts with a cutting edge all done in white.  There is a backing piece done in a deeper purple that I just used the cutting edge to mirror the first border.  I added some pearl PVA glue dots down the middle of the two insert patterns.  I ran a piece of thwe silky crush ribbon around the card (under the border) and secured it to the back of the card and added a bow with glue dots.  I stamped my sentiment on a tag and inked lightly around it.  I added it to my bow with a bit of Bakers Twine.  I mounted my focal element on 3D foam above my ribbon and bow, added a few decorative stick pins and pierced around the edge to finish it off.  So you have my early signs of spring here even if Mother Nature isn't cooperating! LOL  All for now, Sue x

Thursday 5 April 2012

So Many Winners!

Hi guys!  If you have come to the blog to see today's card, then scroll down to the post below this.  If you have come to the blog to see if you are a winner, then it's finally time!  Thank you so much for your patience in waiting for this!  I decided that it may be simpler to do all the third place winners, then all the second place winners, then all the grand prize winners together at the end of the post.  Without further delay...

The three winners of third place in the blog candy contest are...............................
..........................................................................................................................
.................................................................................................................
.........................................................................................................
................................................................................................
...................................................................................
......................................................................
...........................................................
..........................................
........................
................
Tammy Ortiz!!!
Fresh Scents Scotland!!!
Lucy (big eye avatar)!!!

The three winners for the second place prizes in the overdue blog candy contest are...................
.......................................................................................................
...........................................................................................
...........................................................................
...........................................................
.........................................
..........................
.................
............
Marie-Louise!!!!
Kelly's Kards!!!!
Crafty Marian!!!

Now for the three grand prize winners in the overdue blog candy contests.  They are..................
.................................................................................................................................
......................................................................................................................
..............................................................................................
.............................................................................
............................................................
............................................
..........................
............
......
Cornish Emma!!!
Nikkib!!!
Delyth!!!

Congratulations to all nine winners!  Please email me at americansue1@gmail.com to confirm your addresses and claim your prize!  Thank you everyone for being so incredibly patient in waiting for me to get back here, finish my shows and then draw the candy winners!  If you didn't win this time, don't forget about the Sunday drawing for the comment game.  It's not too late to leave a comment on the blog and have your name entered to win!  Thanks again!  All for now, Sue x

Decorative Lace Border

Good morning! Another favourite colour combo of mine and I absolutely love this shade of the silky crush ribbon!  This is another of the Heartfelt Creation dies (aren't they lovely, you can tell that I favour them, can't you?!)  This is the Decorative Lace border that I have used, cut out of taupe card and threaded my ribbon through some of the openings.  I know it is difficult to see behind my ginormous bow, sorry!  I stamped my sentiment on the bottom corner of the same colour background card.   I wanted a tone on tone look for it.  I matted it on to a piece of decorative card which matched my ribbon.  I cut the bottom border with a decorative insert and a cutting edge from the edgebility range.  The top was done using one of the smallest inserts to give it a pretty accent.  I pierced down the left and right side and added a swirly pearl piece for bling to finish off my card.  Very simple, quick and easy, but I was really happy with it in the end. 
Now for the good news!  I have finally finished my shows for the week.  There were sell outs of the remaining two bundles of new dies after my 1pm show yesterday so they let me go home after the show and have cancelled the remaining shows on Thursday and Friday.  This is good news because I can finally get into work today and get all the blog candy drawings caught up!  For the first time ever, I am officially three blog candy drawings behind!  Check back later this afternoon for a list of winners!  All for now, Sue x


Wednesday 4 April 2012

A Summer Wreath

Hi blog friends!   While this could easily be made into a Christmas card, I decided it would make a lovely summer wreath.  Why not?  I have used the small sprig from the Heartfelt Creations that comes in the Bella Rose Die set.  I used four different shades of green and cut out about 6 sprigs from each colour.  This die will easily allow you to cut them two at a time and I didn't bother embossing these, so it went very quickly.  I used the Valour embossibility on white card for a crisp clean white embossed background for my wreath.  I left the bottom of the card without embossing and stamped my sentiment on the right side.  To begin my wreath, I used a bit of Cosmic Shimmer dries clear glue on the end of each sprig and alternated the colours as I attached them in a circular pattern.  The Scalloped Posy die set comes with eight very small flowers that are perfect for this.  I cut about 24 of these flowers using a pale pink and a deep cranberry colour and added them randomly to my wreath.  I added a small dot in the centre of each of them using the Cosmic Shimmer  pearl PVA glue.  I cut a thin border from the same cranberry coloured card and used a decorative insert to cut a pretty accent in it.  I used this border to separate the embossed section from the unembossed section on my background.  I tied a double loop bow from some matching cranberry coloured satin edged ribbon (a new ribbon to play with!)and added some pearl decorative pins.  I pierced the entire edge to frame my wreath and finish the card.  Generic enough for any sentiment of your choice and suitable for many occasions too.  All for now, Sue x

Tuesday 3 April 2012

Red Red Rose

Hi guys!  Look, I coloured!  It has been absolutely ages since I got my coloured pencils out and put them to work!  I'm a bit rusty in fact, as it took me forever to finish this rose, but in the end, I really enjoyed it!  There is a lot going on in this card, but to start, I embossed the centre of a large piece of card, using the Valor Embossibility folder.  I cut two of the Chateau Gates but taped the gates from the back and cut both of them at the small swirl half way down the side of the die.  I put them end to end and added some mounting foam across the back to secure them in place, then mounted the piece in the centre of my embossed background. This gave me a lacy filligree edge for my focal element.  I stamped the Bella rose and coloured it with pencils.  Using  the rose die, I cut a template out of card so I would be able to line it up over my stamped image to see where I needed to place my die.  Once aligned, I taped it into place and re-registered the die in the same place through my template.  Taped it all and then cut it so my rose was cut without being uneven.  I stamped the rose a second time and cut out just the centre of the rose to decoupage.  I used  two of the basic oval nesties to show off my rose.  The sides of the cards are mirror pieces both done with two of the new edgeability inserts and the fancy scalloped cutting edge.  I used the negative piece to add on the edge with a thin piece of mounting foam.  I mounted both pieces on a strip of red card to show off the cut out pieces.  I mounted each piece to the sides and matted everything on black card.  To finish, I added a few of the black rhinestone swirls to the top and bottom of the rose.  A little late for Valentines day, or just way early for next year!  All for now, Sue x


Monday 2 April 2012

Purple and Taupe Lace

Good morning guys!  Another card which features several of the Heartfelt Creation dies.  I love the look of these, so lacy and filligree.  I started with the background and used an Embossibility folder to achieve the texture on the background.  I did a little cheat on this one because I wasn't sure what size I wanted this to be so my background has been cut into two pieces so I could either lengthen or shorten it as needed and hide the cut with my ribbon.  On the top of the background piece, I cut three of the scalloped posy die half circles, cutting away the negative piece.  I did the same on the smaller bottom piece to my background too. I decided what size I wanted to final size to be then  I used the pretty purple striped grosgrain ribbon to hide the cut and I added a bow and crystal stick pins to the side.  For the focal element, I cut the larger Elegant Swirl die twice (it is a half circle shape) to get a circular back shape.  I stamped my sentiment and cut it with Labels 24 (the med size in the set)  I used the die to trace around the outside to create a faux nestie shape for my sentiment.  I used dusty concord distress ink to highlight my sentiment while in the die.  I matted the card with my taupe card and pierced down each side, rather than all the way around this time.  Hope it sings to you!  All for now, Sue x

Sunday 1 April 2012

Remembering With You

Hello my blog family!  I thought I would show you one of the cards that I made using the Heartfelt Creation dies.  I'm hoping to be able to demo this one at some point, but it may have to be rejigged a bit if we sell out of some of these dies.  It is difficult to tell, but there is a fun bit of roundness to the half circle pieces on the top and the bottom of the card.  Just the very tips of the dies rest under the edge of the sentiment die in the centre, but they were designed so that they would be a bit poofy (for lack of a better word!)  They have just been cut from a strip of card that is about four inches wide and about 8 inches long.  I cut the top and the bottom with the decorative swirl design from Heartfelt.  This piece does not cut all the way out, but rather leaves the flat section attached.  So once I cut both sides, I folded it over so that they covered a piece of decorative paper that I attached between them.  I used the thread die from the Sewing Elements set to stamp my sentiment on and use as a stopper for the two decorative pieces top and bottom (it was the perfect size and it doesn't really look like thread when put on it's side, does it?  Using the same decorative paper, I cut a border using the edgeability dies and decorative insert.  I wished that I had backed it with another colour card to bring it out a bit more, but the bow made from the silky crush ribbon covers most of it anyways!  Hindsight, is always 20/20 isn't it!  I did cut two more of the edgeability borders using one of the new inserts and attached them to the sides of my focal piece for a bit of interest.  I mounted the entire piece on a coordinating paper and then did my paper piercing all the way around the edge to finish it off.  If you were lucky enough to get these Heartfelt Creation dies, you will love them and all the fun things you can do with them!

It's Sunday so it is time to do the drawing for the weekly comment game.  Just a quick not to let you know that the blog candy drawing will take place on Monday the 9th (unless we sell out and they let me go home earlier than scheduled, then it will be moved up).

The winners this week are:
Serene Polly!!!
Jacqui aka Morgana!!!
Joesgrandma!!!

Ladies, please email me at americansue1@gmail.com to confirm your address and claim your prize!  Thanks for all the lovely emails that have been left for me on the blog, I really love reading your comments about my cards!  All for now, Sue x